Modern SSAO in a modern run-time

Use.GPU 0.14 is out, so here's an update on my declarative/reactive rendering efforts.
The highlights in this release are:
- dramatic inspector viewing upgrades
- a modern ambient-occlusion (SSAO/GTAO) implementation
- newly revised render pass infrastructure
- expanded shader generation for bind groups
- more use of generated WGSL struct types
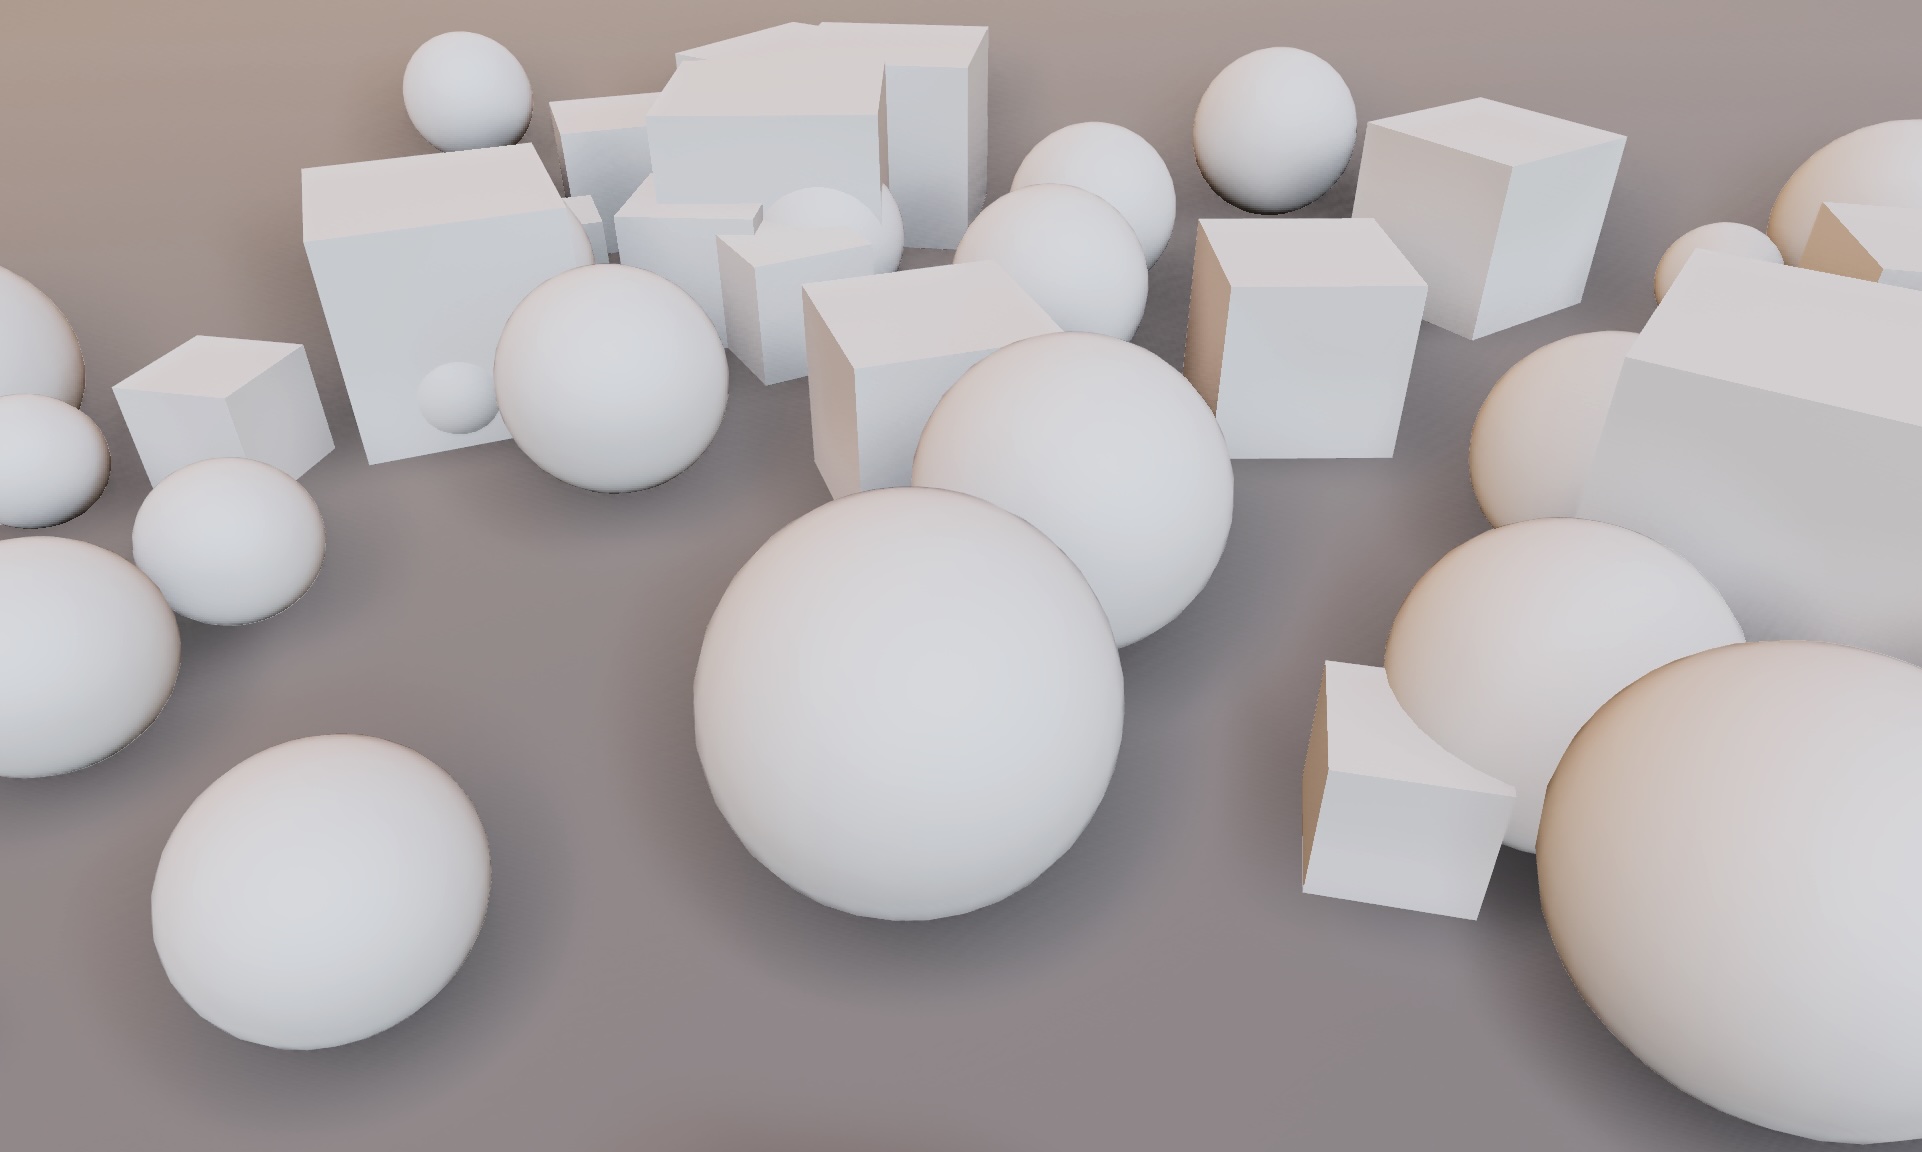
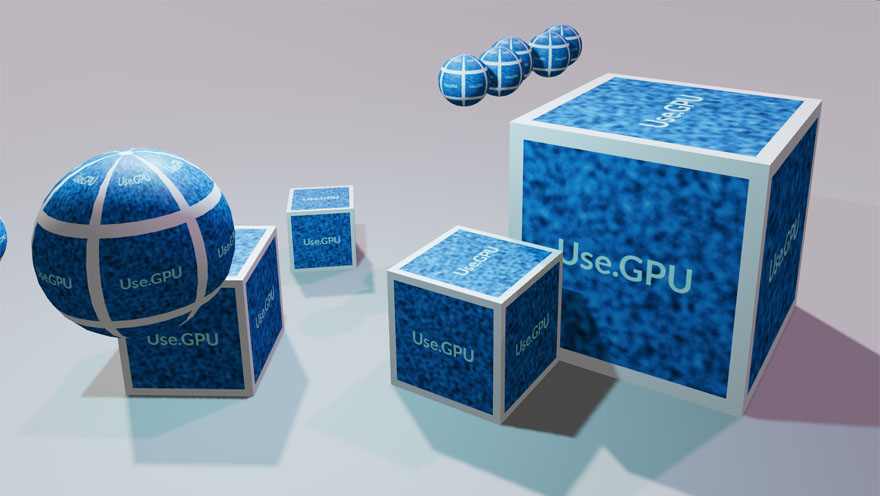
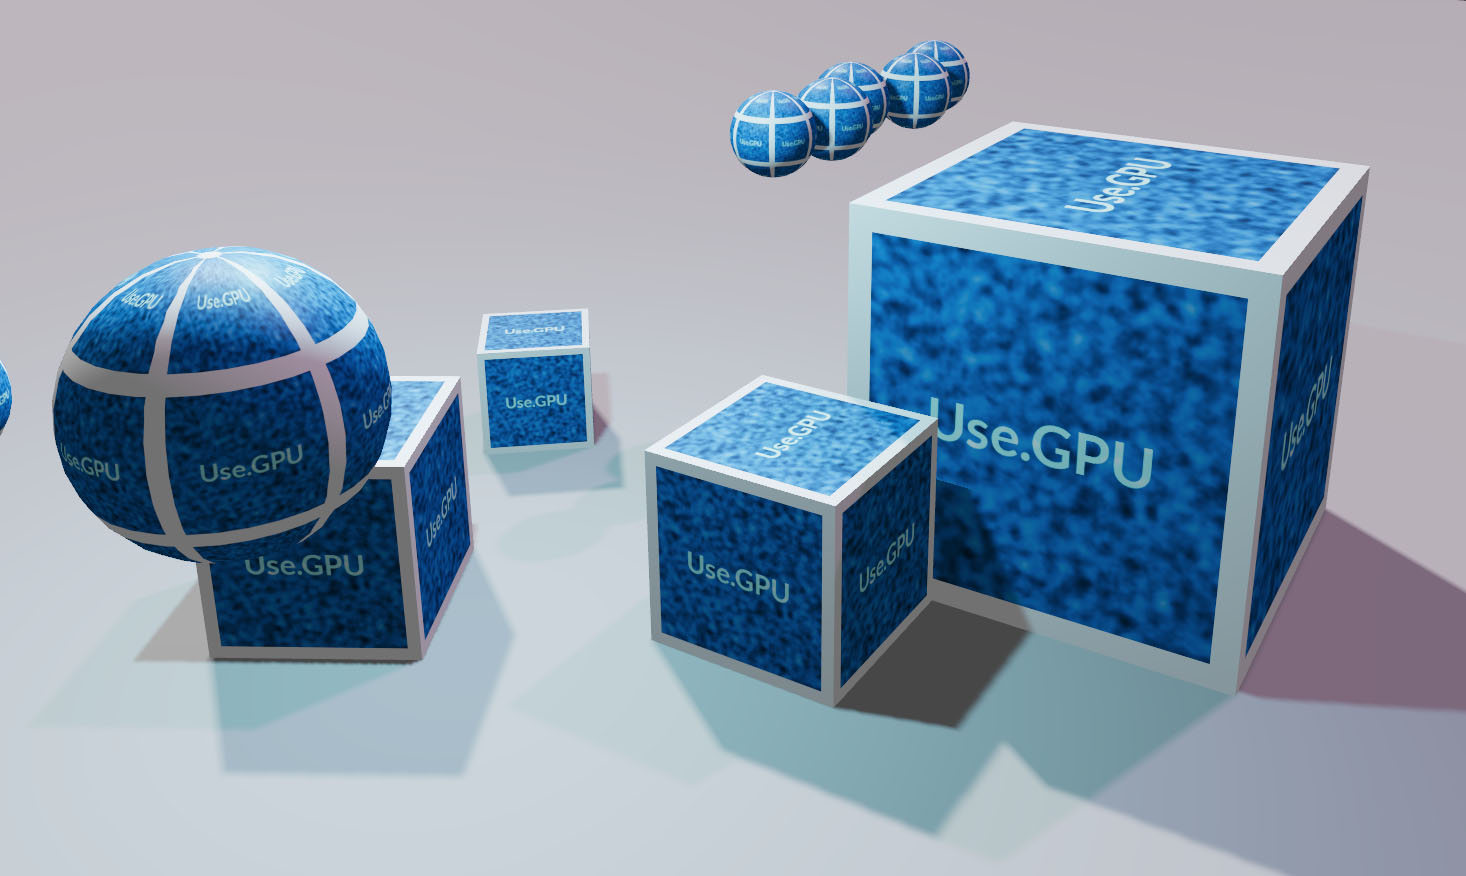
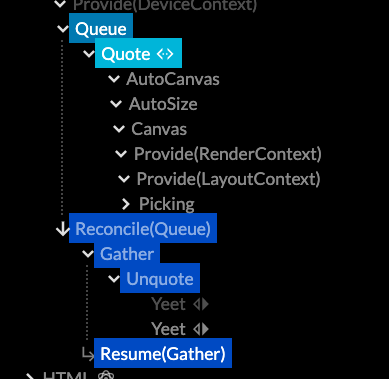
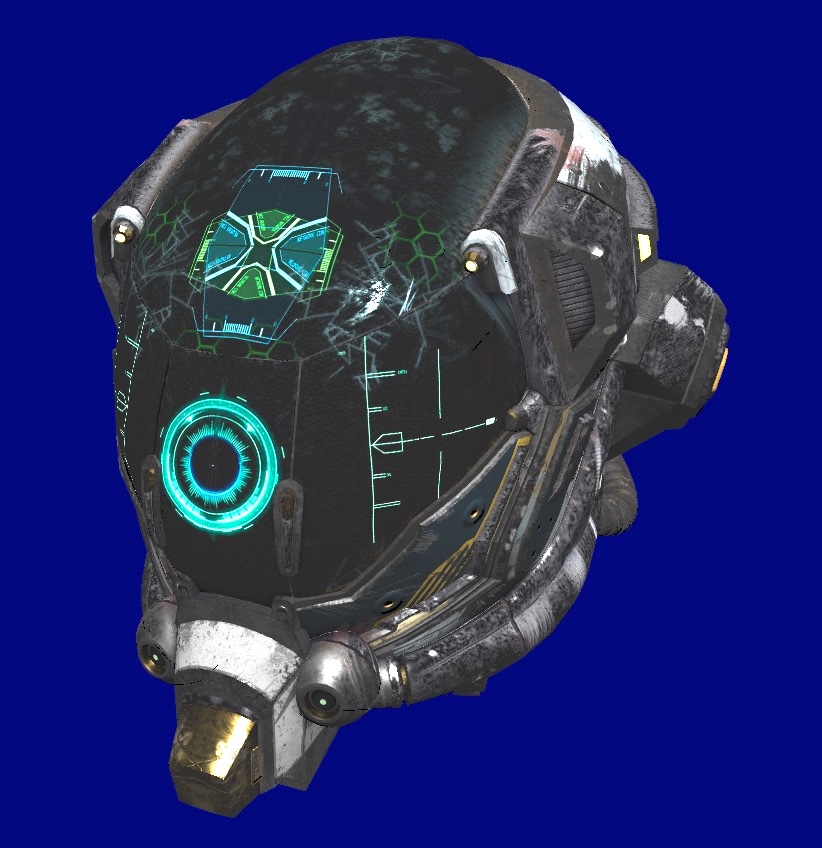
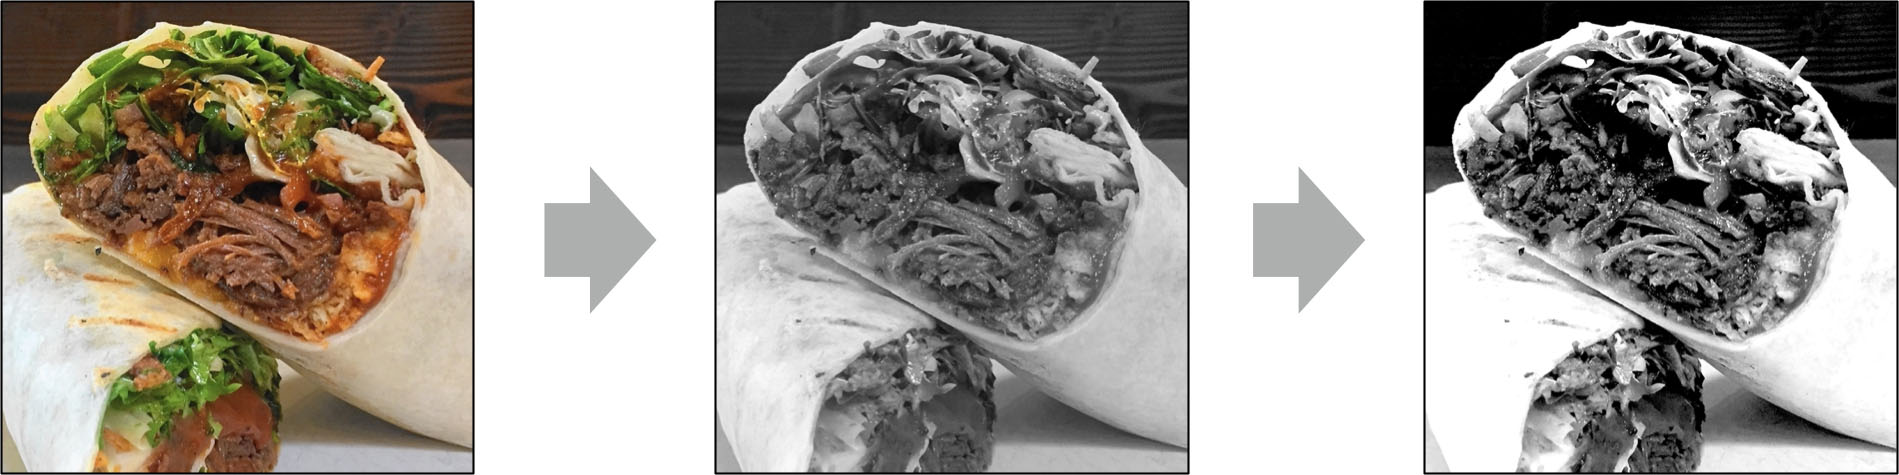
SSAO with Image-Based Lighting
The main effect is that out-of-the-box, without any textures, Use.GPU no longer looks like early 2000s OpenGL. This is a problem every home-grown 3D effort runs into: how to make things look good without premium, high-quality models and pre-baking all the lights.
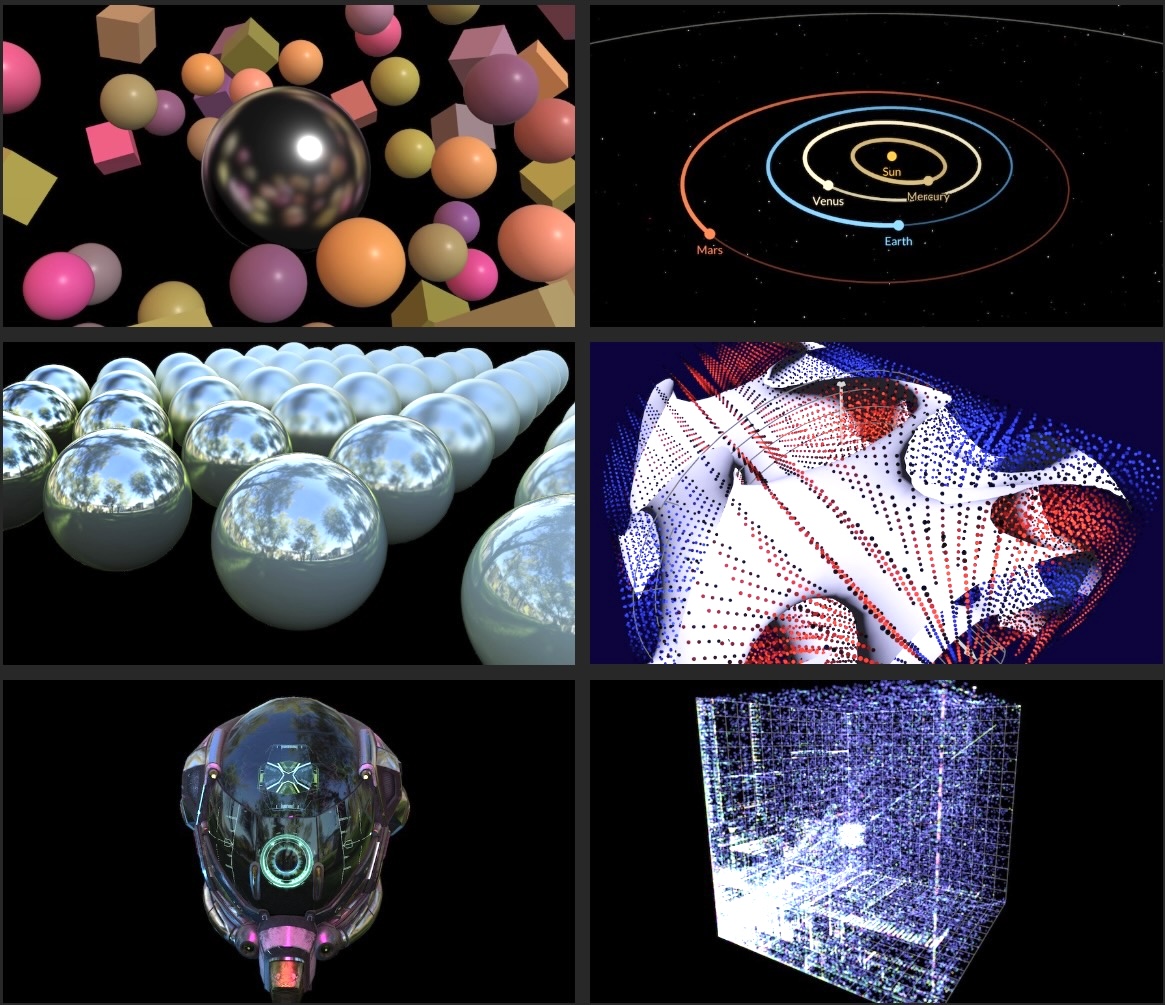
Use.GPU's reactive run-time continues to purr along well. Its main role is to enable doing at run-time what normally only happens at build time: dealing with shader permutations, assigning bindings, and so on. I'm quite proud of the line up of demos Use.GPU has now, for the sheer diversity of rendering techniques on display, including an example path tracer. The new inspector is the cherry on top.
A lot of the effort continues to revolve around mitigating flaws in GPU API design, and offering something simpler. As such, the challenge here wasn't just implementing SSAO: the basic effect is pretty easy. Rather, it brings with it a few new requirements, such as temporal accumulation and reprojection, that put new demands on the rendering pipeline, which I still want to expose in a modular and flexible way. This refines the efforts I detailed previously for 0.8.
Good SSAO also requires deep integration in the lighting pipeline. Here there is tension between modularizing and ease-of-use. If there is only one way to assemble a particular set of components, then it should probably be provided as a prefab. As such, occlusion has to remain a first class concept, tho it can be provided in several ways. It's a good case study of pragmatism over purity.
In case you're wondering: WebGPU is still not readily available on every device, so Use.GPU remains niche, tho it already excels at in-house use for adventurous clients. At this point you can imagine me and the browser GPU teams eyeing each other awkwardly from across the room: I certainly do.
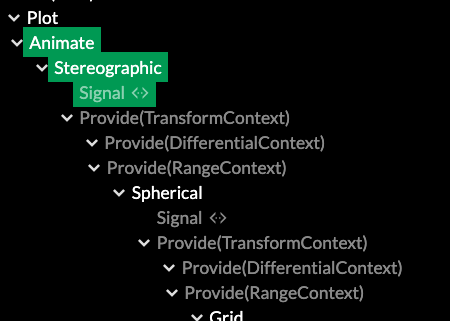
Inspector Gadget
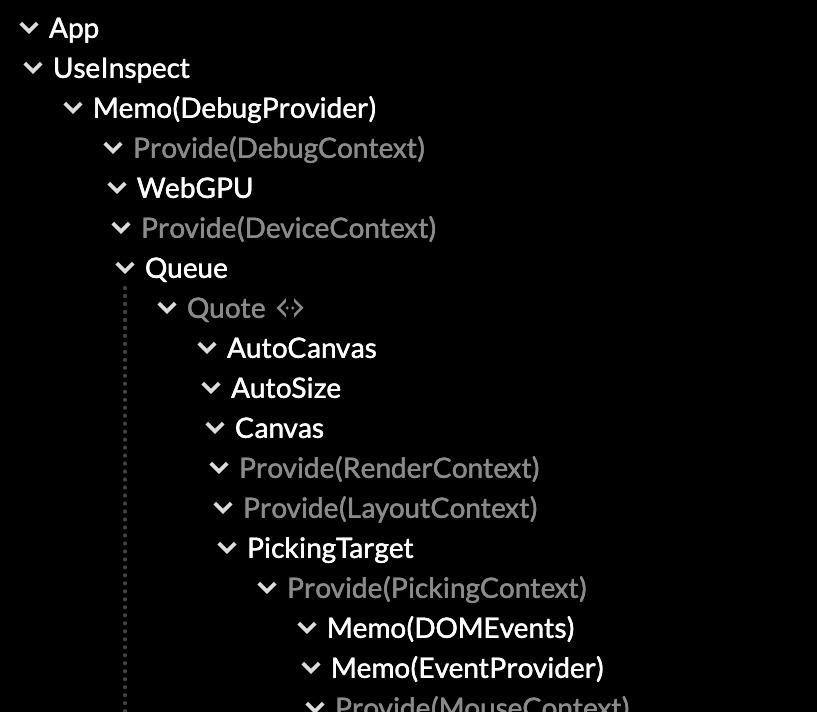
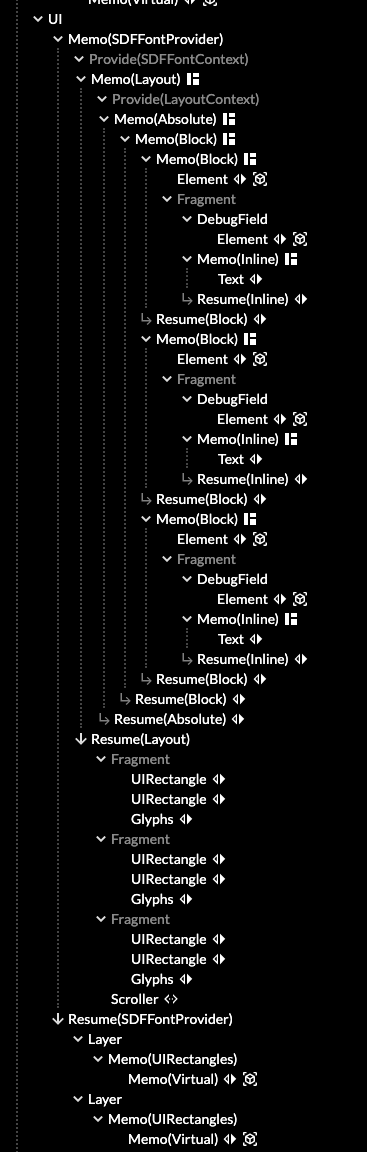
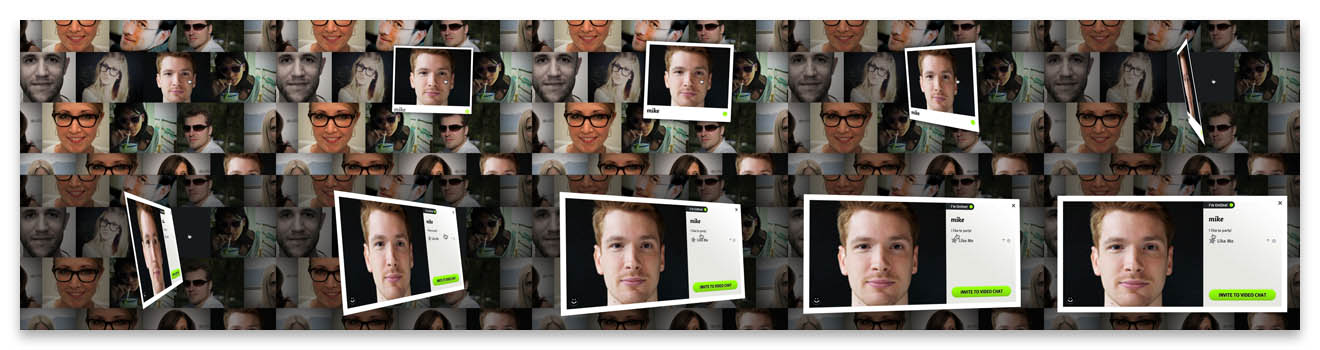
The first thing to mention is the upgraded the Use.GPU inspector. It already had a lot of quality-of-life features like highlighting, but the main issue was finding your way around the giant trees that Use.GPU now expands into.
Old
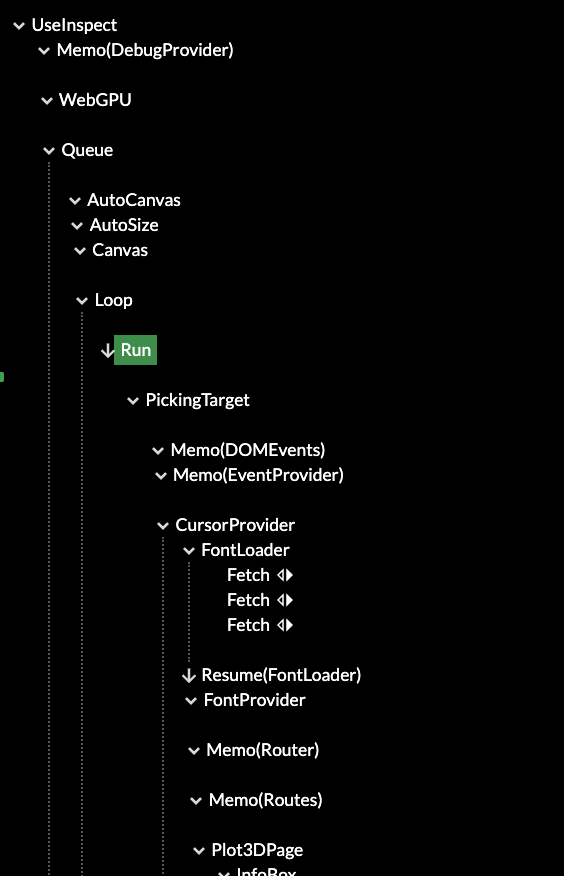
New

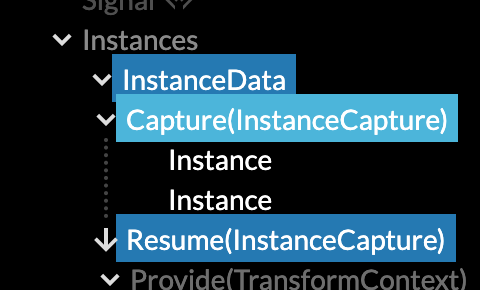
Highlights show data dependencies
The fix was filtering by type. This is very simple as a component already advertises its inspectability in a few pragmatic ways. Additionally, it uses the data dependency graph between components to identify relevant parents. This shows a surprisingly tidy overview with no additional manual tagging. For each demo, it really does show you the major parts first now.
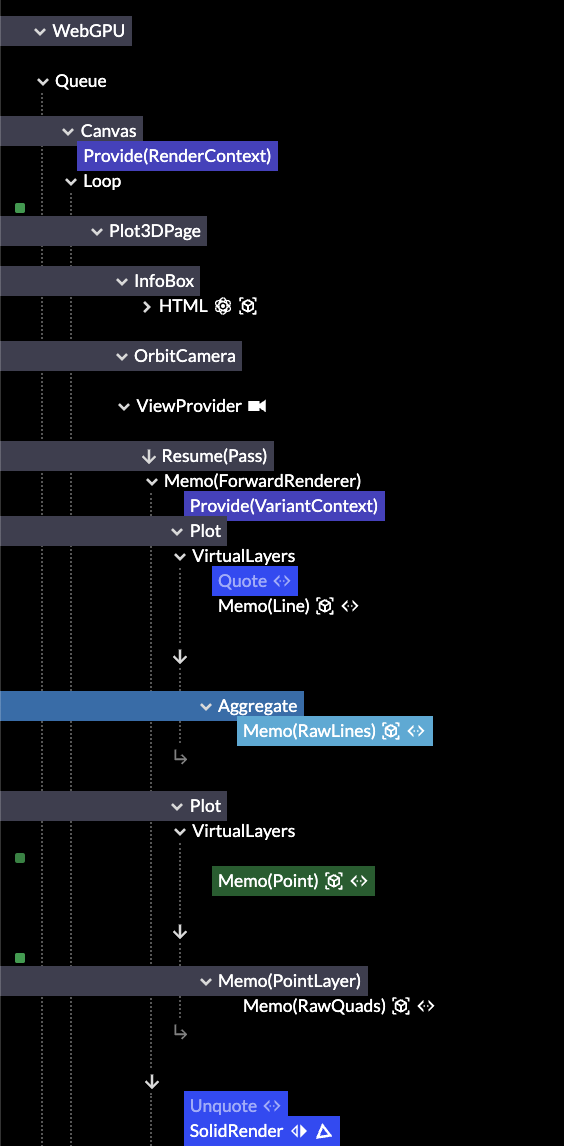
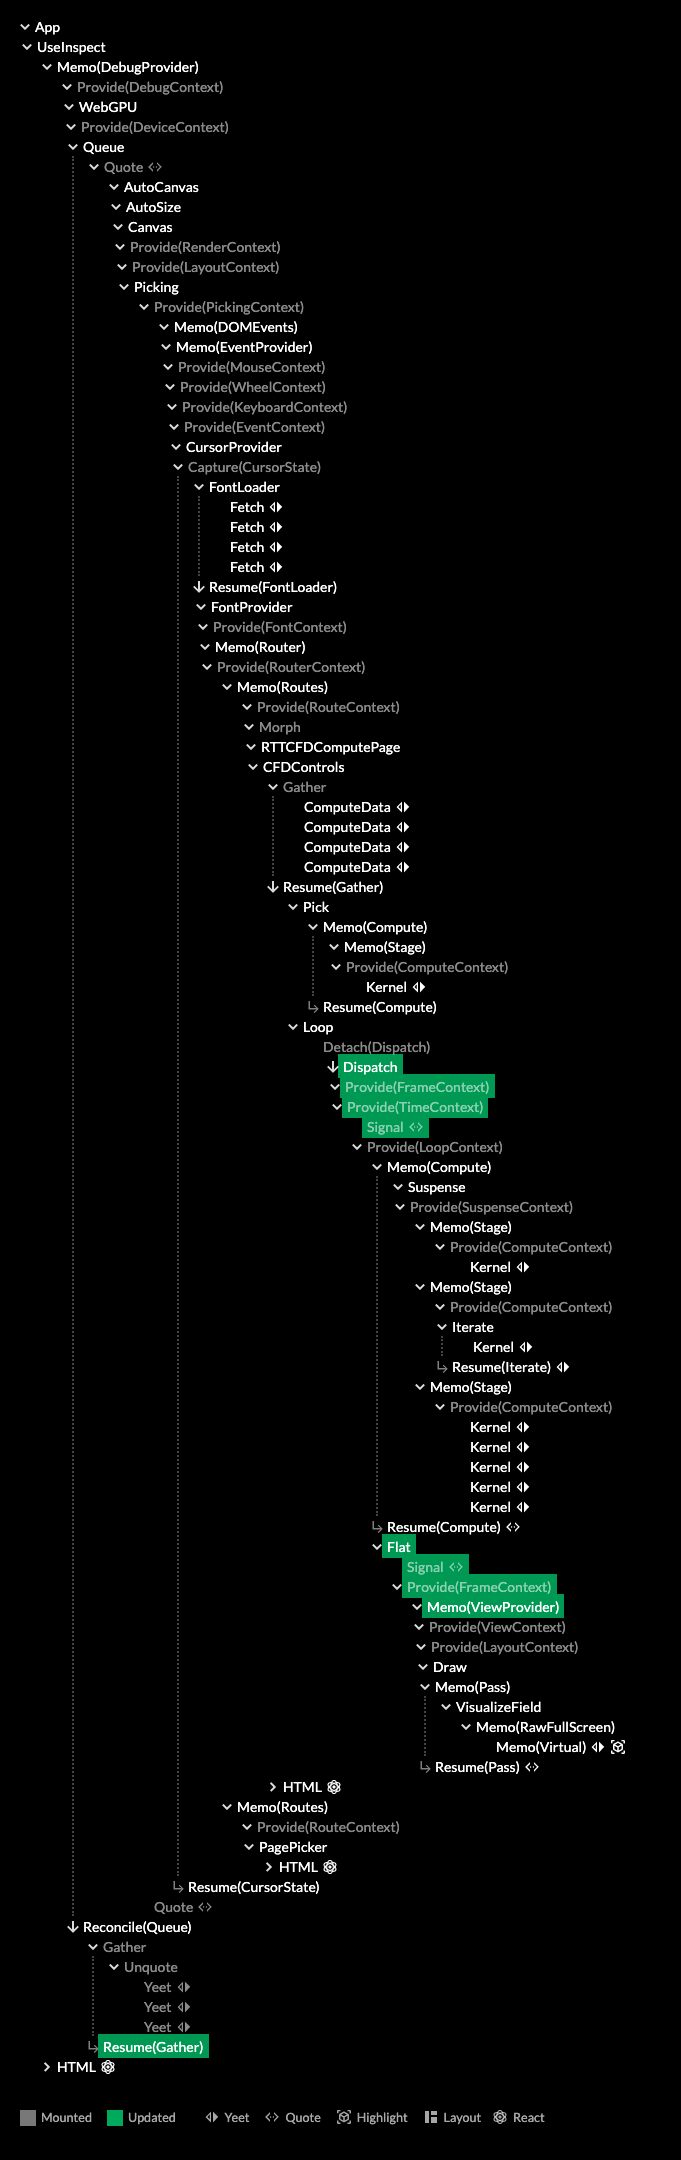
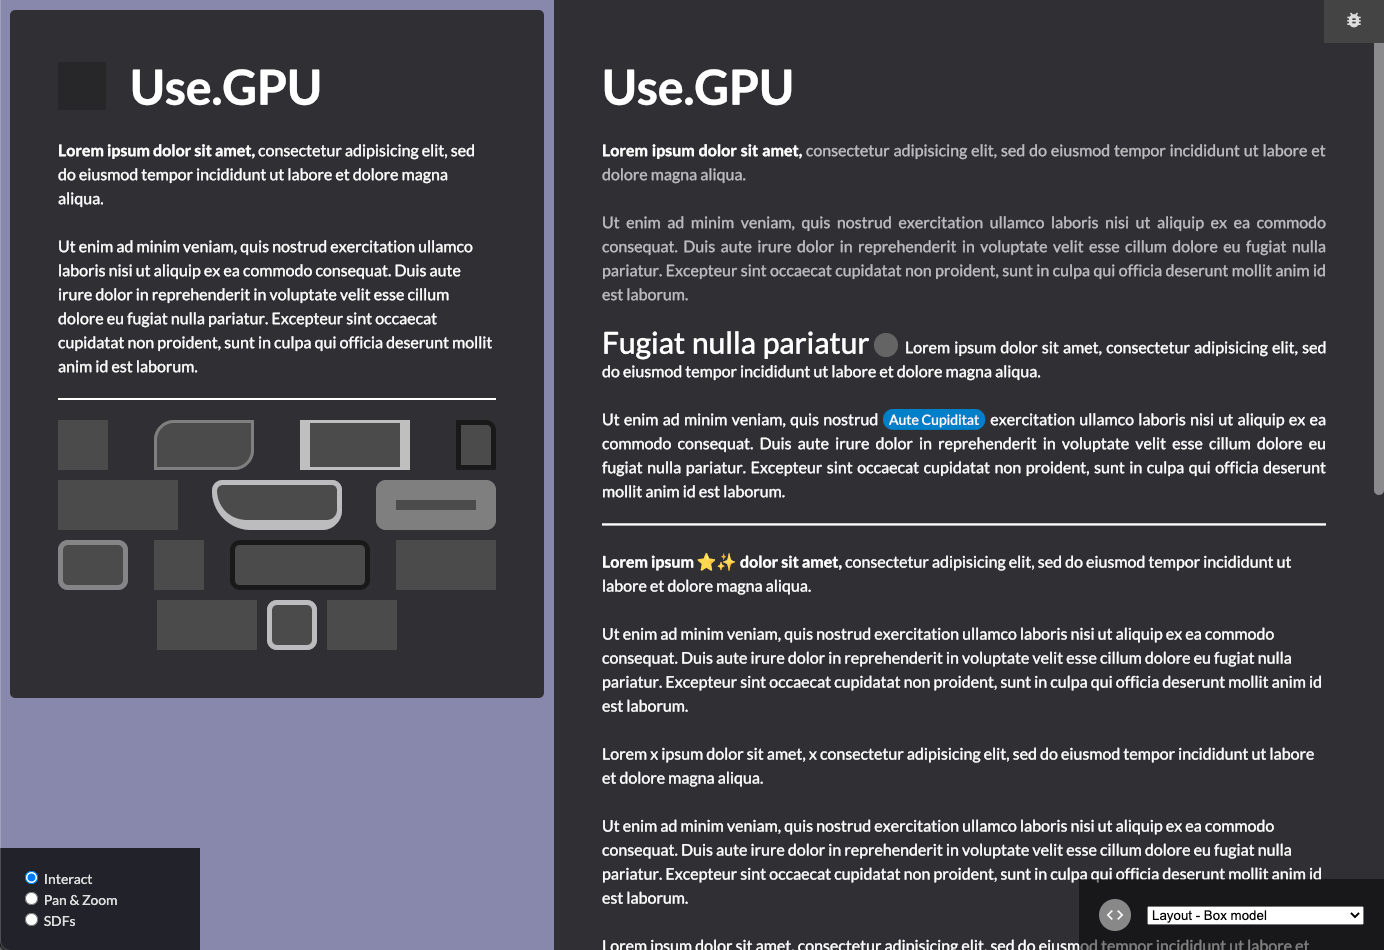
If you've checked it out before, give it another try. The layered structure is now clearly visible, and often fits in one screen. The main split is how Live is used to reconcile different levels of representation: from data, to geometry, to renders, to dispatches. These points appear as different reconciler nodes, and can be toggled as a filter.
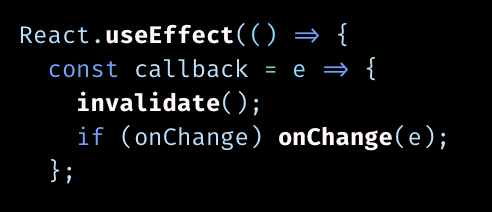
It's still the best way to see Live and Use.GPU in action. It can be tricky to grok that each line in the tree is really a plain function, calling other functions, as it's an execution trace you can inspect. It will now point you more in the right way, and auto-select the most useful tabs by default.
The inspector is unfortunately far heavier than the GPU rendering itself, as it all relies on HTML and React to do its thing. At some point it's probably worth to remake it into a Live-native version, maybe as a 2D canvas with some virtualization. But in the mean time it's a dev tool, so the important thing is that it still works when nothing else does.
Most of the images of buffers in this post can be viewed live in the inspector, if you have a WebGPU capable browser.
SSAO
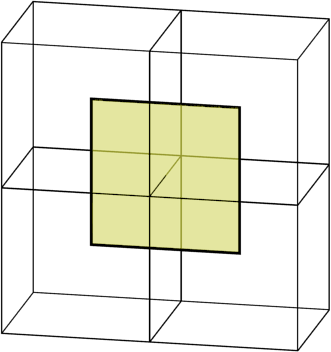
Screen-space AO is common now: using the rendered depth buffer, you estimate occlusion in a hemisphere around every point. I opted for Ground Truth AO (GTAO) as it estimates the correct visibility integral, as opposed to a more empirical 'crease darkening' technique. It also allows me to estimate bent normals along the way, i.e. the average unoccluded direction, for better environment lighting.
Hemisphere sampling
This image shows the debug viz in the demo. Each frame will sample one green ring around a hemisphere, spinning rapidly, and you can hold ALT to capture the sampling process for the pixel you're pointing at. It was invaluable to find sampling issues, and also makes it trivial to verify alignment in 3D. The shader calls printPoint(…) and printLine(…) in WGSL, which are provided by a print helper, and linked in the same way it links any other shader functions.
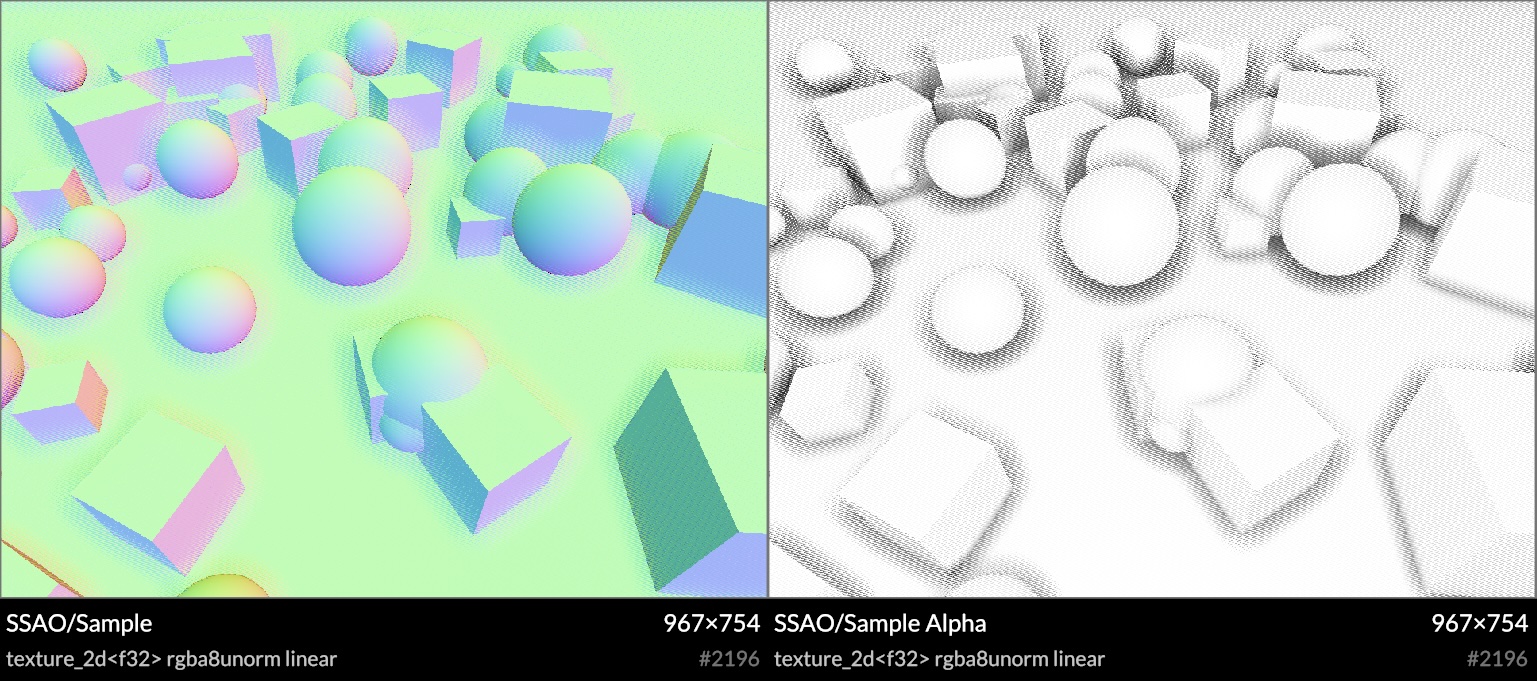
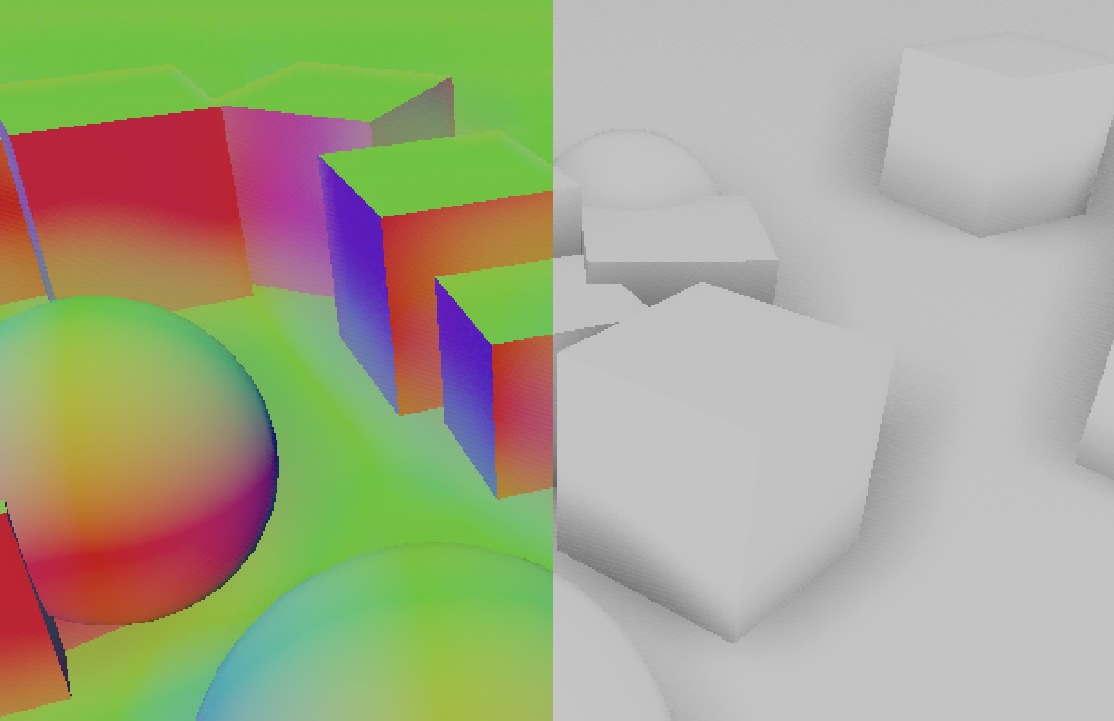
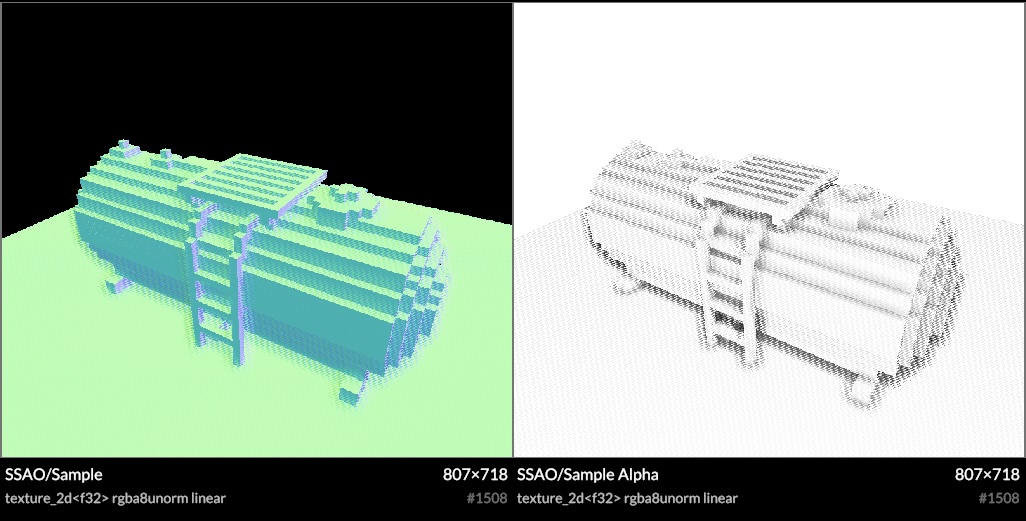
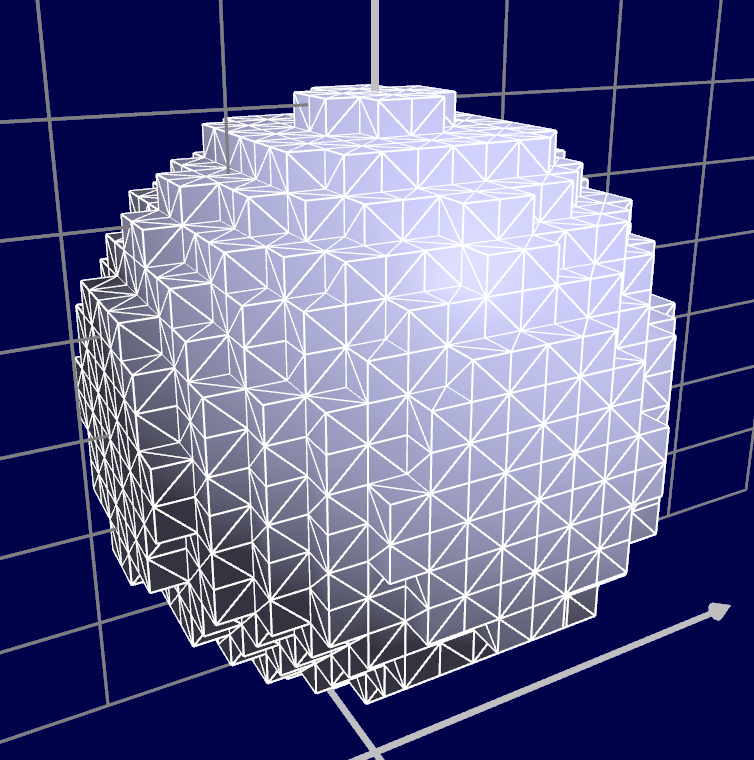
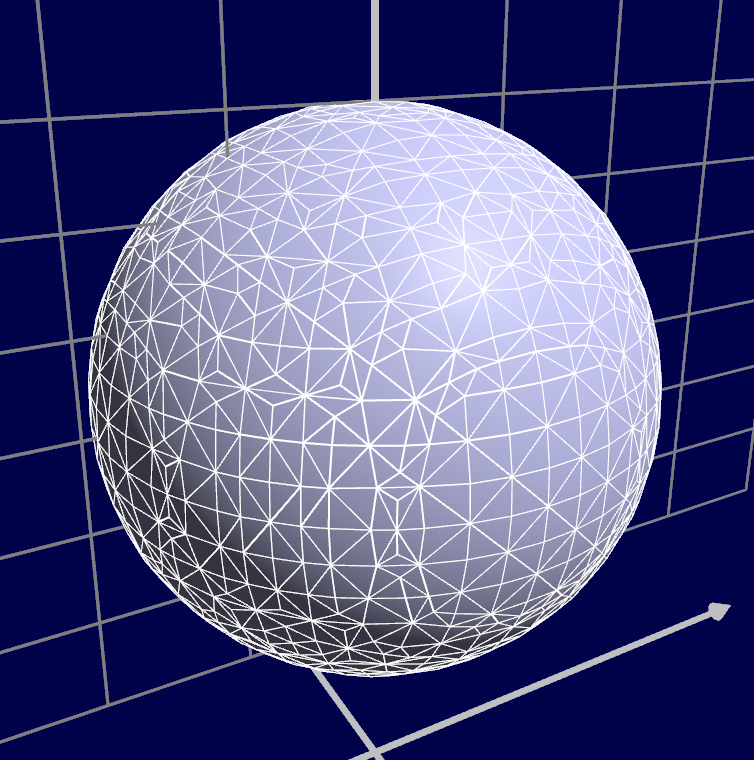
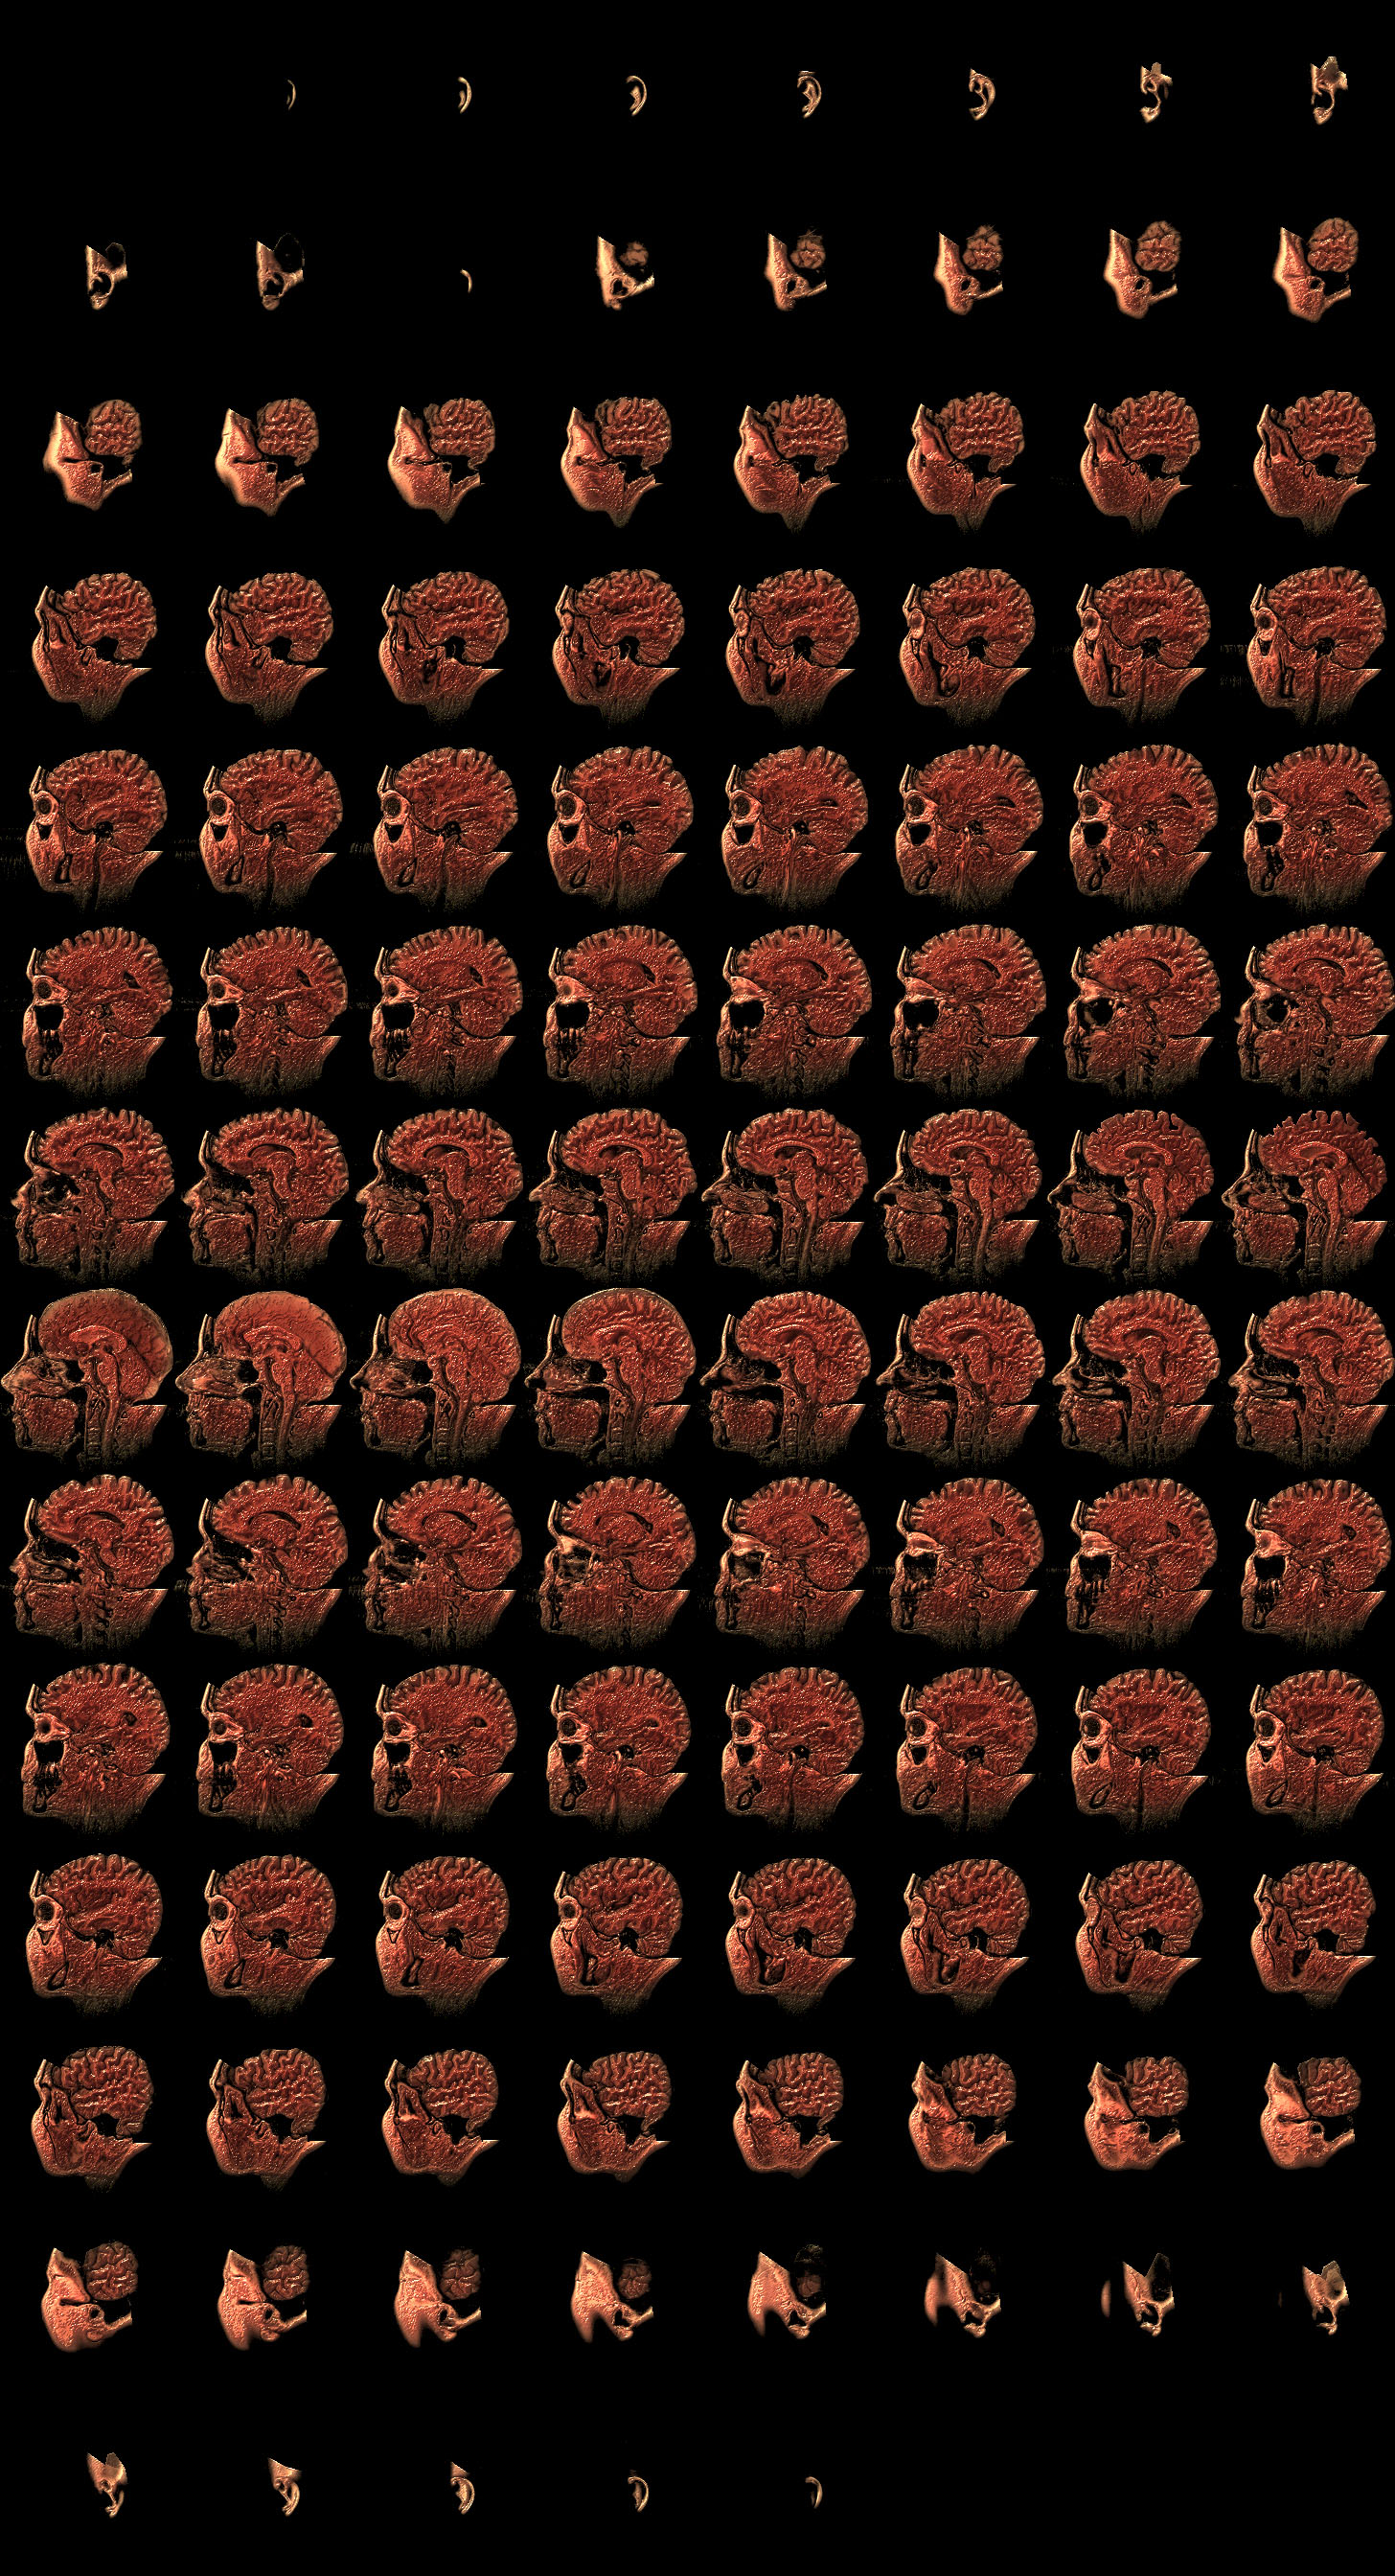
Bent normal and occlusion samples
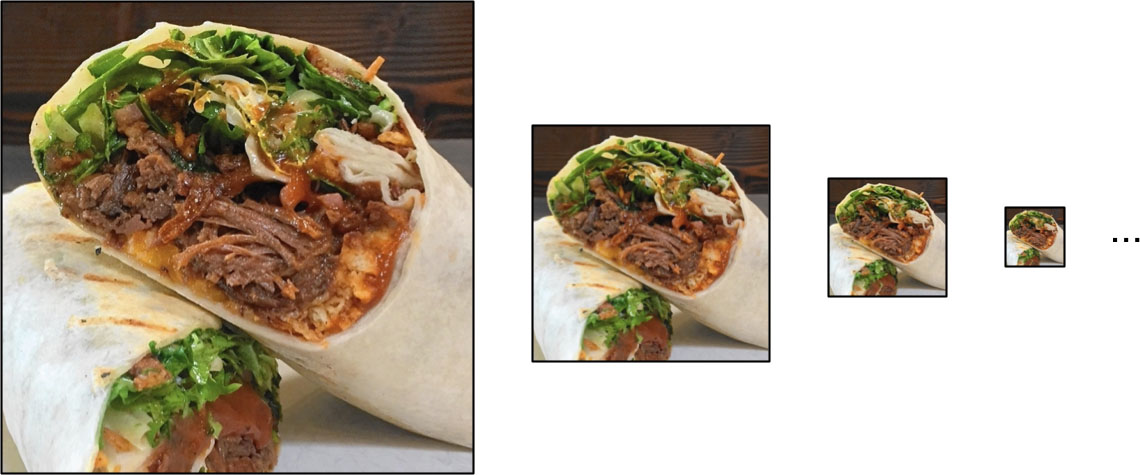
SSAO is expensive, and typically done at half-res, with heavy blurring to hide the sampling noise. Mine is no different, though I did take care to handle odd-sized framebuffers correctly, with no unexpected sample misalignments.
It also has accumulation over time, as the shadows change slowly from frame to frame. This is done with temporal reprojection and motion vectors, at the cost of a little bit of ghosting. Moving the camera doesn't reset the ambient occlusion, as long as it's moving smoothly.
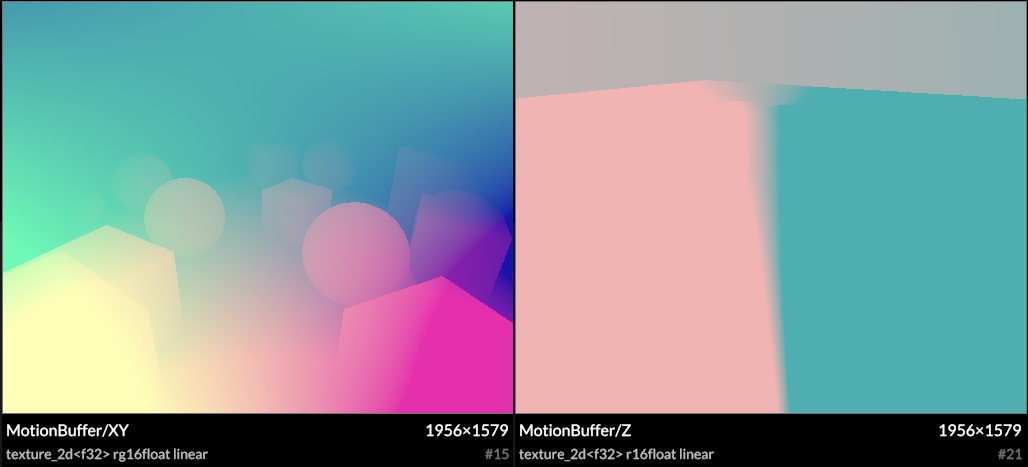
Motion vectors example
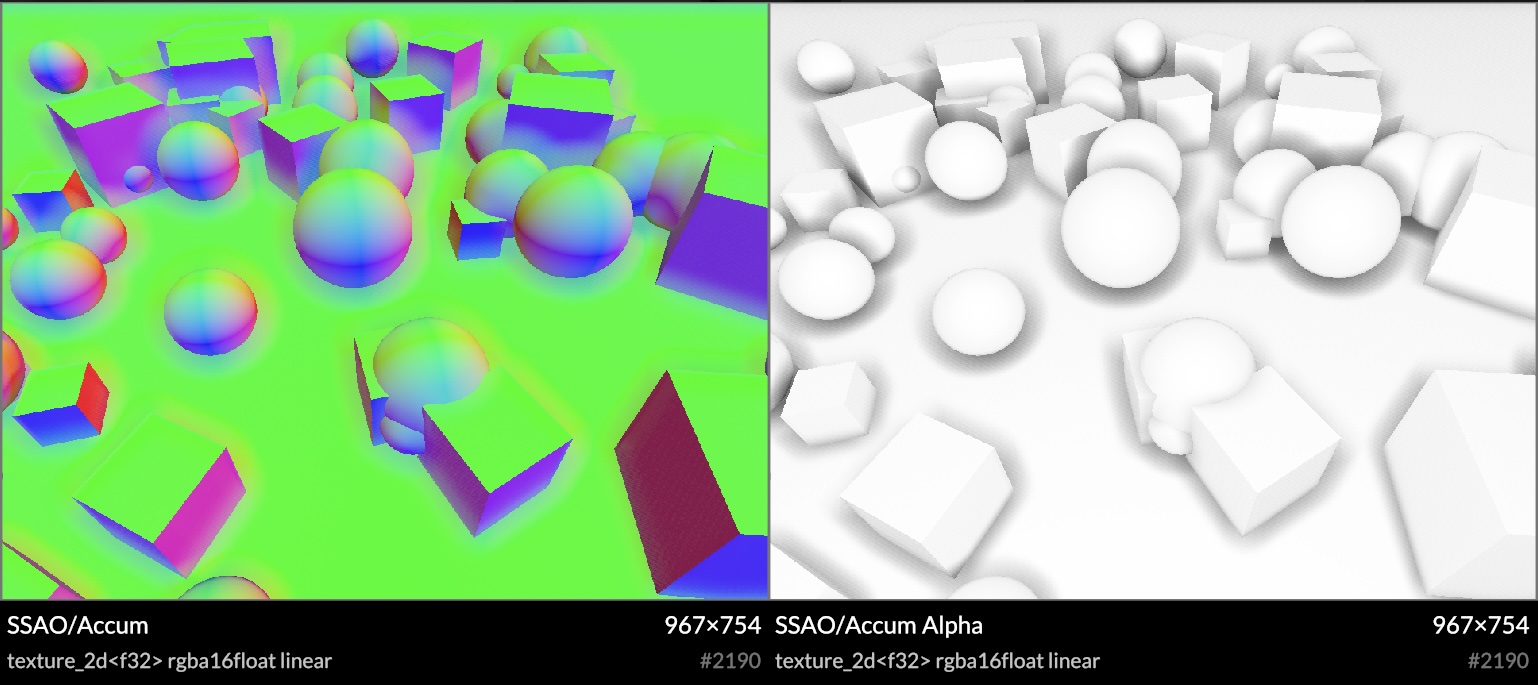
Accumulated samples
As Use.GPU doesn't render continuously, you can now use <Loop converge={N}> to decide how many extra frames you want to render after every visual change.
Reprojection requires access to the last frame's depth, normal and samples, and this is trivial to provide. Use.GPU has built-in transparent history for render targets and buffers. This allows for a classic front/back buffer flipping arrangement with zero effort (also, n > 2).
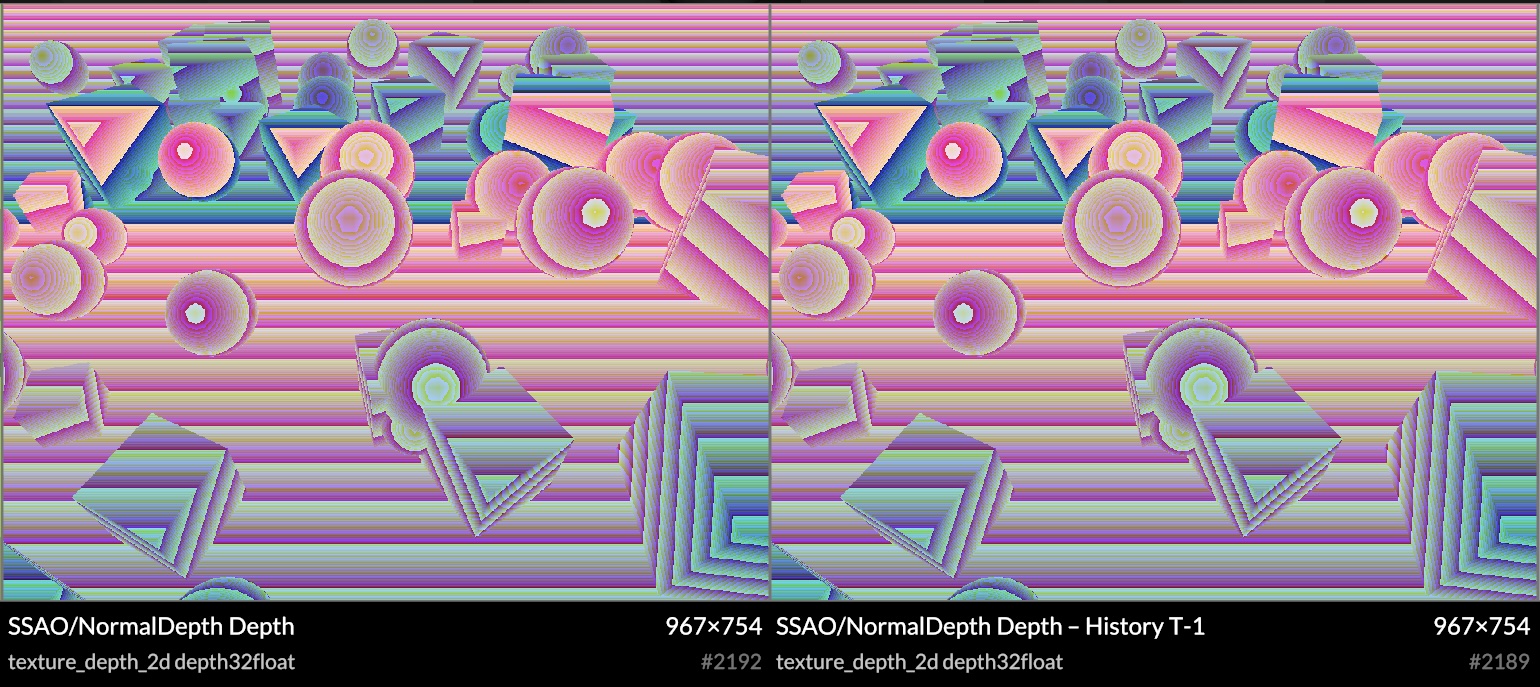
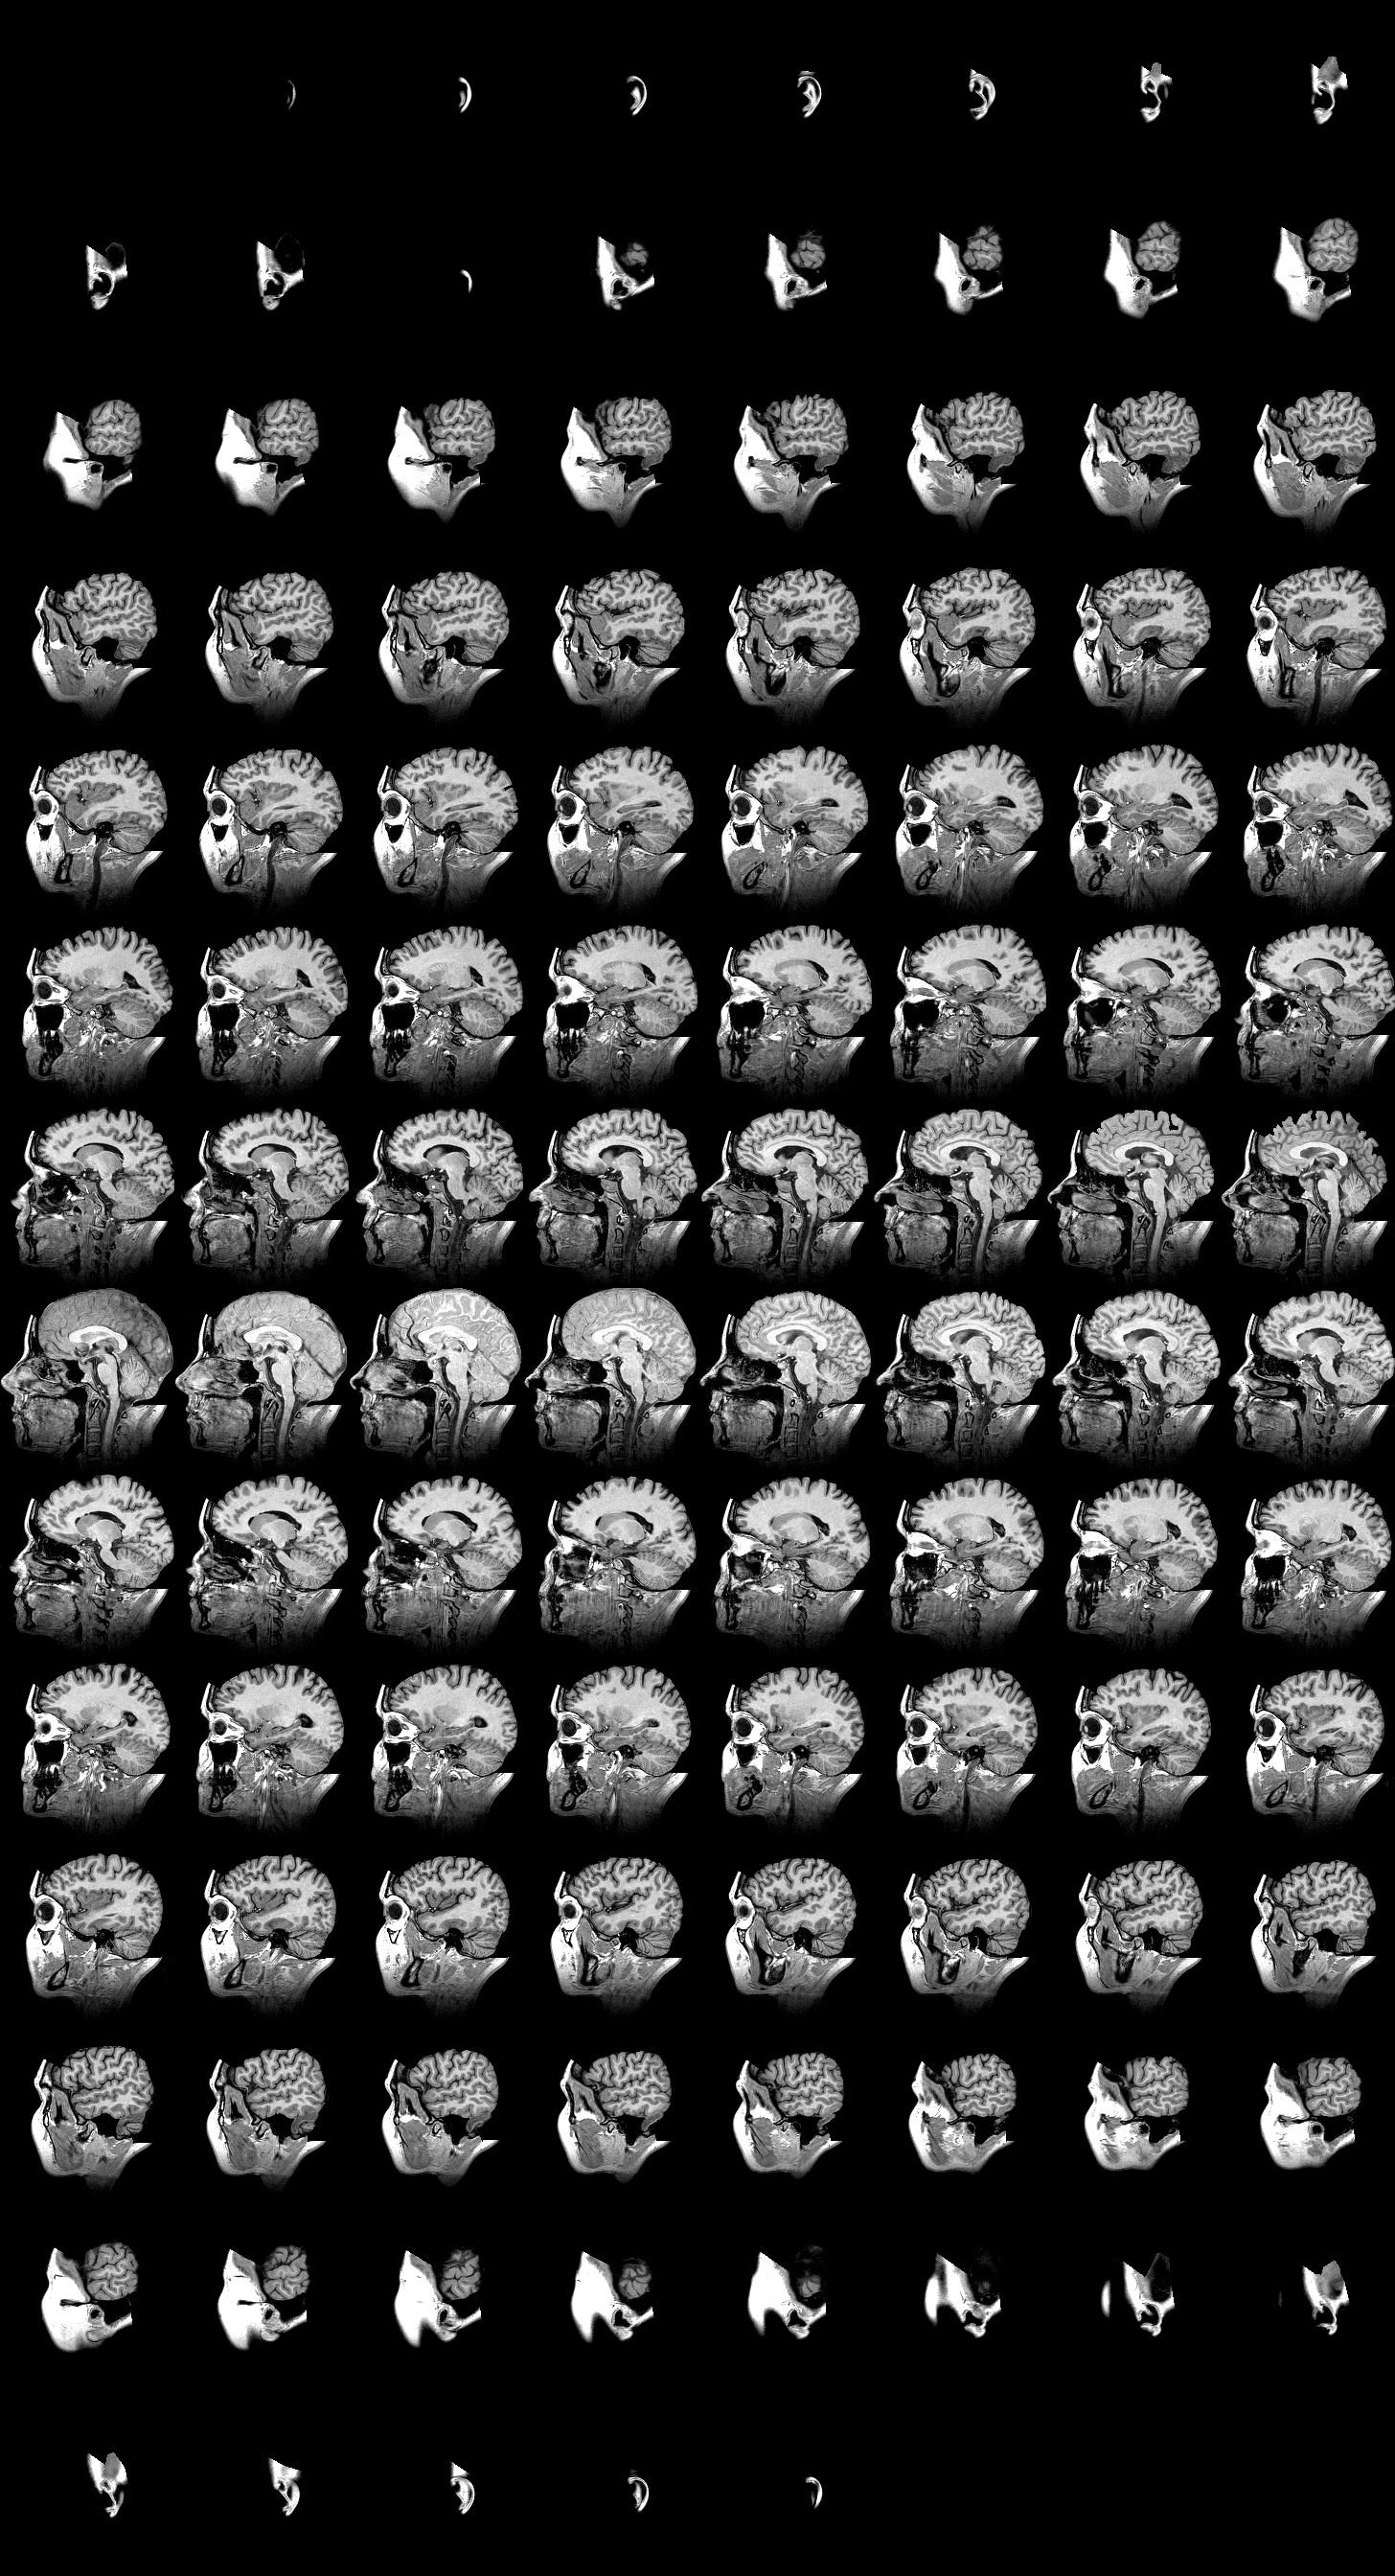
Depth history
You bind this as virtual sources, each accessing a fixed slot history[i], which will transparently cycle whenever you render to its target. Any reimagined GPU API should seriously consider buffer history as a first-class concept. All the modern techniques require it.
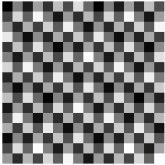
IGN
Rather than use e.g. blue noise and hope the statistics work out, I chose a very precise sampling and blurring scheme. This uses interleaved gradient noise (IGN), and pre-filters samples in alternating 2x2 quads to help diffuse the speckles as quickly as possible. IGN is designed for 3x3 filters, so a more specifically tuned noise generator may work even better, but it's a decent V1.
Reprojection often doubles as a cheap blur filter, creating free anti-aliasing under motion or jitter. I avoided this however, as the data being sampled includes the bent normals, and this would cause all edges to become rounded. Instead I use a precise bilateral filter based on depth and normal, aided by 3D motion vectors. This means it knows exactly what depth to expect in the last frame, and the reprojected samples remain fully aliased, which is a good thing here. The choice of 3D motion vectors is mainly a fun experiment, it may be an unnecessary luxury.
Detail of accumulated samples
The motion vectors are based only on the camera motion for now, though there is already the option of implementing custom motion shaders similar to e.g. Unity. For live data viz and procedural geometry, motion vectors may not even be well-defined. Luckily it doesn't matter much: it converges fast enough that artifacts are hard to spot.
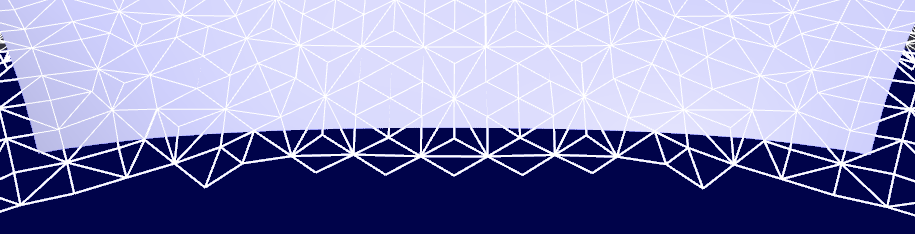
The final resolve can then do a bilateral upsample of these accumulated samples, using the original high-res normal and depth buffer:
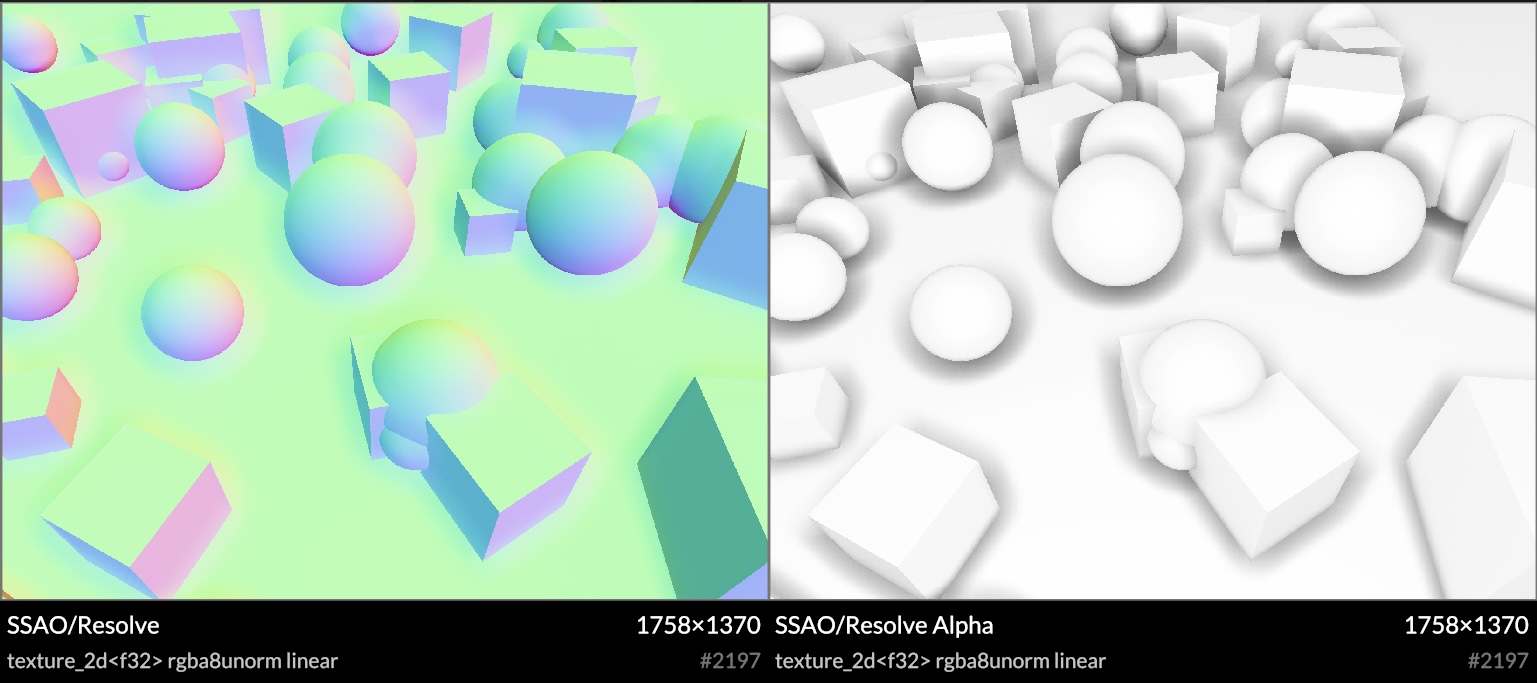
Upscaled and resolved samples, with overscan trimmed off
Because it's screen-space, the shadows disappear at the screen edges. To remedy this, I implemented a very precise form of overscan. It expands the framebuffer by a constant amount of pixels, and expands the projectionMatrix to match. This border is then trimmed off when doing the final resolve. In principle this is pixel-exact, barring GPU quirks. These extra pixels don't go to waste either: they can get reprojected into the frame under motion, reducing visible noise significantly.
In theory this is very simple, as it's a direct scaling of [-1..1] XY clip space. In practice you have to make sure absolutely nothing visual depends on the exact X/Y range of your projectionMatrix, either its aspect ratio or in screen-space units. This required some cleanup on the inside, as Use.GPU has some pretty subtle scaling shaders for 2.5D and 3D points and lines. I imagine this is also why I haven't seen more people do this. But it's definitely worth it.
Overall I'm very satisfied with this. Improvements and tweaks can be made aplenty, some performance tuning needs to happen, but it looks great already. It also works in both forward and deferred mode. The shader source is here.
Render Buffers & Passes
The rendering API for passes reflects the way a user wants to think about it, as 1 logical step in producing a final image. Sub-passes such as shadows or SSAO aren't really separate here, as the correct render cannot be finished without it.
The main entry point here is the <Pass> component, representing such a logical render pass. It sits inside a view, like an <OrbitCamera>, and has some kind of pre-existing render context, like the visible canvas.
<Pass
  lights
  ssao={{ radius: 3, indirect: 0.5 }}
  overscan={0.05}
>
  ...
</Pass>
You can sequence multiple logical passes to add overlays with overlay: true, or even merge two scenes in 3D using the same Z-buffer.
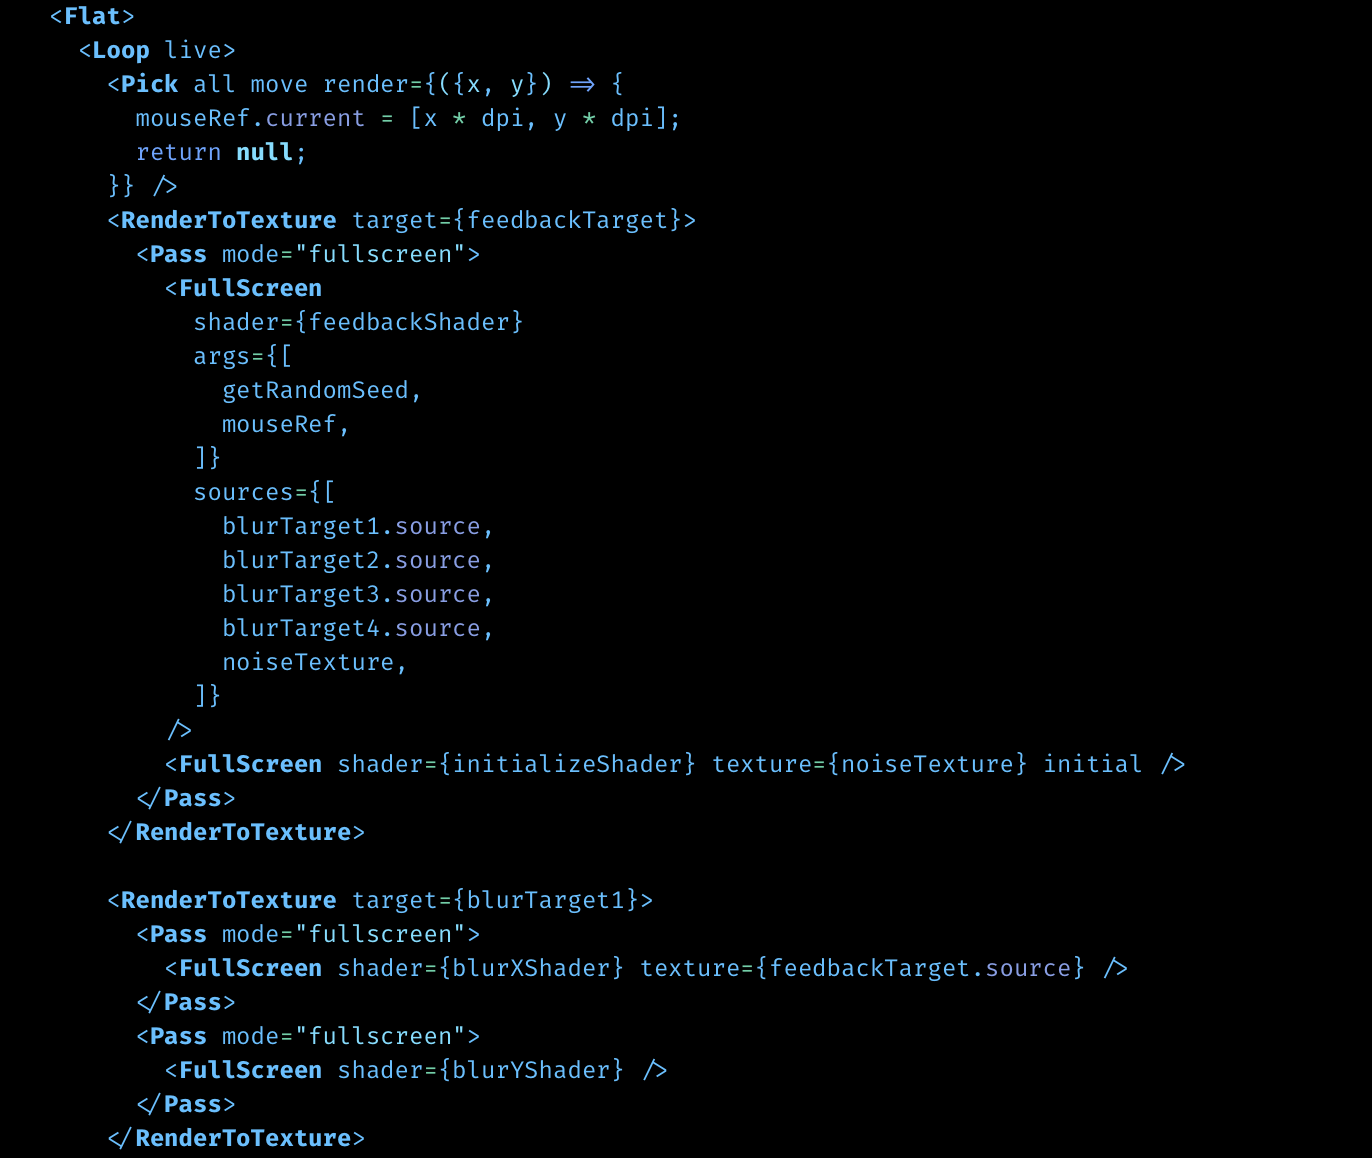
Inside it's a declarative recipe that turns a few flags and options into the necessary arrangement of buffers and passes required. This uses the alt-Live syntax use(…) but you can pretend that's JSX:
const resources = [
use(ViewBuffer, options),
lights ? use(LightBuffer, options) : null,
shadows ? use(ShadowBuffer, options) : null,
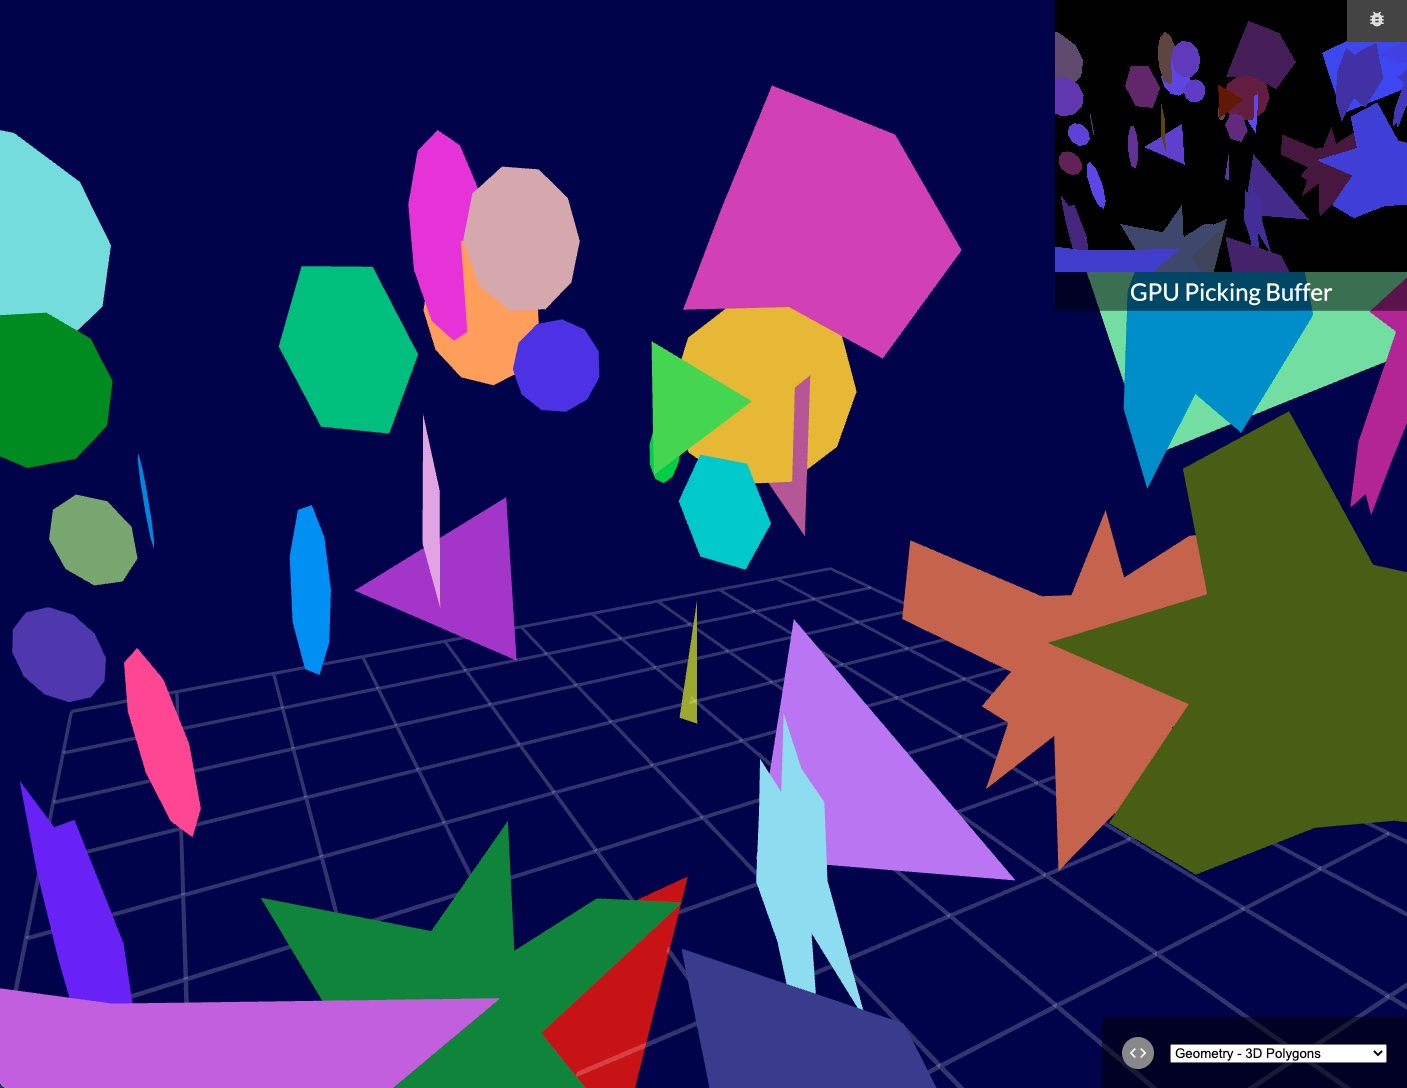
picking ? use(PickingBuffer, options) : null,
overscan ? use(OverscanBuffer, options) : null,
...(ssao ? [
use(NormalBuffer, options),
use(MotionBuffer, options),
] : []),
ssao ? use(SSAOBuffer, options) : null,
];
const resolved = passes ?? [
  normals ? use(NormalPass, options) : null,
  motion ? use(MotionPass, options) : null,
  ssao ? use(SSAOPass, options) : null,
  shadows ? use(ShadowPass, options) : null,
  use(DEFAULT_PASS[viewType], options),
  picking ? use(PickingPass, options) : null,
  debug ? use(DebugPass, options) : null,
]
e.g. The <SSAOBuffer> will spawn all the buffers necessary to do SSAO.
Notice what is absent here: the inputs and outputs. The render passes are wired up implicitly, because if you had to do it manually, there would only be one correct way. This is the purpose of separating the resources from the passes: it allows everything to be allocated once, up front, so that then the render passes can connect them into a suitable graph with a non-trivial but generally expected topology. They find each other using 'well-known names' like normal and motion, which is how it's done in practice anyway.
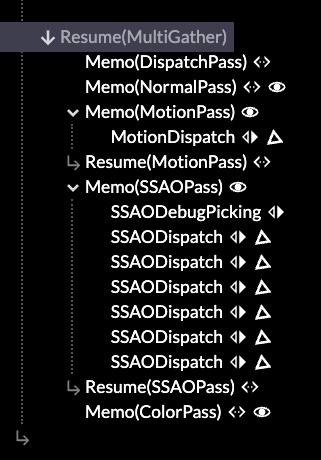
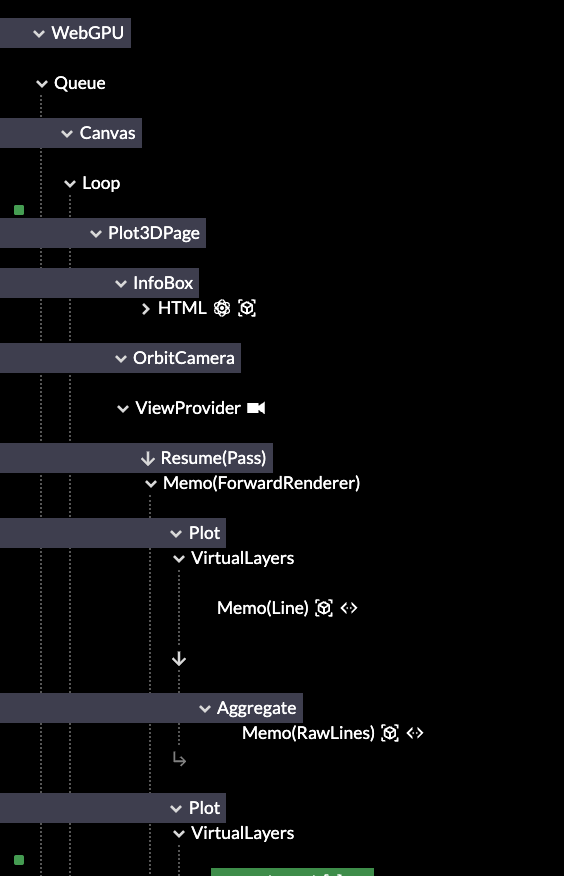
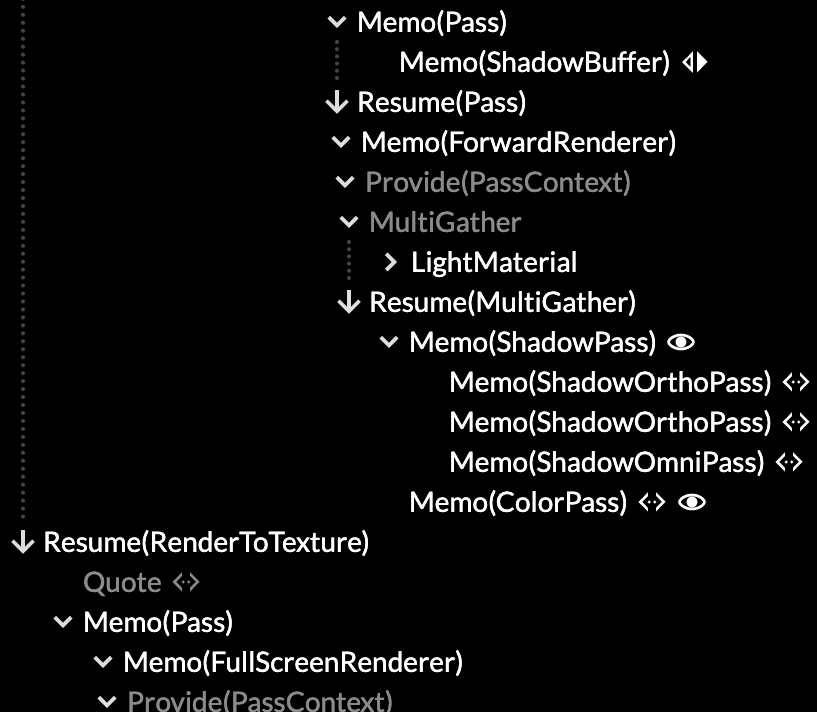
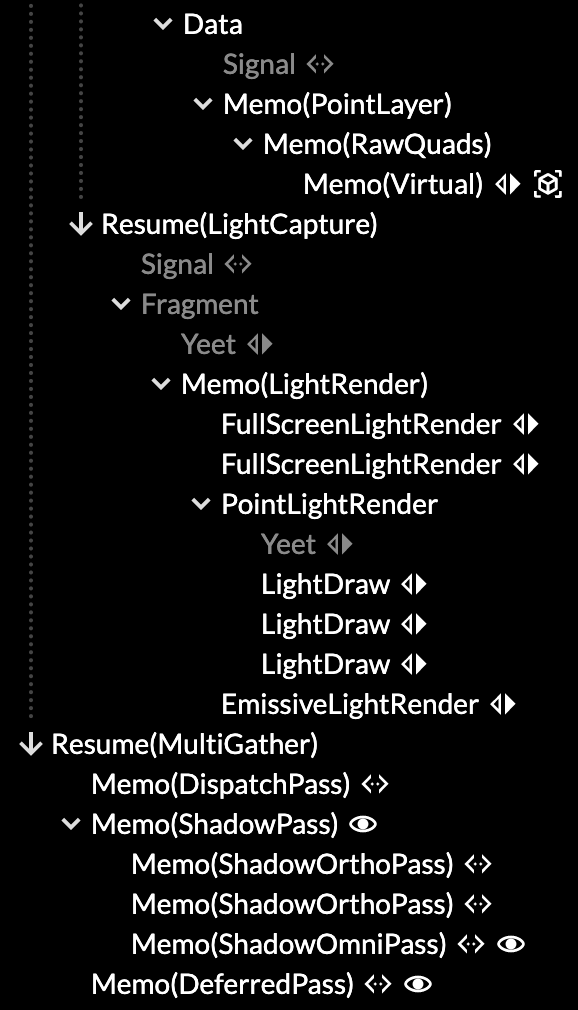
Render passes in the inspector
This reflects what I am starting to run into more and more: that decomposed systems have little value if everyone has to use it the same way. It can lead to a lot of code noise, and also tie users to unimportant details of the existing implementation. Hence the simple recipe.
But, if you want to sequence your own render exactly, nothing prevents you from using the render components à la carte: the main method of composition is mounting reactive components in Live, like everything else. Your passes work exactly the same as the built-in ones.
I make use of the dynamicism of JS to e.g. not care what options are passed to the buffers and passes. The convention is that each should be namespaced so they don't collide. This provides real extensibility for custom use, while paving the cow paths that exist.
It's typical that buffers and passes come in matching pairs. However, one could swap out one variation of a <FooPass> for another, while reusing the same buffer type. Most <FooBuffer> implementations are themselves declarative recipes, with e.g. a <RenderTarget> or two, and perhaps an associated data binding. All the meat—i.e. the dispatches—is in the passes.
It's so declarative that there isn't much left inside <Renderer> itself. It maps logical calls into concrete ones by leveraging Live, and that's reflected entirely in what's there. It only gathers up some data it doesn't know details about, and helps ensure the sequence of compute before render before readback. This is a big clue that renderers really want to be reactive run-times instead.
Bind Group Soup
Use.GPU's initial design goal was "a unique shader for every draw call". This means its data binding fu has mostly been applied to local shader bindings. These apply only to one particular draw, and you bind the data to the shader at the same time as creating it.
This is the useShader hook. There is no separation where you first prepare the binding layout, and as such, you use it like a deferred function call, just like JSX.
// Prepare to call surfaceShader(matrix, ray, normal, size, ...)
const getSurface = useShader(surfaceShader, [
  matrix, ray, normal, size, insideRef, originRef,
  sdf, palette, pbr, ...sources
], defs);
Shader and pipeline reuse is handled via structural hashing behind the scenes: it's merely a happy benefit if two draw calls can reuse the same shader and pipeline, but absolutely not a problem if they don't. As batching is highly encouraged, and large data sets can be rendered as one, the number of draw calls tends to be low.
All local bindings are grouped in two bind groups, static and volatile. The latter allows for the transparent history feature, as well as just-in-time allocated atlases. Static bindings don't need to be 100% static, they just can't change during dispatch or rendering.
WebGPU only has four bind groups total. I previously used the other two for respectively the global view, and the concrete render pass, using up all the bind groups. This was wasteful but an unfortunate necessity, without an easy way to compose them at run-time.
| Bind Group: | #0 | #1 | #2 | #3 |
|---|---|---|---|---|
| Use.GPU 0.13 | View | Pass | Static | Volatile |
| Use.GPU 0.14 | Pass | Static | Volatile | Free |
This has been fixed in 0.14, which frees up a bind group. It also means every render pass fully owns its own view. It can pick from a set of pre-provided ones (e.g. overscanned or not), or set a custom one, the same way it finds buffers and other bindings.
Having bind group 3 free also opens up the possibility of a more traditional sub-pipeline, as seen in a traditional scene graph renderer. These can handle larger amounts of individual draw calls, all sharing the same shader template, but with different textures and parameters. My goal however is to avoid monomorphizing to this degree, unless it's absolutely necessary (e.g. with the lighting).
This required upgrading the shader linker. Given e.g. a static binding snippet such as:
use '@use-gpu/wgsl/use/types'::{ Light };

@export struct LightUniforms {
  count: u32,
  lights: array<Light>,
};

@group(PASS) @binding(1) var<storage> lightUniforms: LightUniforms;
...you can import it in Typescript like any other shader module, with the @binding as an attribute to be linked. The shader linker will understand struct types like LightUniforms with array<Light> fully now, and is able to produce e.g. a correct minimum binding size for types that cross module boundaries.
The ergonomics of useShader have been replicated here, so that useBindGroupLayout takes a set of these and prepares them into a single static bind group, managing e.g. the shader stages for you. To bind data to the bind group, a render pass delegates via useApplyPassBindGroup: this allows the source of the data to be modularized, instead of requiring every pass to know about every possible binding (e.g. lighting, shadows, SSAO, etc.). That is, while there is a separation between bind group layout and data binding, it's lazy: both are still defined in the same place.
The binding system is flexible enough end-to-end that the SSAO can e.g. be applied to the voxel raytracer from @use-gpu/voxel with zero effort required, as it also uses the shaded technique (with per fragment depth). It has a getSurface(...) shader function that raytraces and returns a surface fragment. The SSAO sampler can just attach its occlusion information to it, by decorating it in WGSL.
WGSL Types
Worth noting, this all derives from previous work on auto-generated structs for data aggregation.
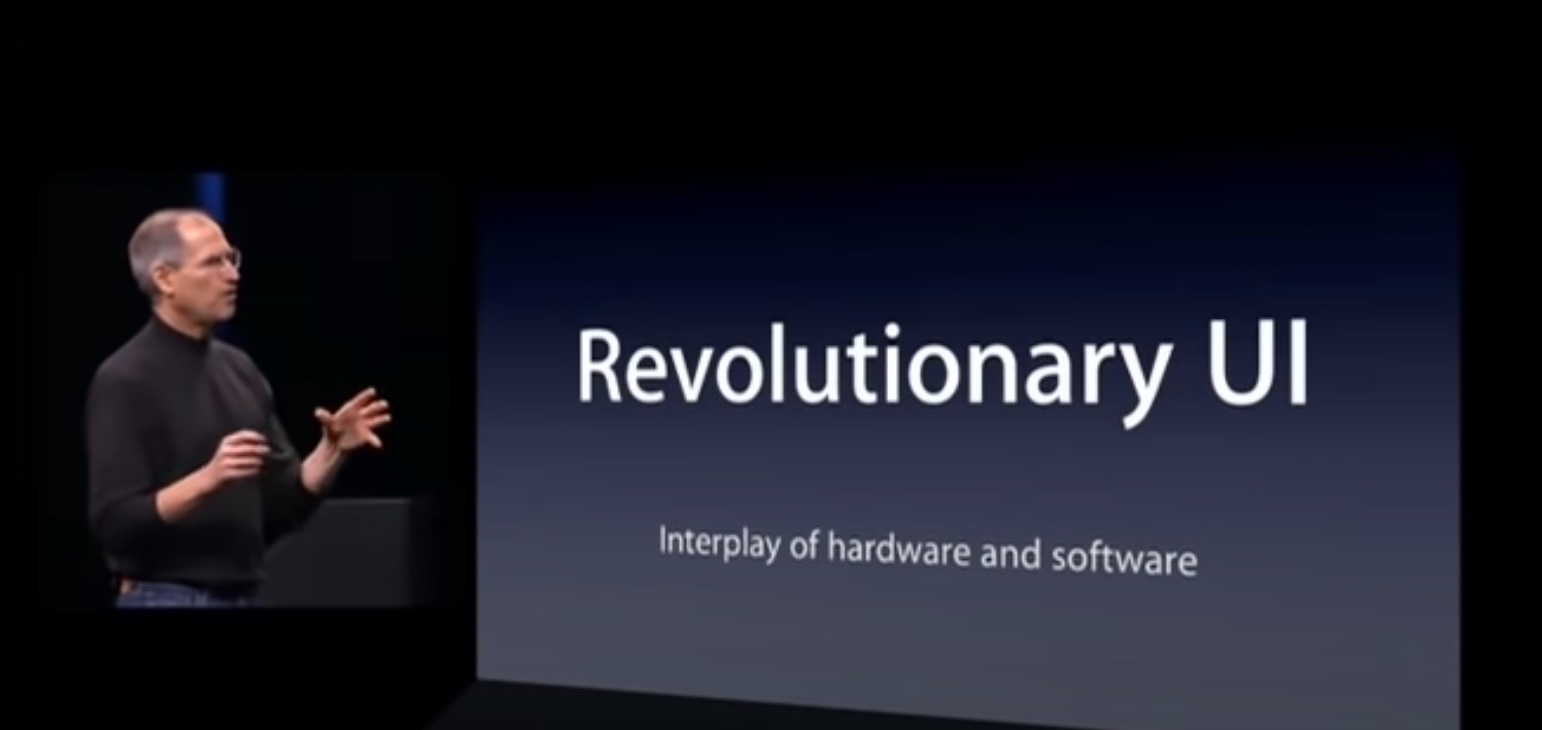
It's cool tech, but it's hard to show off, because it's completely invisible on the outside, and the shader code is all ugly autogenerated glue. There's a presentation up on the site that details it at the lower level, if you're curious.
The main reason I had aggregation initially was to work around the 8 storage buffers limit in WebGPU. The Plot API needed to auto-aggregate all the different attributes of shapes, with their given spread policies, based on what the user supplied.
This allows me to offer e.g. a bulk line drawing primitive where attributes don't waste precious bandwidth on repeated data. Each ends up grouped in structs, taking up only 1 storage buffer, depending on whether it is constant or varying, per instance or per vertex:
<Line
  // Two lines
  positions={[
    [[300, 50], [350, 150], [400, 50], [450, 150]],
    [[300, 150], [350, 250], [400, 150], [450, 250]],
  ]}
  // Of the same color and width
  color={'#40c000'}
  width={5}
/>

<Line
  // Two lines
  positions={[
    [[300, 250], [350, 350], [400, 250], [450, 350]],
    [[300, 350], [350, 450], [400, 350], [450, 450]],
  ]}
  // With color per line
  color={['#ffa040', '#7f40a0']}
  // And width per vertex
  widths={[[1, 2, 2, 1], [1, 2, 2, 1]}
/>
This involves a comprehensive buffer interleaving and copying mechanism, that has to satisfy all the alignment constraints. This then leverages @use-gpu/shader's structType(…) API to generate WGSL struct types at run-time. Given a list of attributes, it returns a virtual shader module with a real symbol table. This is materialized into shader code on demand, and can be exploded into individual accessor functions as well.
Hence data sources in Use.GPU can now have a format of T or array<T> with a WGSL shader module as the type parameter. I already had most of the pieces in place for this, but hadn't quite put it all together everywhere.
Using shader modules as the representation of types is very natural, as they carry all the WGSL attributes and GPU-only concepts. It goes far beyond what I had initially scoped for the linker, as it's all source-code-level, but it was worth it. The main limitation is that type inference only happens at link time, as binding shader modules together has to remain a fast and lazy op.
Native WGSL types are somewhat poorly aligned with the WebGPU API on the CPU side. A good chunk of @use-gpu/core is lookup tables with info about formats and types, as well as alignment and size, so it can all be resolved at run-time. There's something similar for bind group creation, where it has to translate between a few different ways of saying the same thing.
The types I expose instead are simple: TextureSource, StorageSource and LambdaSource. Everything you bind to a shader is either one of these, or a constant (by reference). They carry all the necessary metadata to derive a suitable binding and accessor.
That said, I cannot shield you from the limitations underneath. Texture formats can e.g. be renderable or not, filterable or not, writeable or not, and the specific mechanisms available to you vary. If this involves native depth buffers, you may need to use a full-screen render pass to copy data, instead of just calling copyTextureToTexture. I run into this too, and can only provide a few more convenience hooks.
I did come up with a neat way to genericize these copy shaders, using the existing WGSL type inference I had, souped up a bit. This uses simple selector functions to serve the role of reassembling types. It's finally given me a concrete way to make 'root shaders' (i.e. the entry points) generic enough to support all use. I may end up using something similar to handle the ordinary vertex and fragment entry points, which still have to be provided in various permutations.
* * *
Phew. Use.GPU is always a lot to go over. But its à la carte nature remains and that's great.
For in-house use it's already useful, especially if you need a decent GPU on a desktop anyway. I have been using it for some client work, and it seems to be making people happy. If you want to go off-road from there, you can.
It delivers on combining low-level shader code with its own stock components, without making you reinvent a lot of the wheels.
Visit usegpu.live for more and to view demos in a WebGPU capable browser.
PS: I upgraded the aging build of Jekyll that was driving this blog, so if you see anything out of the ordinary, please let me know.


