Teardown Frame Teardown
Rendering analysis
In this post I'll do a "one frame" breakdown of Tuxedo Labs' indie game Teardown.
The game is unique for having a voxel-driven engine, which provides a fully destructible environment. It embraces this boon, by giving the player a multitude of tools that gleefully alter and obliterate the setting, to create shortcuts between spaces. This enables a kind of gameplay rarely seen: where the environment is not just a passive backdrop, but a fully interactive part of the experience.
This is highly notable. In today's landscape of Unity/Unreal-powered gaming titles, it illustrates a very old maxim: that novel gameplay is primarily the result of having a dedicated game engine to enable that play. In doing so, it manages to evoke a feeling that is both incredibly retro and yet unquestionably futuristic. But it's more than that: it shows that the path graphics development has been walking, in search of ever more realistic graphics, can be bent and subverted entirely. It creates something wholly unique and delightful, without seeking true photorealism.
It utilizes raytracing, to present global illumination, with real-time reflections, and physically convincing smoke and fire. It not only has ordinary vehicles, like cars and vans, but also industrial machinery like bulldozers and cranes, as well as an assortment of weapons and explosives, to bring the entire experience together. Nevertheless, it does not require the latest GPU hardware: it is an "ordinary" OpenGL application. So how does it do it?
The classic way to analyze this would be to just fire up RenderDoc and present an analytical breakdown of every buffer rendered along the way. But that would be doing the game a disservice. Not only is it much more fun to try and figure it out on your own, the game actually gives you all the tools you need to do so. It would be negligent not to embrace it. RenderDoc is only part 2.
Teardown is, in my view, a love letter to decades of real-time games and graphics. It features a few winks and nods to those in the know, but on the whole its innovations have gone sadly unremarked. I'm disappointed we haven't seen an explosion of voxel-based games since. Maybe this will change that.
I will also indulge in some backseat graphics coding. This is not to say that any of this stuff is easy. Rather, I've been writing my own .vox renderer in Use.GPU, which draws heavily from Teardown's example.
Hunting for Clues
The Voxels
Let's start with the most obvious thing: the voxels. At a casual glance, every Teardown level is made out of a 3D grid. The various buildings and objects you encounter are made out of tiny cubes, all the same size, like this spiral glass staircase in the Villa Gordon:
However, closer inspection shows something curious. Behind the mansion is a ramp—placed there for obvious reasons—which does not conform to the strict voxel grid at all: it has diagonal surfaces. More detailed investigation of the levels will reveal various places where this is done.
The various dynamic objects, be they crates, vehicles or just debris, also don't conform to the voxel grid: they can be moved around freely. Therefore this engine is not strictly voxel-grid-based: rather, it utilizes cube-based voxels inside a freeform 3D environment.
There is another highly salient clue here, in the form of the game's map screen. When you press M, the game zooms out to an overhead view. Not only is it able to display all these voxels from a first person view, it is able to show an entire level's worth of voxels, and transition smoothly to-and-fro, without any noticeable pop-in. Even on a vertical, labyrinthine 3D level like Quilez Security.
This implies that however this is implemented, the renderer largely does not care how many voxels are on screen in total. It somehow utilizes a rendering technique that is independent of the overall complexity of the environment, and simply focuses on what is needed to show whatever is currently in view.
The Lighting
The next big thing to notice is the lighting in this game, which appears to be fully real-time.
Despite the chunky environment, shadows are cast convincingly. This casually includes features that are still a challenge in real-time graphics, such as lights which cast from a line, area or volume rather than a single point. But just how granular is it?
There are places where, to a knowing eye, this engine performs dark magic. Like the lighting around this elevator:
Not only is it rendering real-time shadows, it is doing so for area-lights in the floor and ceiling. This means a simple 2D shadow-map, rendering depth from a single vantage point, is insufficient. It is also unimaginable that it would do so for every single light-emitting voxel, yet at first sight, it does.
This keeps working even if you pick up a portable light and wave it around in front of you. Even if the environment has been radically altered, the renderer casts shadows convincingly, with no noticeable lag. The only tell is the all-pervasive grain: clearly, it is using noise-techniques to deal with gradients and sampling.
The Reflections
It's more than just lights. The spiral staircase from before is in fact reflected clearly in the surrounding glass. This is consistent regardless of whether the staircase is itself visible:
This is where the first limitations start to pop up. If you examine the sliding doors in the same area, you will notice something curious: while the doors slide smoothly, their reflections do not:
There are two interesting artifacts in this area:
The first is that glossy reflections of straight lines have a jagged appearance. The second is that you can sometimes catch moving reflections splitting before catching up, as if part of the reflection is not updated in sync with the rest.
The game also has actual mirrors:
Here we can begin to dissect the tricks. Most obvious is that some of the reflections are screen-space: mirrors will only reflect objects in full-color if they are already on screen. If you turn away, the reflection becomes dark and murky. But this is not an iron rule: if you blast a hole in a wall, it will still be correctly reflected, no matter the angle. It is only the light cast onto the floor through that hole which fails to be reflected under all circumstances.
This clip illustrates another subtle feature: up close, the voxels aren't just hard-edged cubes. Rather, they appear somewhat like plastic lego bricks, with rounded edges. These edges reflect the surrounding light smoothly, which should dispel the notion that what we are seeing is mere simple vector geometry.
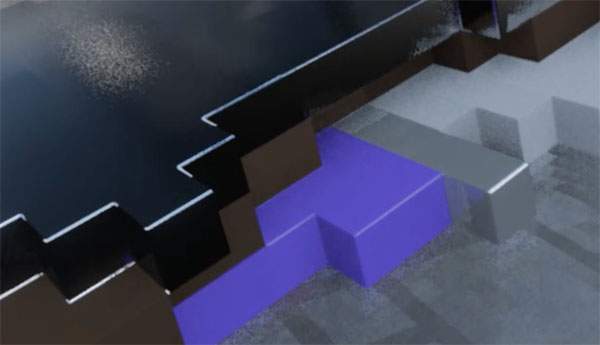
There is a large glass surface nearby which we can use to reveal more. If we hold an object above a mirror, the reflection does not move smoothly. Rather, it is visibly discretized into cubes, only moving on a rough global grid, regardless of its own angle.
This explains the sliding doors. In order to reflect objects, the renderer utilizes some kind of coarse voxel map, which can only accommodate a finite resolution.
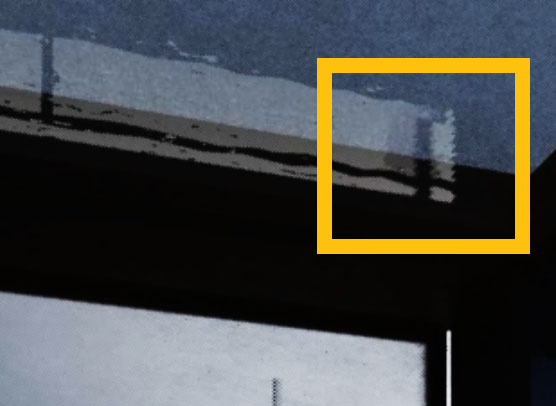
There is only one objectionable artifact which we can readily observe: whenever looking through a transparent surface like a window, and moving sideways, the otherwise smooth image suddenly becomes a jittery mess. Ghost trails appear behind the direction of motion:
This suggests that however the renderer is dealing with transparency, it is a poor fit for the rest of its bag of tricks. There is in fact a very concise explanation for this, which we'll get to.
Still, this is all broadly black magic. According to the commonly publicized techniques, this should simply not be possible, not on hardware incapable of accelerated raytracing.
The Solids
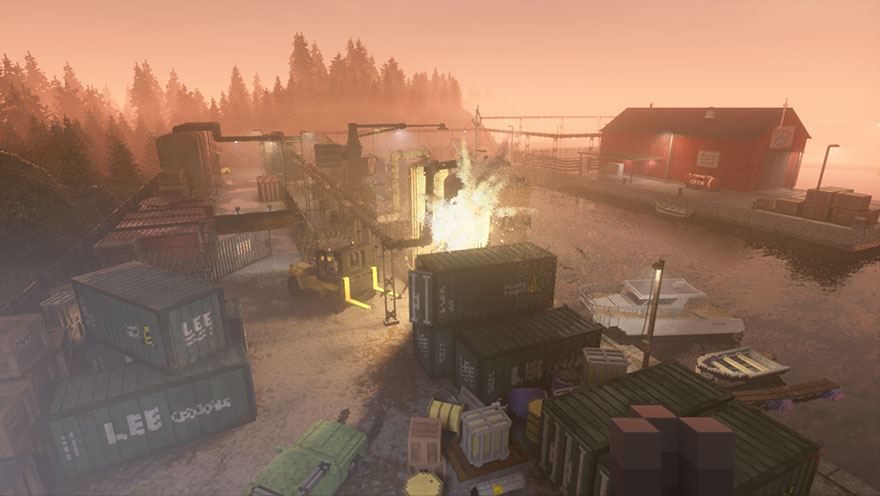
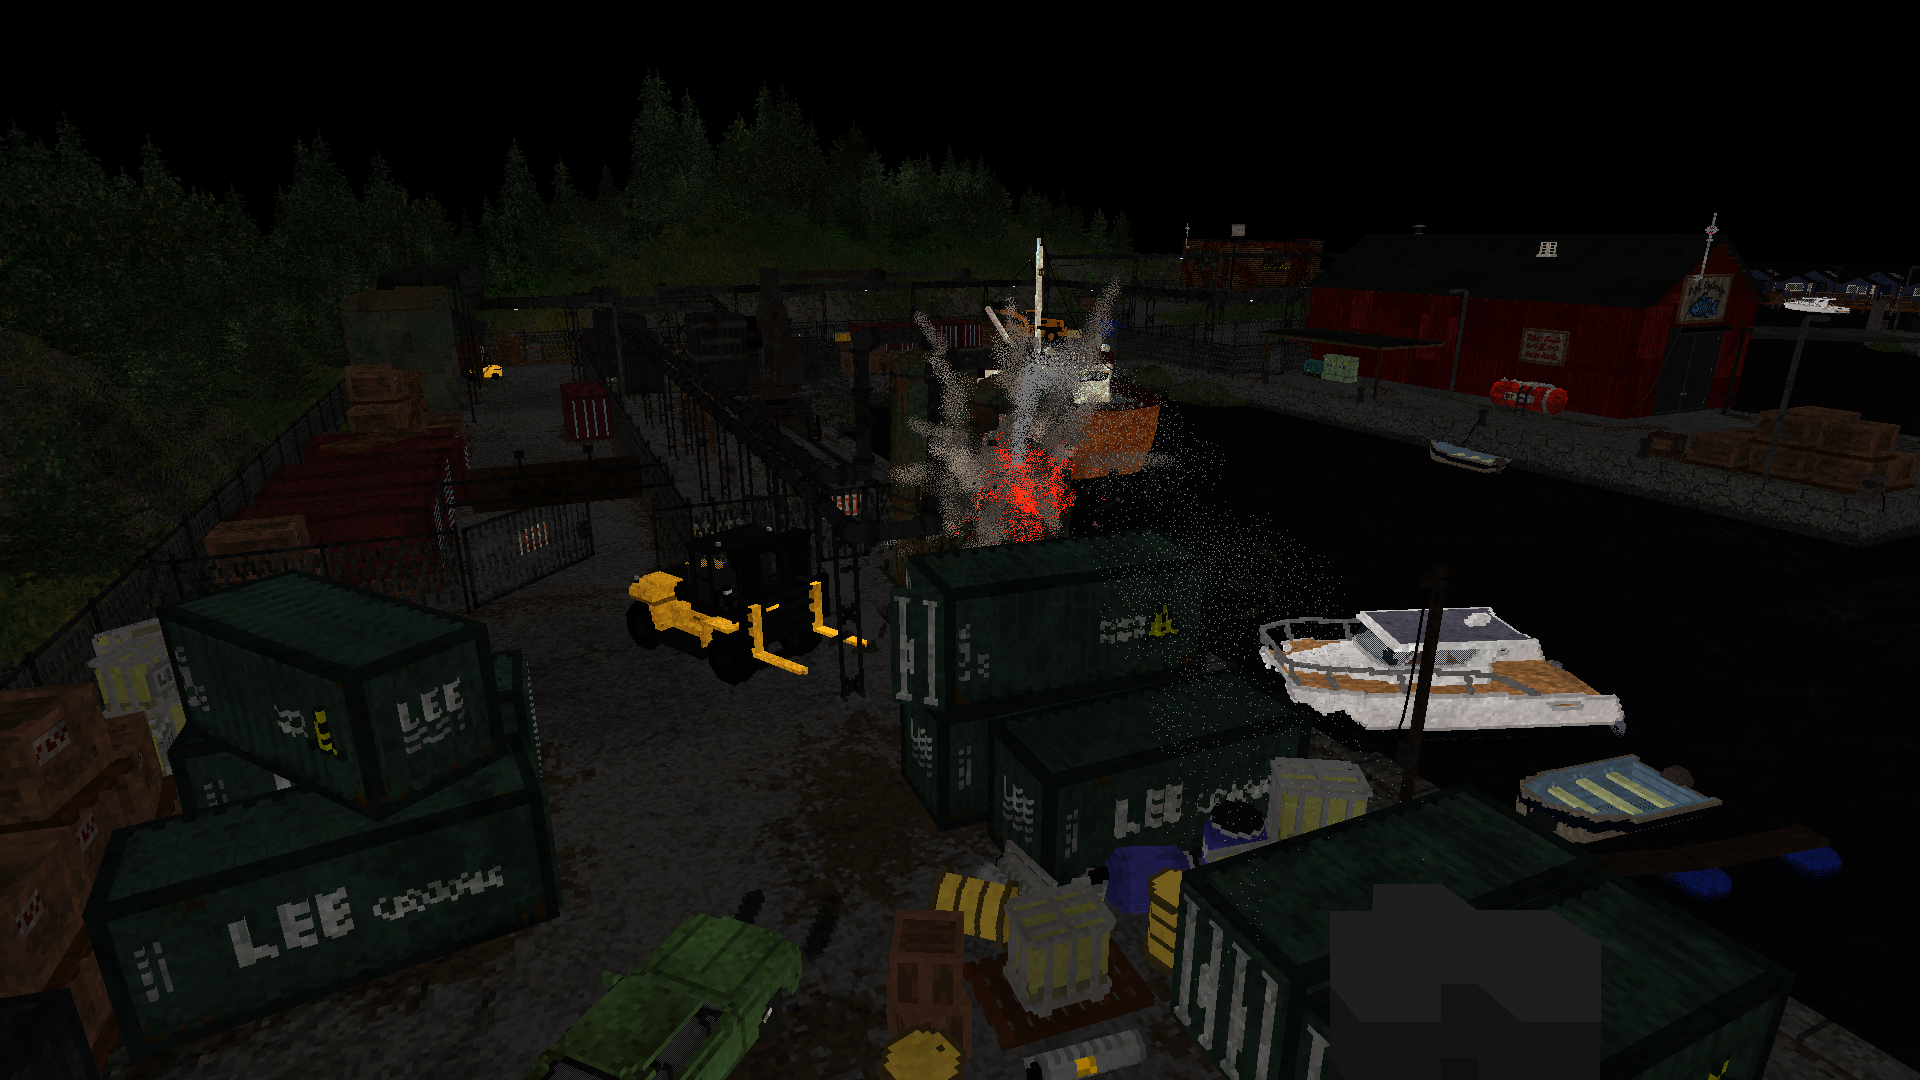
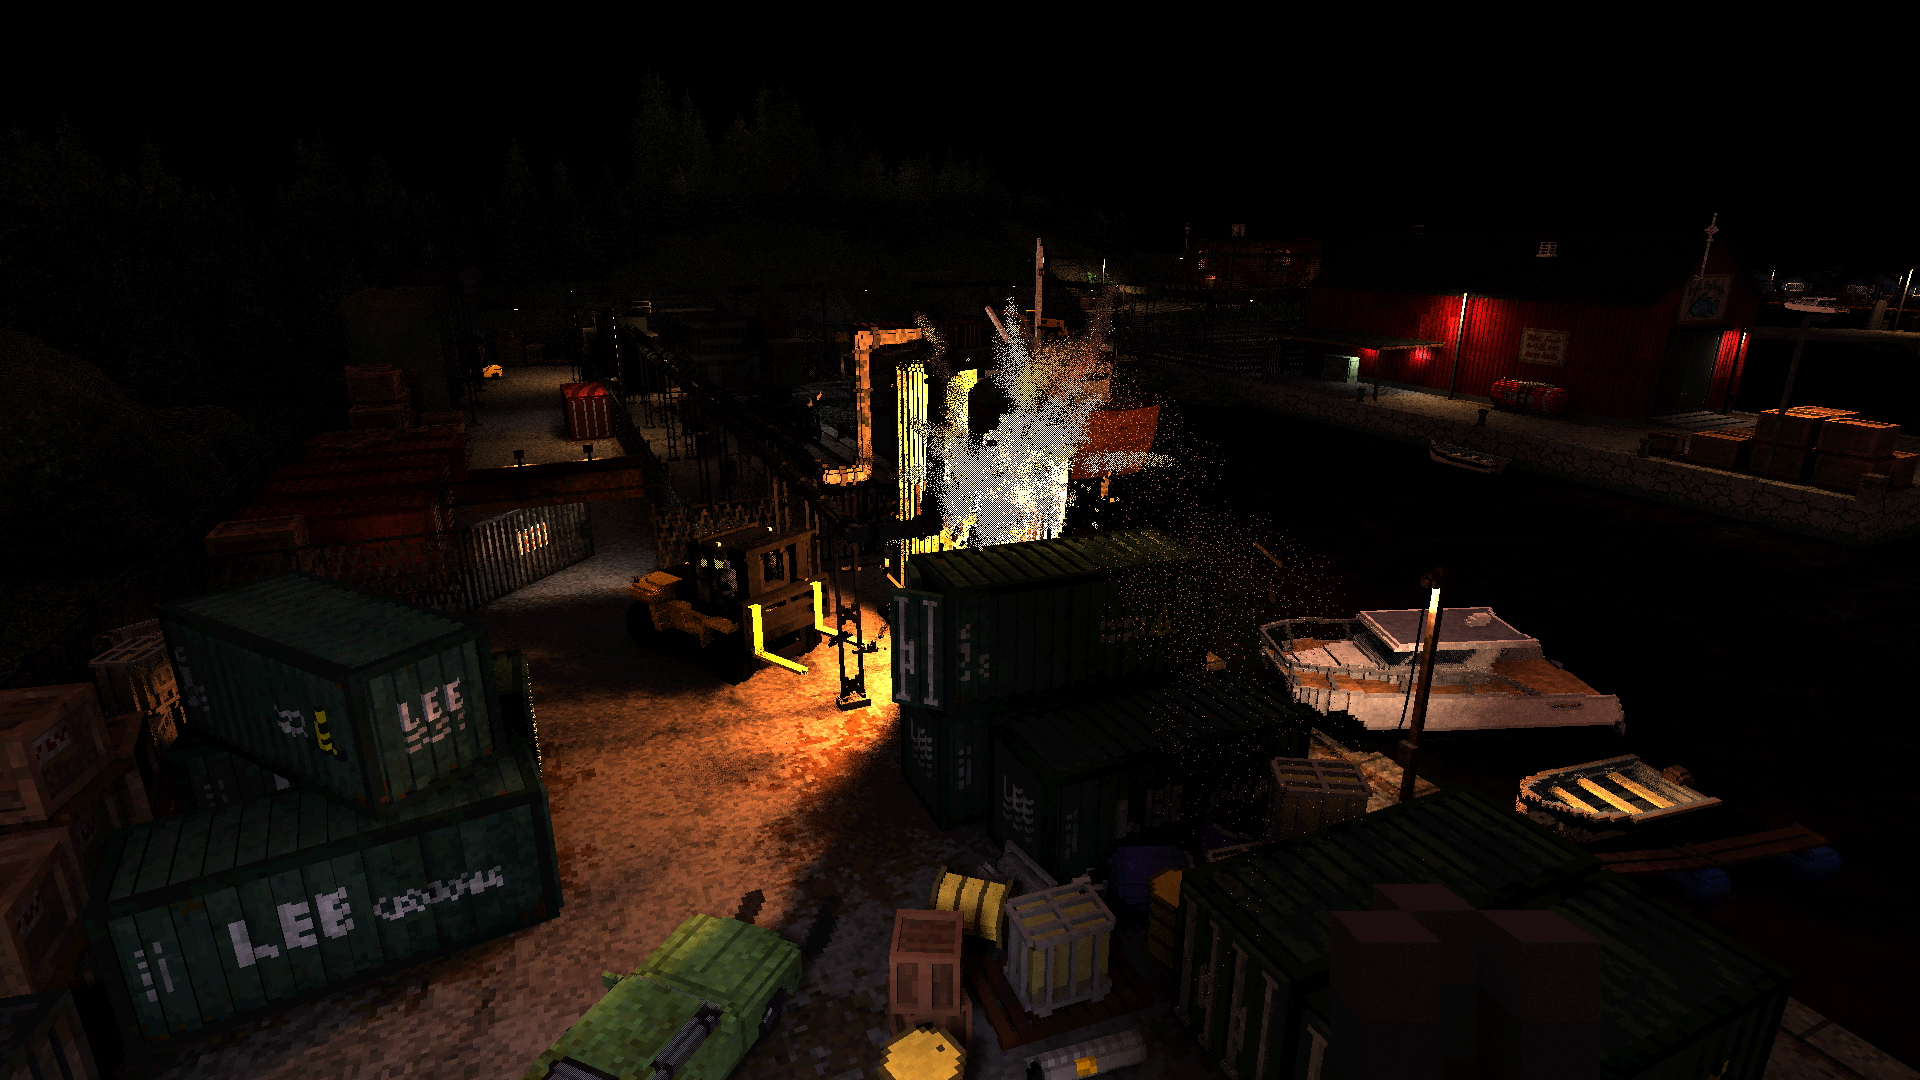
Time for the meat-and-potatoes: a careful breakdown of a single frame. It is difficult to find one golden frame that includes every single thing the renderer does. Nevertheless, the following is mostly representative:
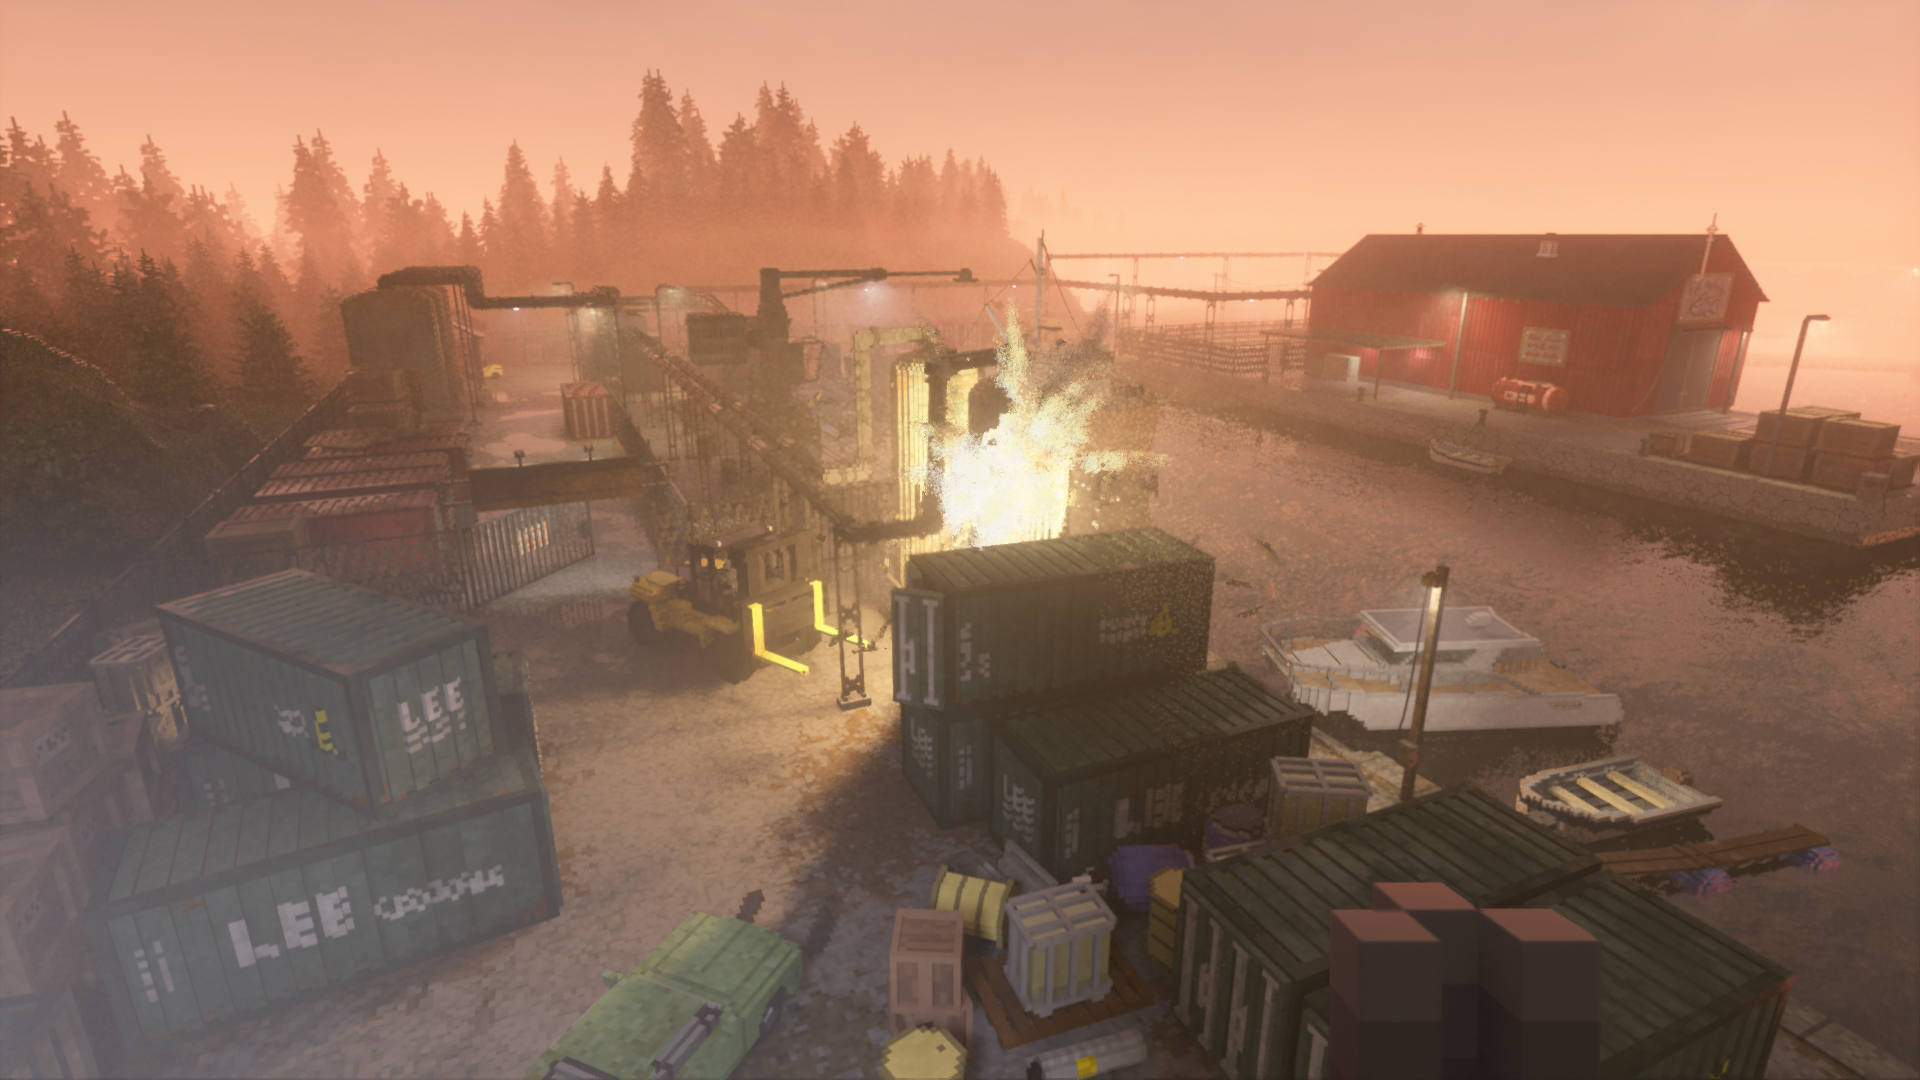
Captures were done at 1080p, with uncompressed PNGs linked. Alpha channels are separated where relevant. The inline images have been adjusted for optimal viewing, while the linked PNGs are left pristine unless absolutely necessary.
G-buffer
If we fire up RenderDoc, a few things will become immediately apparent. Teardown uses a typical deferred G-buffer, with an unusual 5 render targets, plus the usual Z-buffer, laid out as follows:
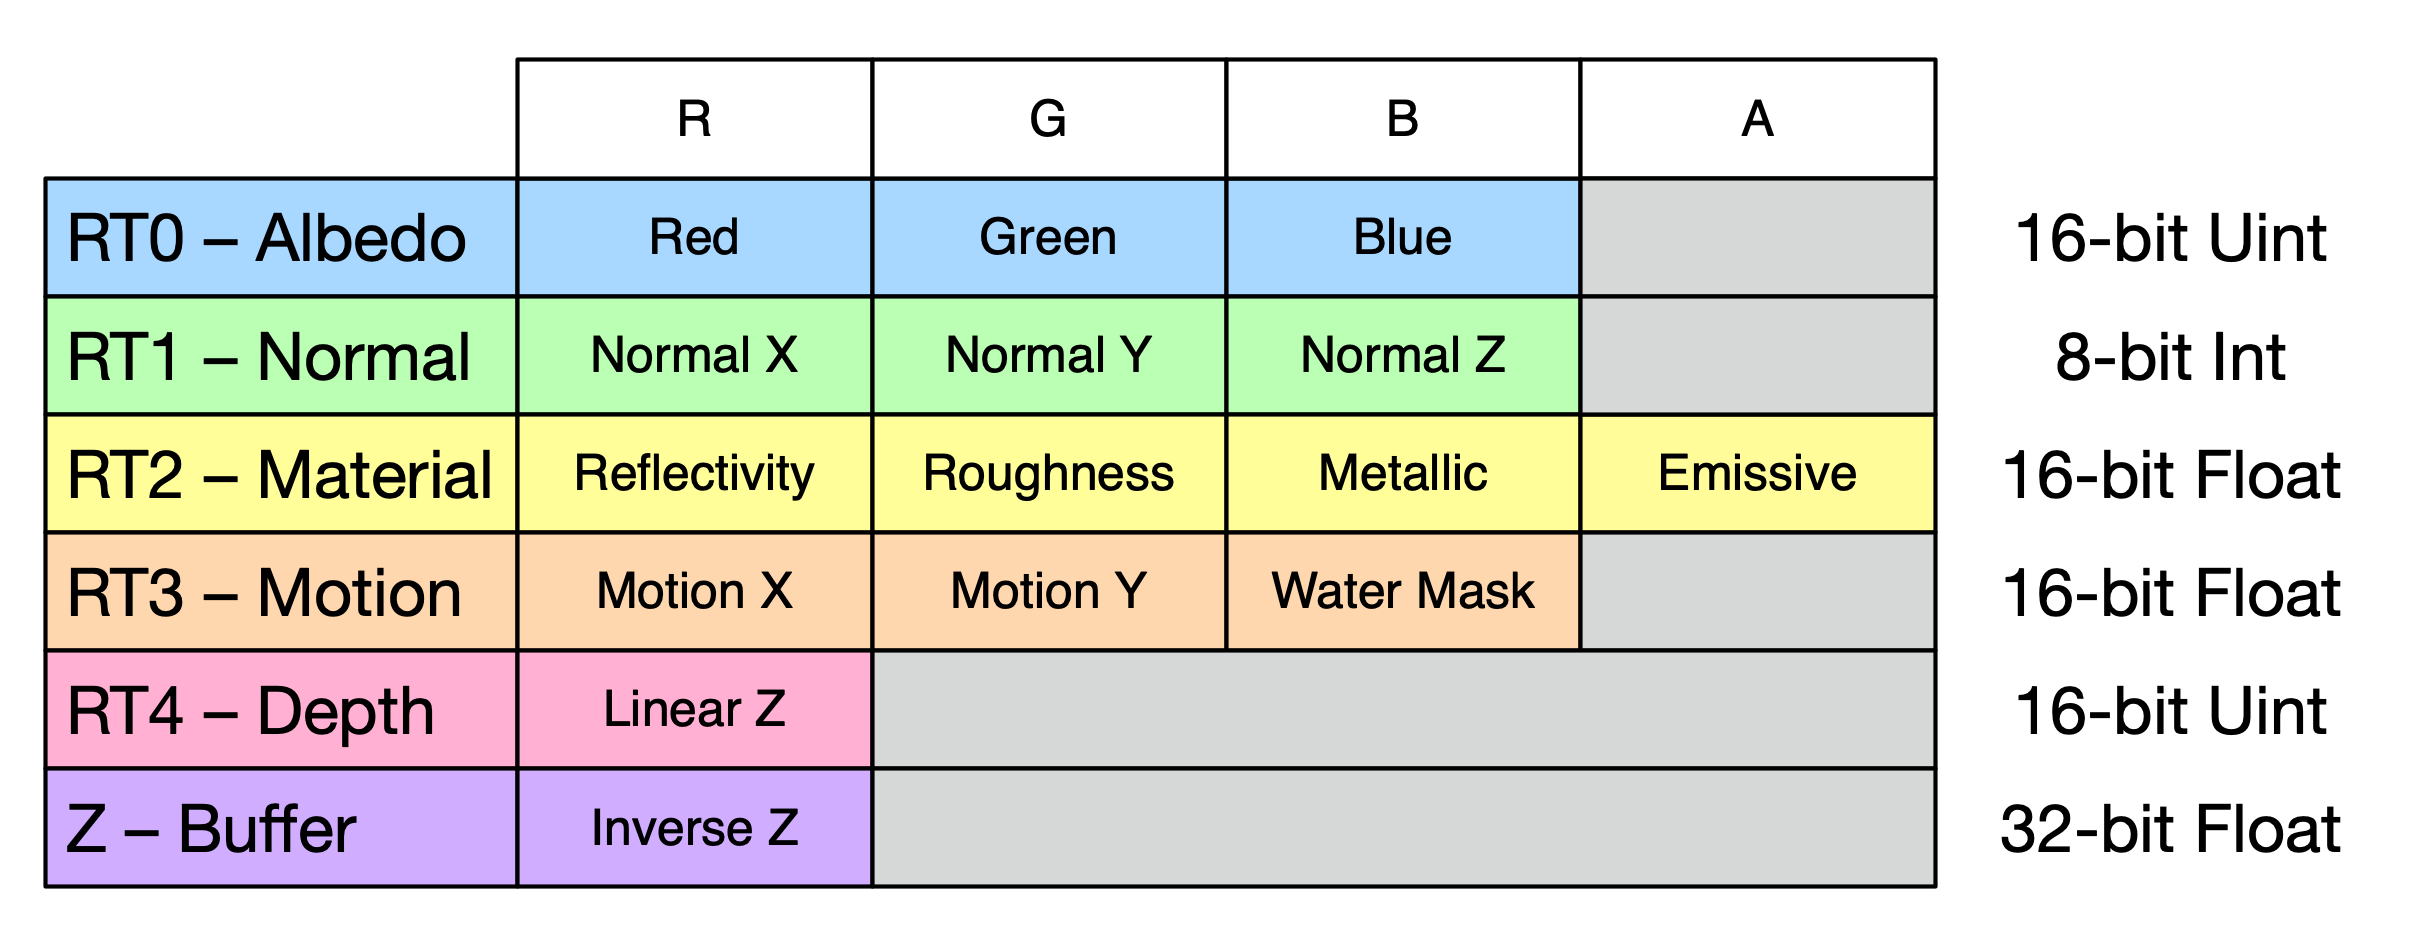

Albedo (RT0)
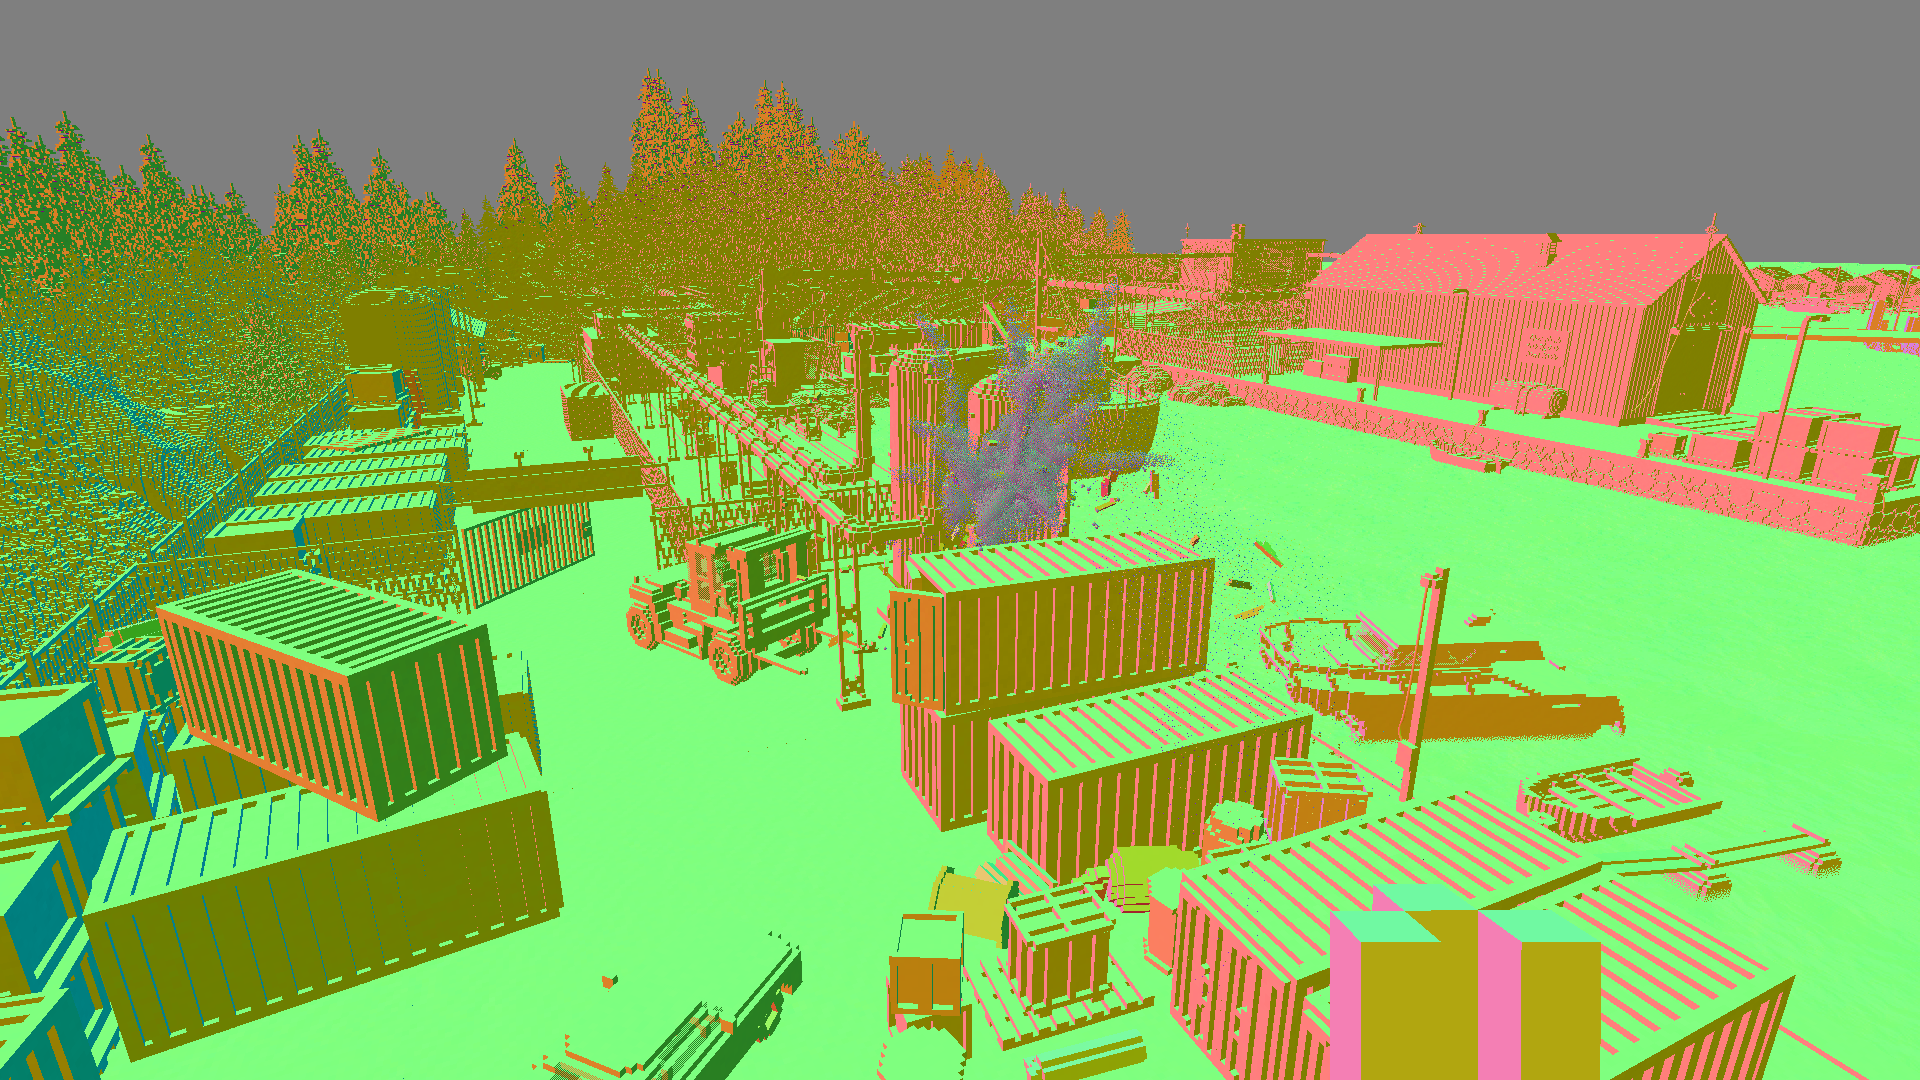
Normal (RT1)
Material (RT2 RGB)
Emissive (RT2 Alpha)
Velocity + Water (RT3)
Linear Depth (RT4)
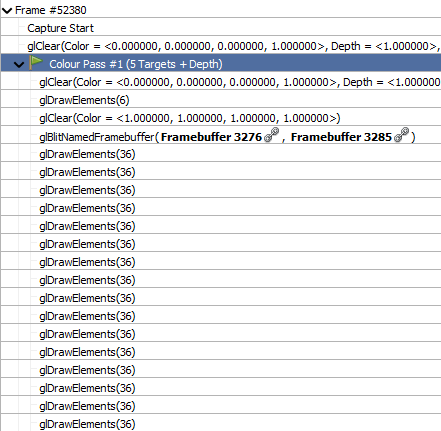
Draw calls
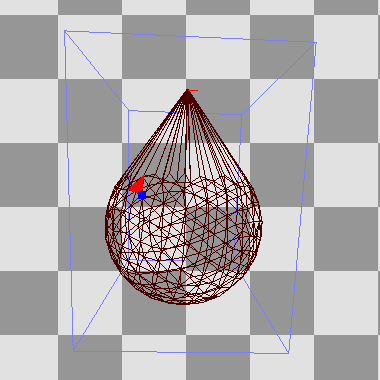
Every draw call renders exactly 36 vertices, i.e. 12 triangles, making up a box. But these are not voxels: each object in Teardown is rendered by drawing the shape's bounding box. All the individual cubes you see don't really exist as geometry. Rather, each object is stored as a 3D volume texture, with one byte per voxel.
Thus, the primary rendering stream consists of one draw call per object, each with a unique 3D texture bound. Each indexes into a 256-entry palette consisting of both color and material properties. The green car looks like this:

This only covers the chassis, as the wheels can move independently, handled as 4 separate objects.
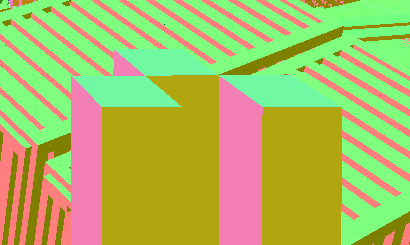
The color and material palettes for all the objects are packed into one large texture each:
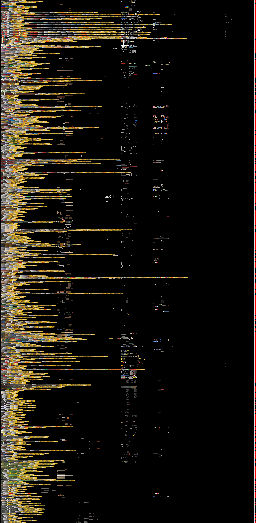
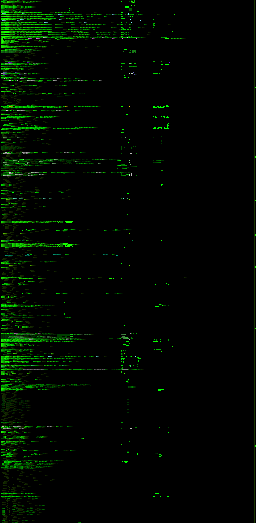
Having reflectivity separate from metallicness might seem odd, as they tend to be highly correlated. Some materials are reflective without being metallic, such as water and wet surfaces. Some materials are metallic without being fully reflective, perhaps to simulate dirt.
You may notice a lot of yellow in the palette: this is because of the game's yellow spray can, detailed in this blog post. It requires a blend of each color towards yellow, as it is applied smoothly. This is in fact the main benefit of this approach: as each object is just a 3D "sprite", it is easy and quick to remove individual voxels, or re-paint them for e.g. vehicle skid marks or bomb scorching.
When objects are blasted apart, the engine will separate them into disconnected chunks, and make a new individual object for each. This can be repeated indefinitely.
Rendering proceeds front-to-back, as follows:
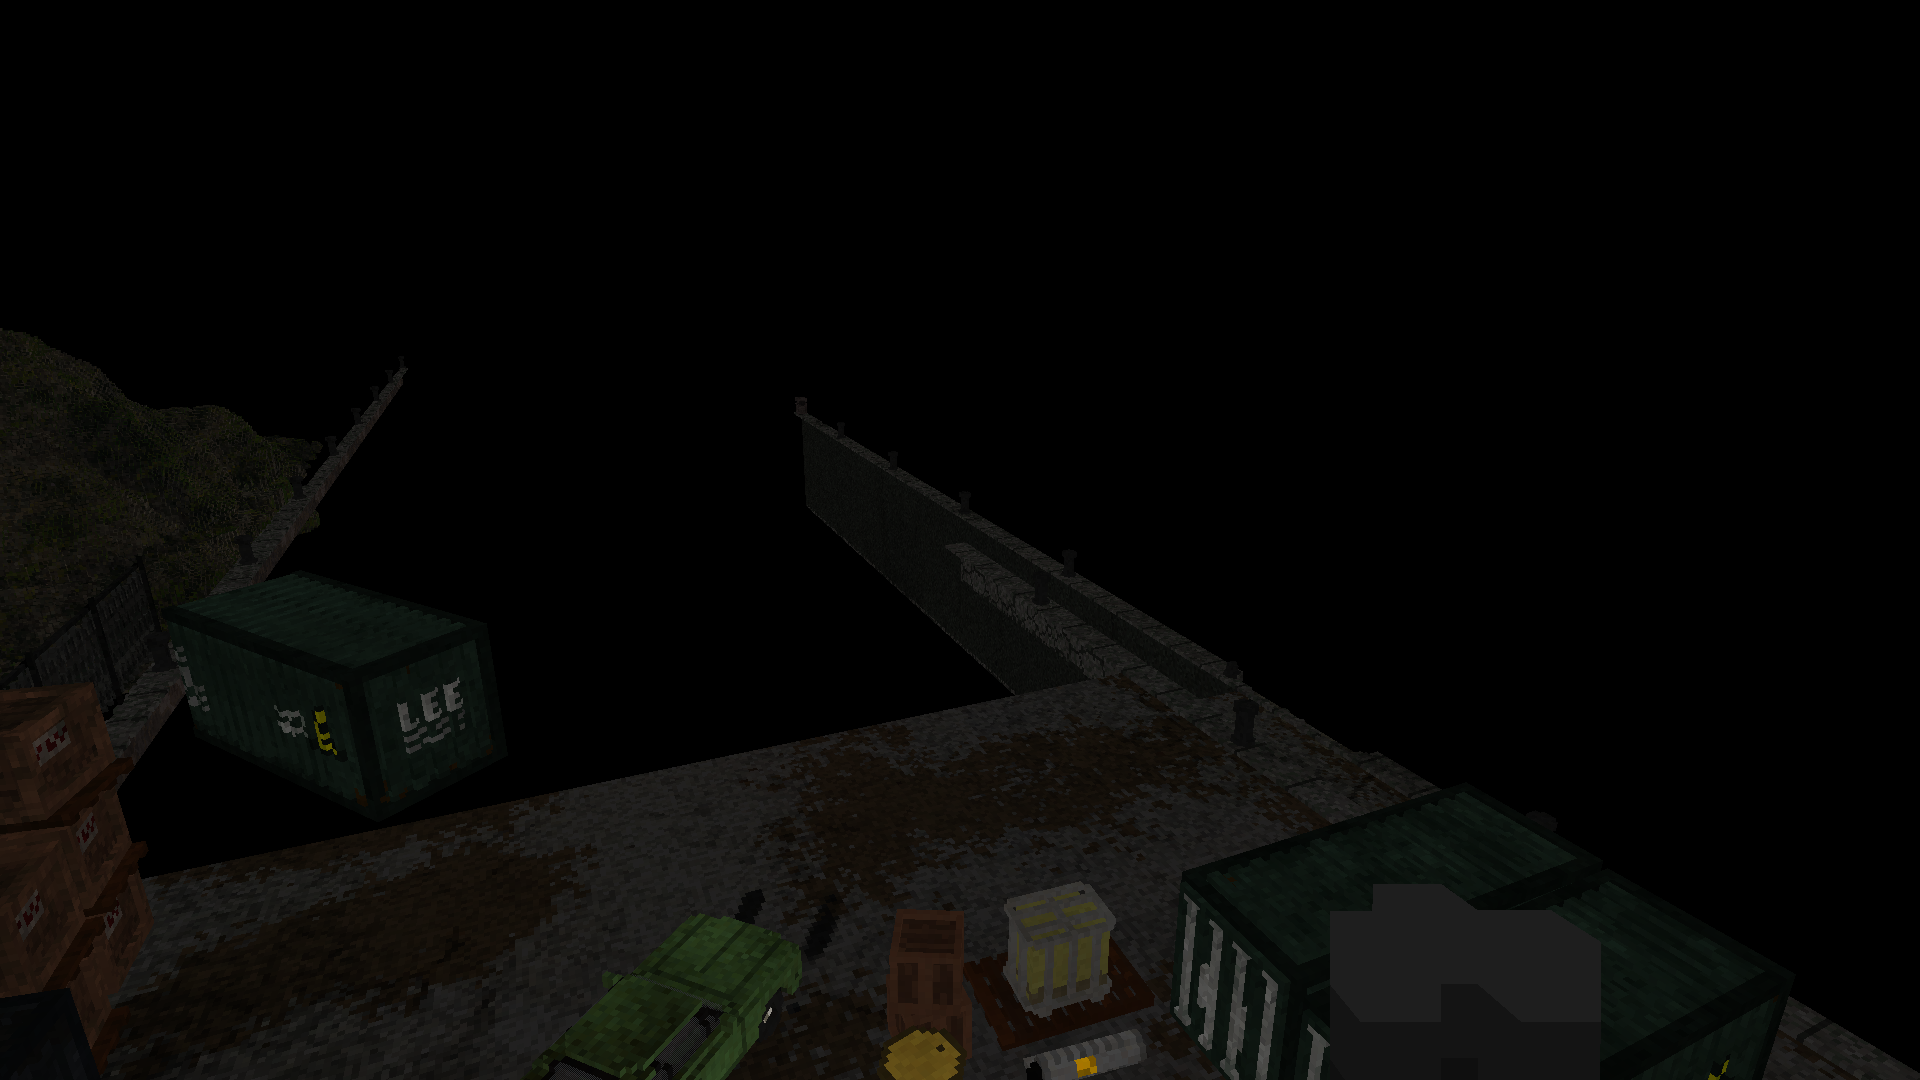

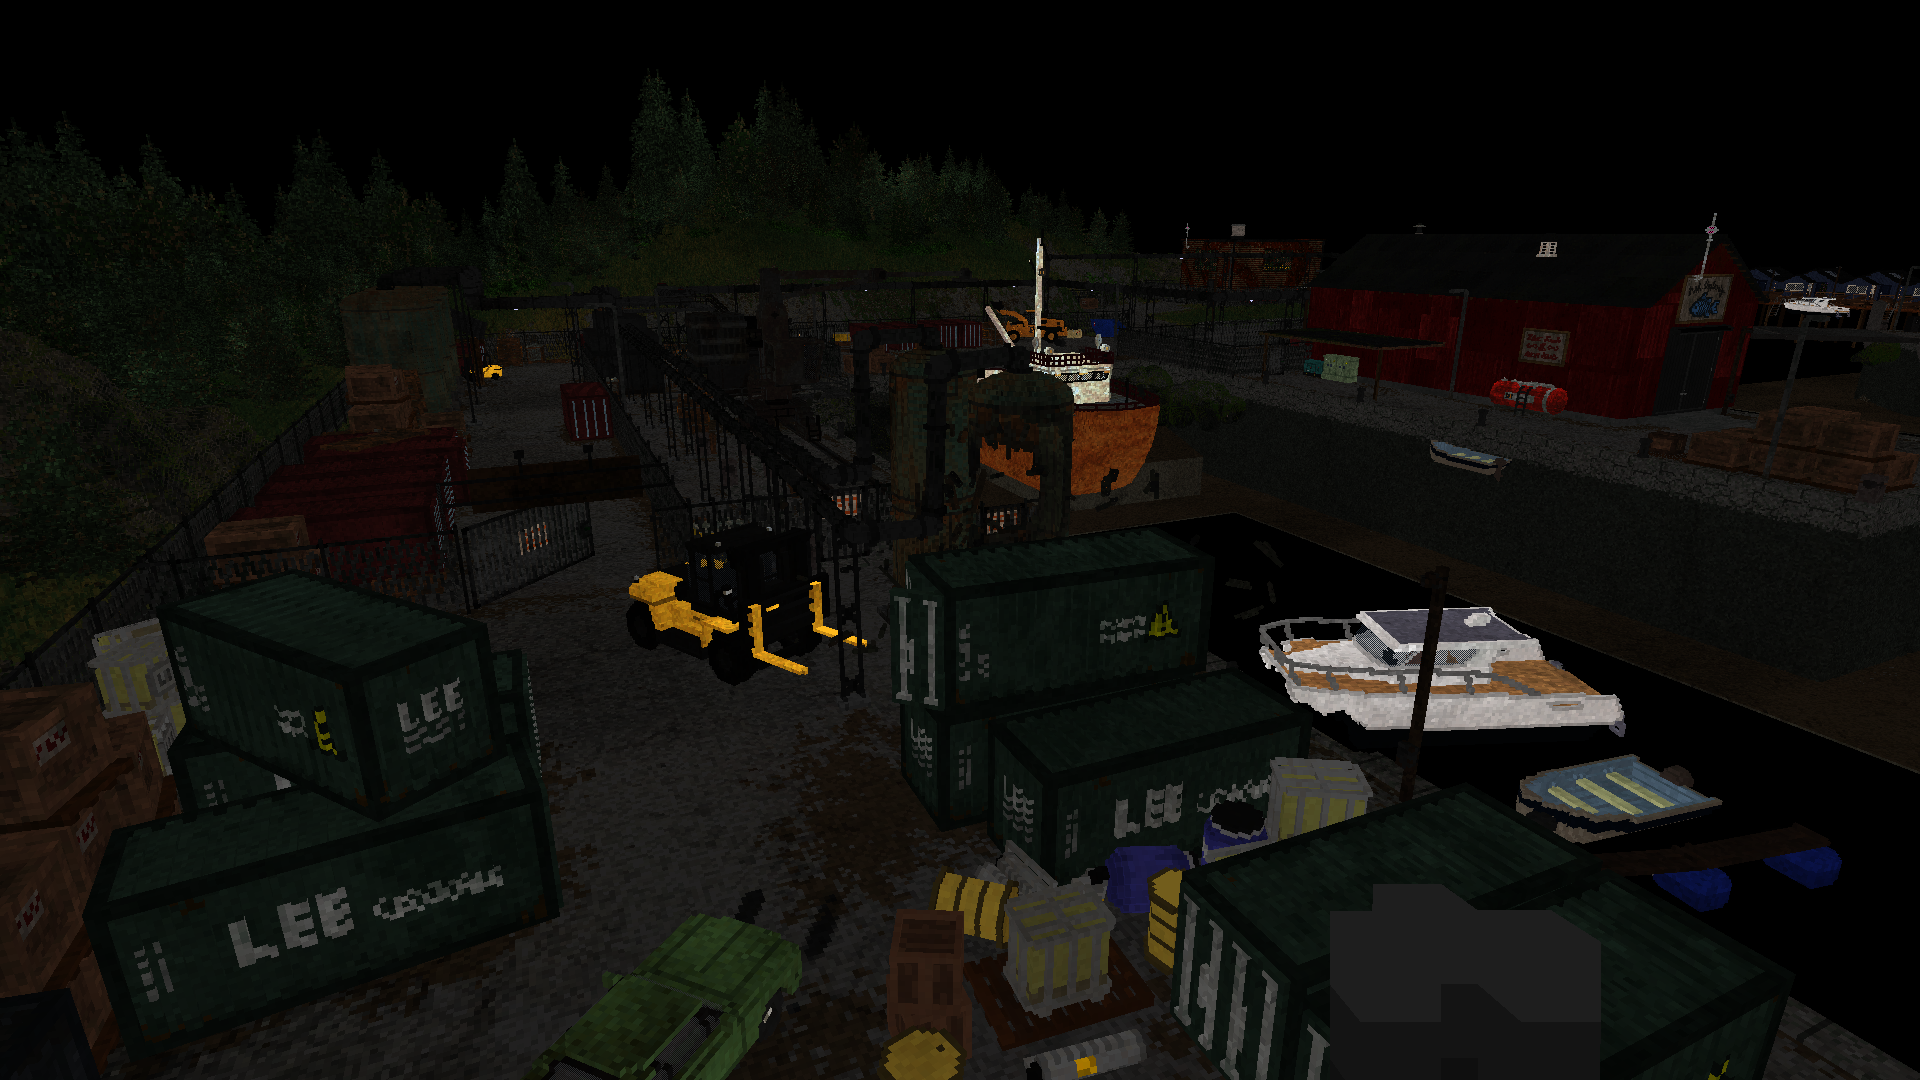
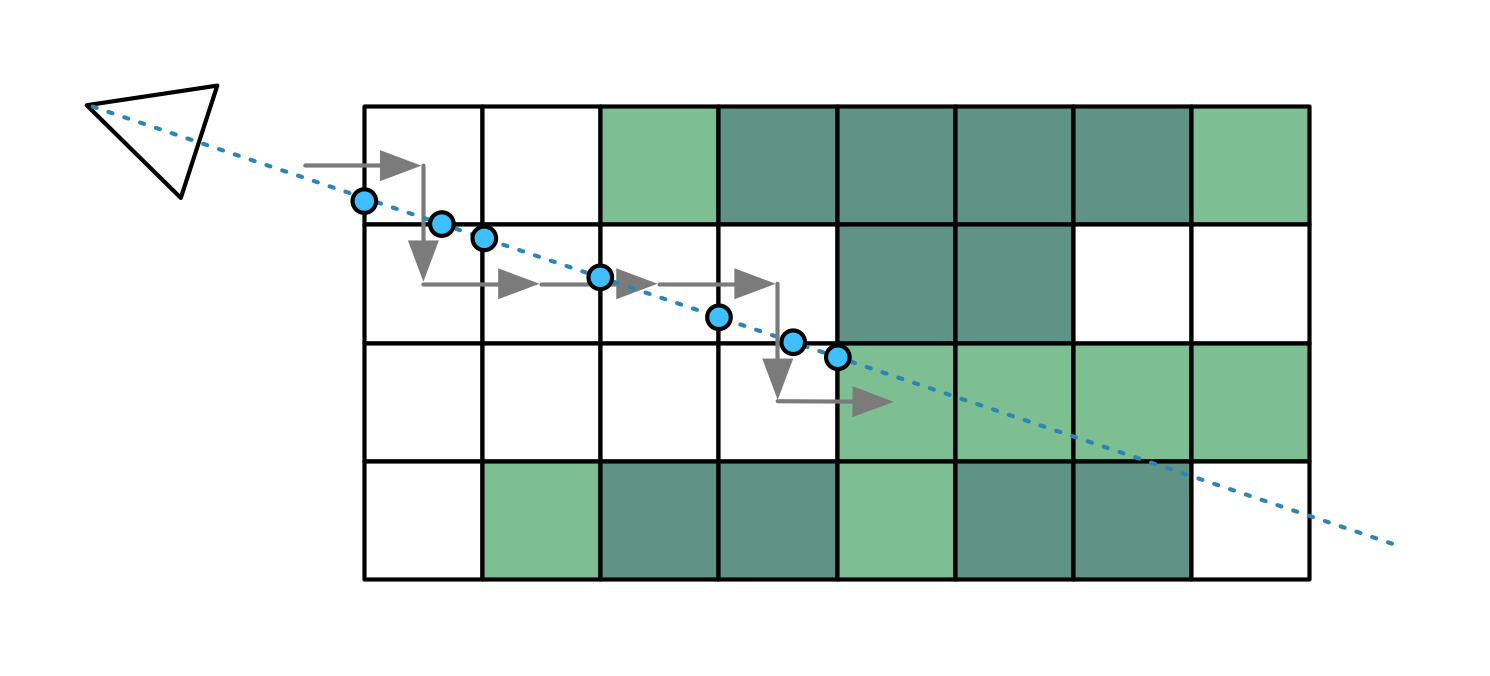
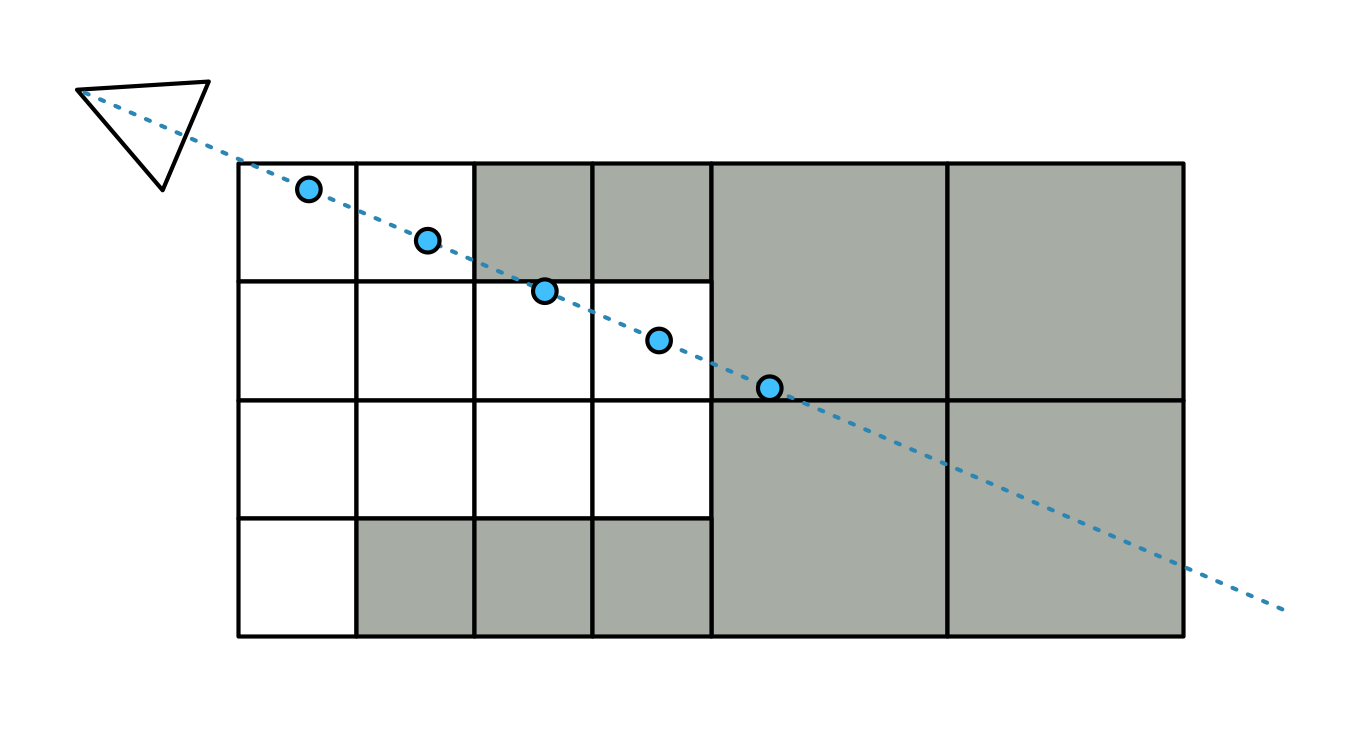
The shader for this is tightly optimized and quite simple. It will raytrace through each volume, starting at the boundary, until it hits a solid voxel. It will repeatedly take a step in the X, Y or Z direction, whichever is less.
To speed up this process, the renderer uses 2 additional MIP maps, at half and quarter size, which allow it to skip over 2×2×2 or 4×4×4 empty voxels at a time. It will jump up and down MIP levels as it encounters solid or empty areas. Because MIP map sizes are divided by 2 and then rounded down, all object dimensions must be a multiple of 4, to avoid misalignment. This means many objects have a border of empty voxels around them.
Curiously, Teardown centers each object inside its expanded volume, which means the extra border tends to be 1 or 2 voxels on each side, rather than 2 or 3 on one. This means its voxel-skipping mechanism cannot work as effectively. Potentially this issue could be avoided entirely by not using native MIP maps at all, and instead just using 3 separately sized 3D textures, with dimensions that are rounded up instead of down.
As G-buffers can only handle solid geometry, the renderer applies a 50% screen-door effect to transparent surfaces. This explains the ghosting artifacts earlier, as it confuses the anti-aliasing logic that follows. To render transparency other than 50%, e.g. to ghost objects in third-person view, it uses a blue-noise texture with thresholding.
This might seem strange, as the typical way to render transparency in a deferred renderer is to apply it separately, at the very end. Teardown cannot easily do this however, as transparent voxels are mixed freely among solid ones.
Another thing worth noting here: because each raytraced pixel sits somewhere inside its bounding box volume, the final Z-depth of each pixel cannot be known ahead of time. The pixel shader must calculate it as part of the raytracing, writing it out using the gl_FragDepth API. As the GPU does not assume that this depth is actually deeper than the initial depth, the native Z-buffer cannot do any early Z rejection. This would mean that even 100% obscured objects would have to be raytraced fully, only to be entirely discarded.
To avoid this, Teardown has its own early-Z mechanism, which uses the additional depth target in the RT4 slot. Before it starts raytracing a pixel, it checks to see if the front of the volume is already obscured. However, GPUs forbid reading and writing from the same render target, to avoid race conditions. So Teardown must periodically pause and copy the current RT4 state to another buffer. For the scene above, there are 8 such "checkpoints". This means that objects part of the same batch will always be raytraced in full, even if one of them is in front of the other.
Certain modern GPU APIs have extensions to signal that gl_FragDepth will always be deeper than the initial Z. If Teardown could make use of this, it could avoid this extra work. In fact, we can wonder why GPU makers didn't do this from the start, because pushing pixels closer to the screen, out of a bounding surface, doesn't really make sense: they would disappear at glancing angles.
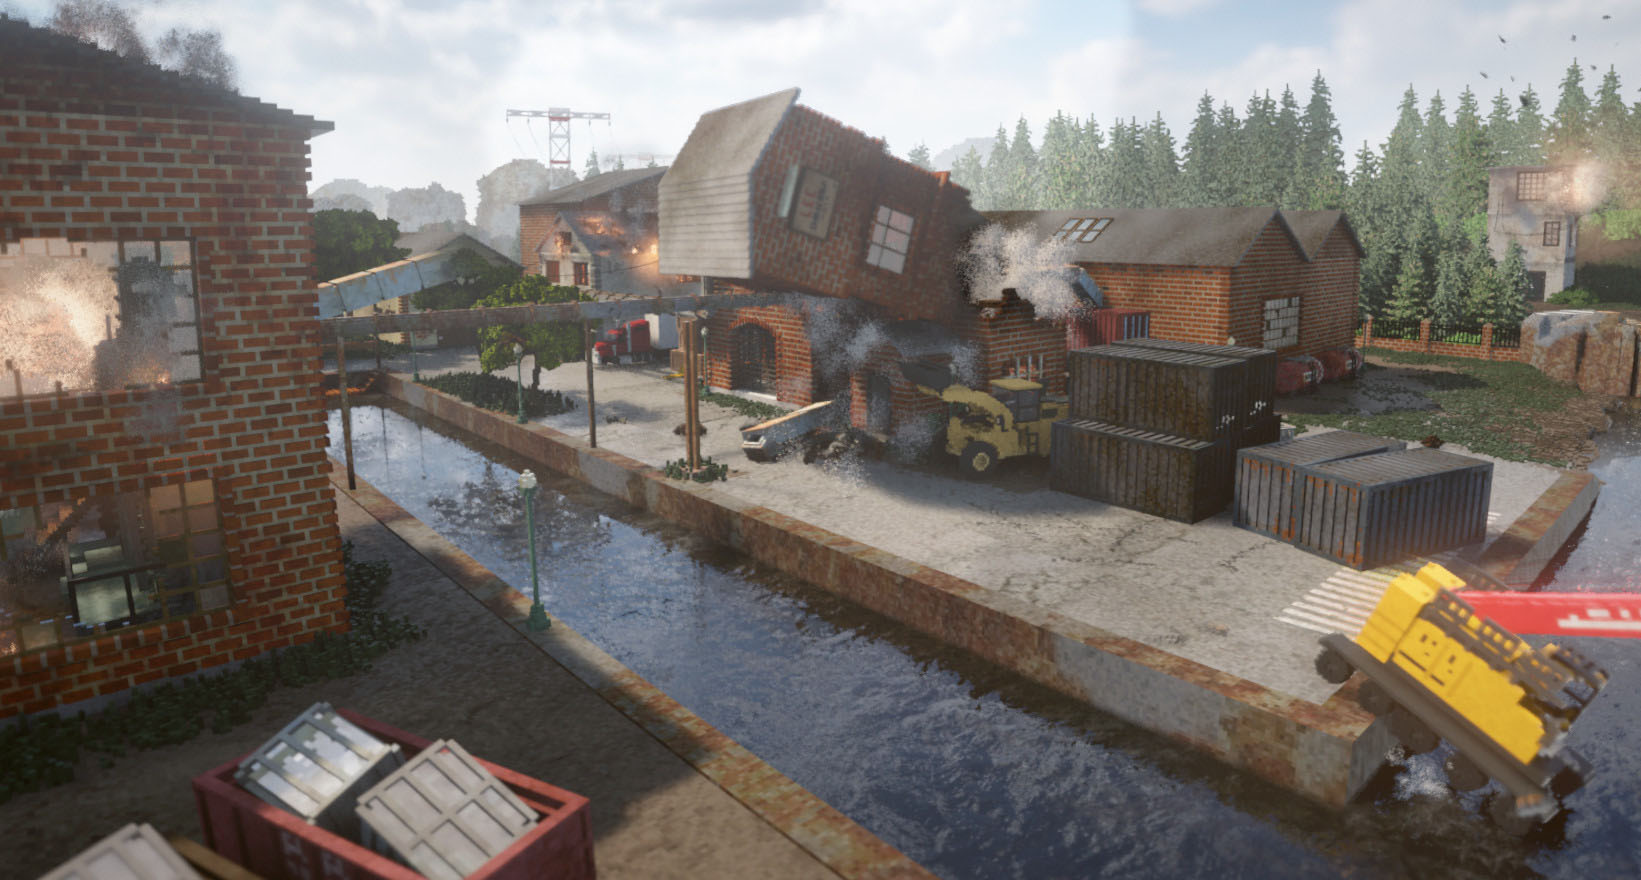
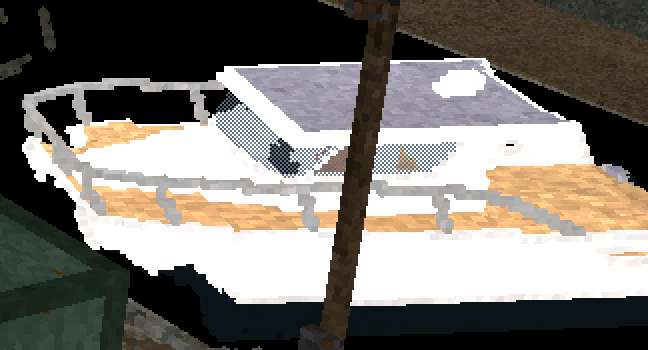
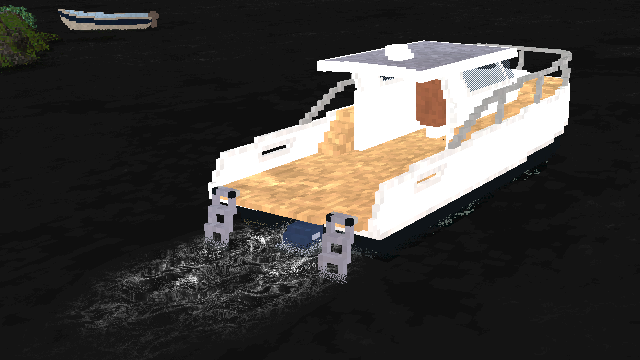
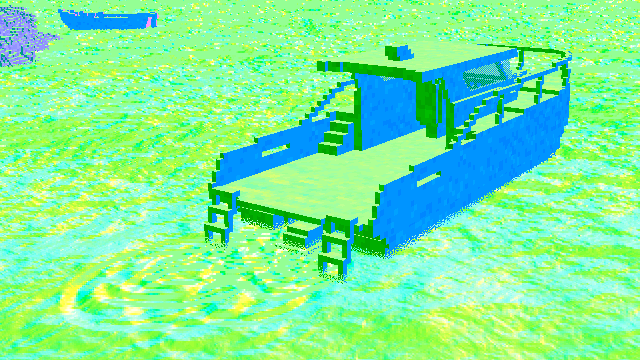
Once all the voxel objects are drawn, there are two more draws. First the various cables, ropes and wires, drawn using a single call for the entire level. This is the only "classic" geometry in the entire scene, e.g. the masts and tethers on the boats here:

Second, the various smoke particles. These are simulated on the CPU, so there are no real clues as to how. They appear to billow quite realistically. This presentation by the creator offers some possible clues as to what it might be doing.
Here too, the renderer makes eager use of blue-noise based screen door transparency. It will also alternate smoke pixels between forward-facing and backward-facing in the normal buffer, to achieve a faux light-scattering effect.
Finally, the drawing finishes by adding the map-wide water surface. While the water is generally murky, objects near the surface do refract correctly. For this, the albedo buffer is first copied to a new buffer (again to avoid race conditions), and then used as a source for the refraction shader. Water pixels are marked in the unused blue channel of the motion vector buffer.
The game also has dynamic foam ripples on the water, when swimming or driving a boat. For this, the last N ripples are stored and evaluated in the same water shader, expanding and fading out over time:
While all draw calls are finished, Teardown still has one trick up its sleeve here. To smooth off the sharp edges of the voxel cubes... it simply blurs the final normal buffer. This is applied only to voxels that are close to the camera, and is limited to nearby pixels that have almost the same depth. In the view above, the only close-by voxels are those of the player's first-person weapon, so those are the only ones getting smoothed.

Puddles and Volumes
Next up is the game's rain puddle effect. This is applied using a screen-wide shader, which uses perlin-like noise to create splotches in the material buffer. This applies on any upward facing surface, using the normal buffer, altering the roughness channel (zero roughness is stored as 1.0).
This wouldn't be remarkable except for one detail: how the renderer avoids drawing puddles indoors and under awnings. This is where the big secret appears for the first time. Remember that coarse voxel map whose existence we inferred earlier?
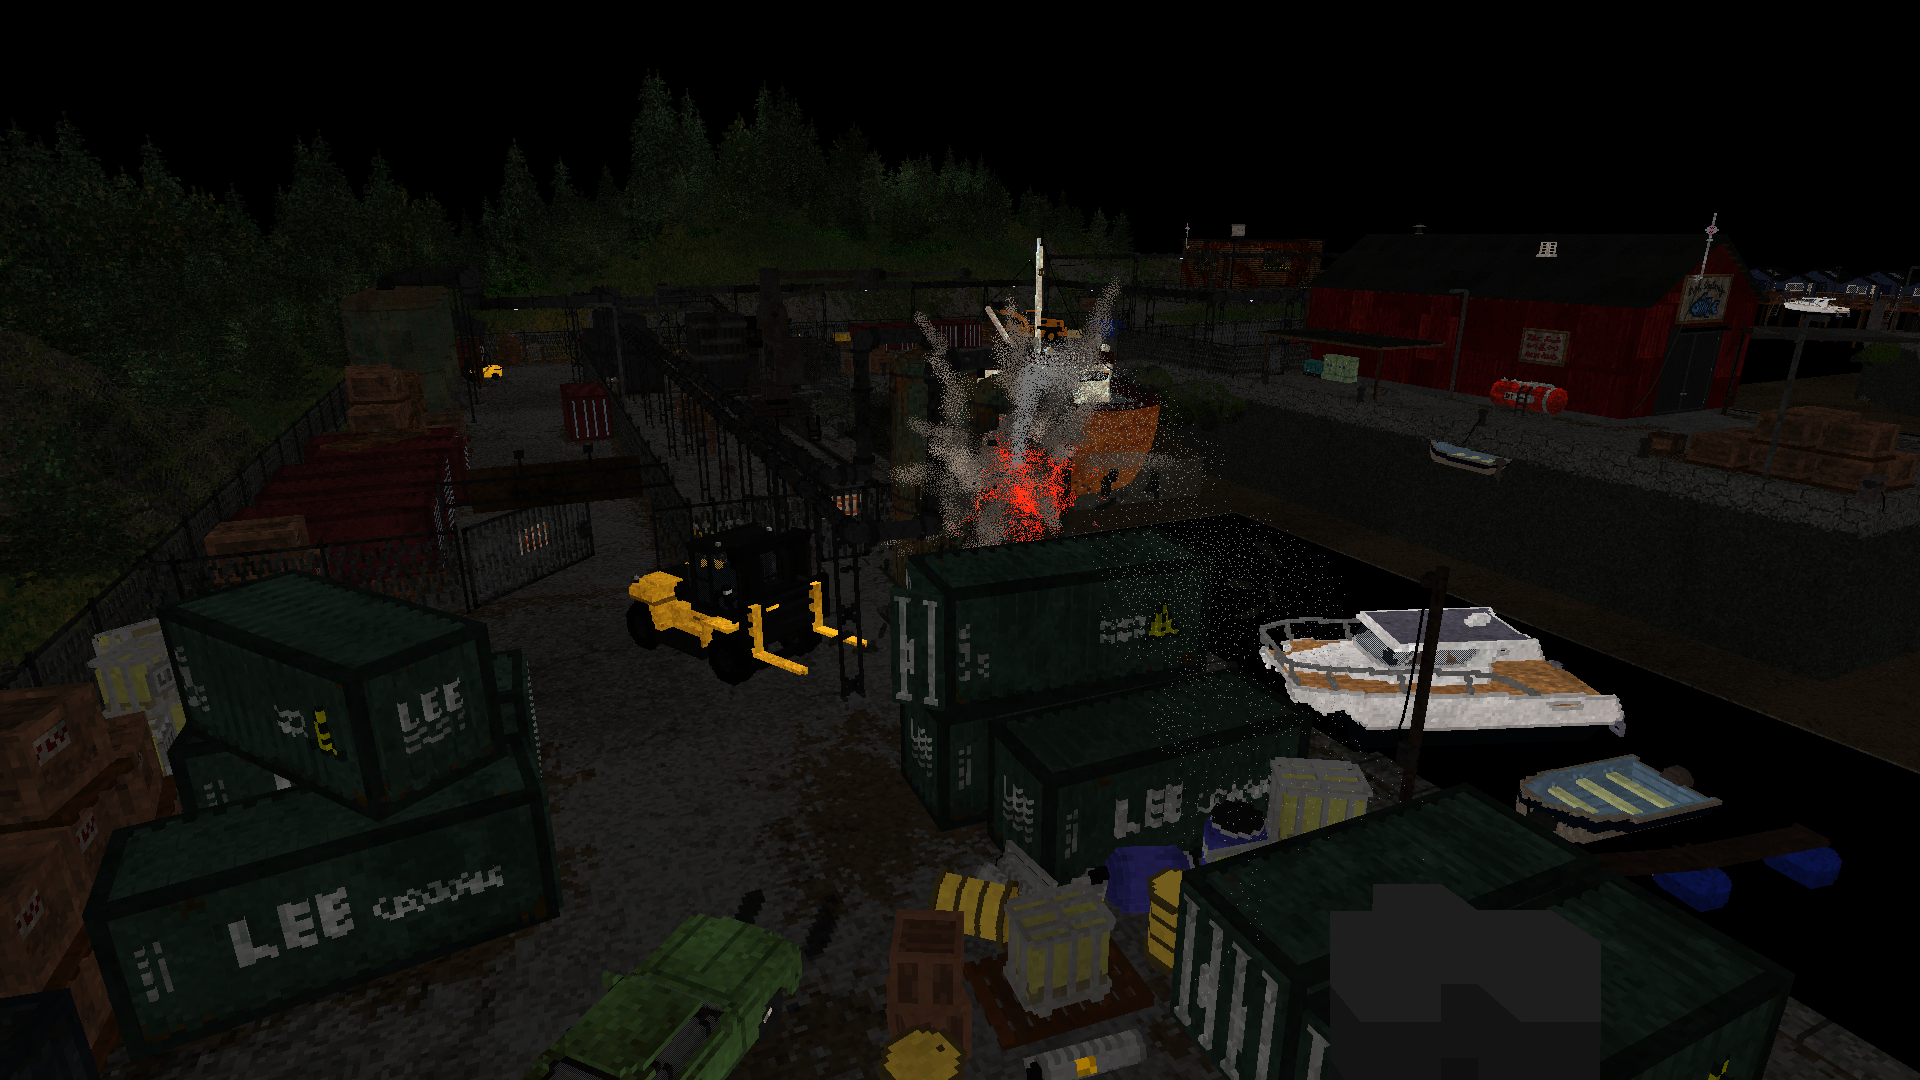
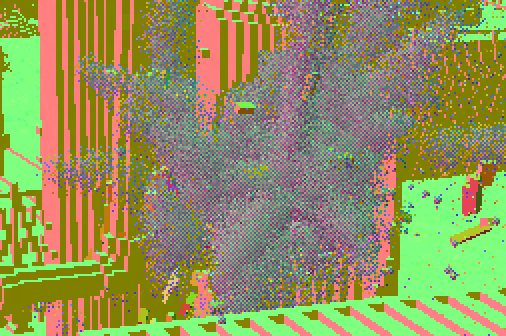
Yeah it turns out, Teardown will actually maintain a volumetric shadow map of the entire play area at all times. For the Marina level, it's stored in a 1752×100×1500 3D texture, a 262MB chonker. Here's a scrub through part of it:

But wait, there's more. Unlike the regular voxel objects, this map is actually 1-bit. Each of its 8-bit texels stores 2×2×2 voxels. So it's actually a 3504×200×3000 voxel volume. Like the other 3D textures, this has 2 additional MIP levels to accelerate raytracing, but it has that additional "-1" MIP level inside the bits, which requires a custom loop to trace through it.
This map is updated using many small texture uploads in the middle of the render. So it's actually CPU-rendered. Presumably this happens on a dedicated thread, which might explain the desynchronization we saw before. The visible explosion in the frame created many small moving fragments, so there are ~50 individual updates here, multiplied by 3 for the 3 MIP levels.
Because the puddle effect is all procedural, they disappear locally when you hold something over them, and appear on the object instead, which is kinda hilarious:
To know where to start tracing in world space, each pixel's position is reconstructed from the linear depth buffer. This is a pattern that reoccurs in everything that follows. A 16-bit depth buffer isn't very accurate, but it's good enough, and it doesn't use much bandwidth.
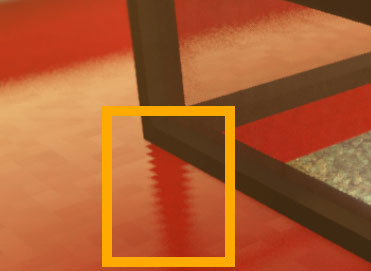
Unlike the object voxel tracing, the volumetric shadow map is always traced approximately. Rather than doing precise X/Y/Z steps, it will just skip ahead a certain distance until it finds itself inside a solid voxel. This works okay, but can miss voxels entirely. This is the reason why many reflections have a jagged appearance.
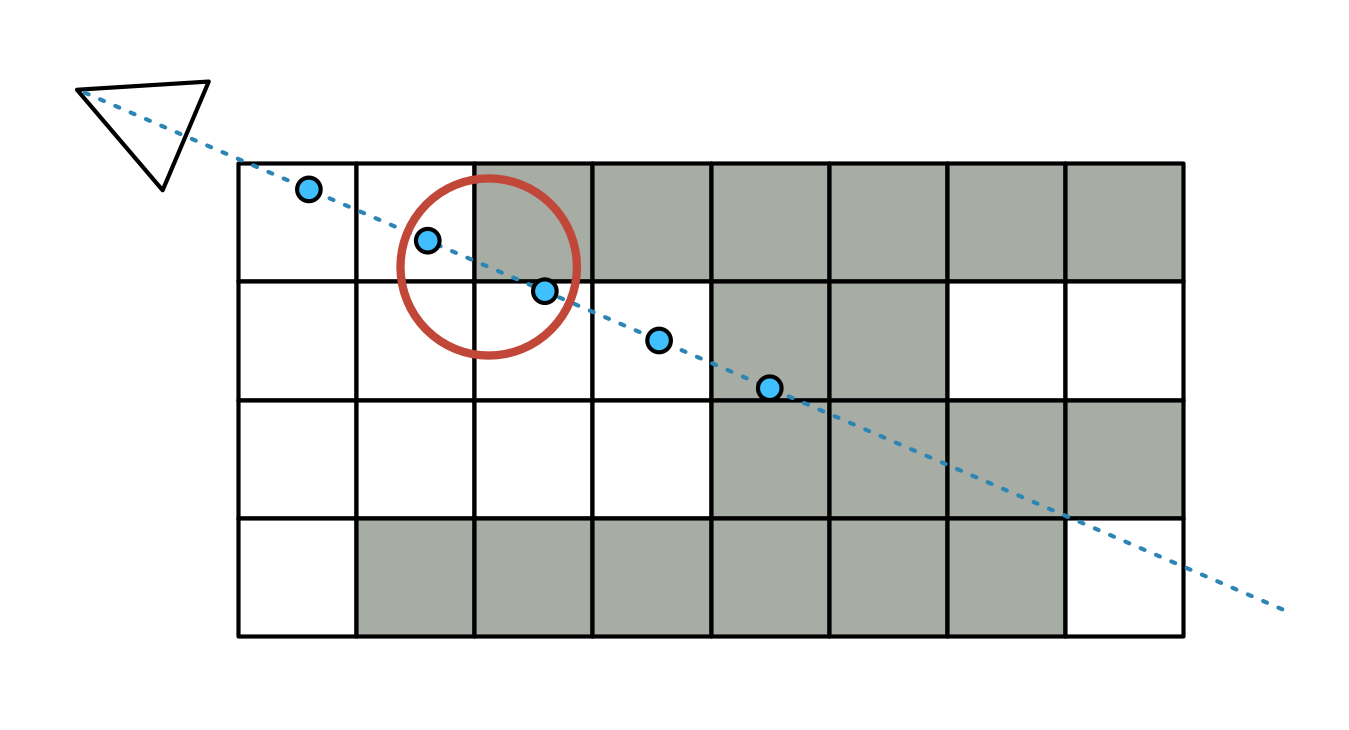
There are in fact two tracing modes coded: sparse and "super sparse". The latter will only do a few steps in each MIP level, starting at -1, before moving to the next coarser one. This effectively does a very rough version of voxel cone tracing, and is the mode used for puddle visibility.
The Lighting
On to the next part: how the renderer actually pulls off its eerily good lighting.
Contrary to first impressions, it is not the voxels themselves that are casting the light: emissive voxels must be accompanied by a manually placed light to illuminate their surroundings. When destroyed, this light is then removed, and the emissive voxels are turned off as a group.
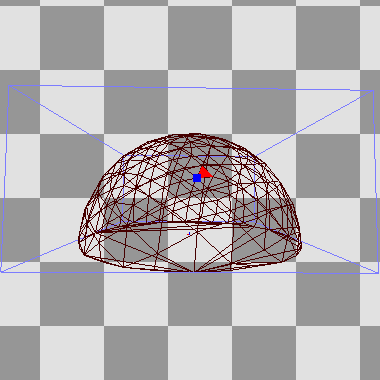
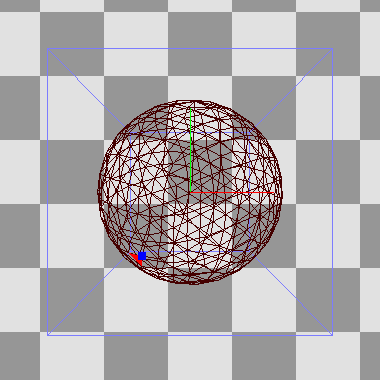
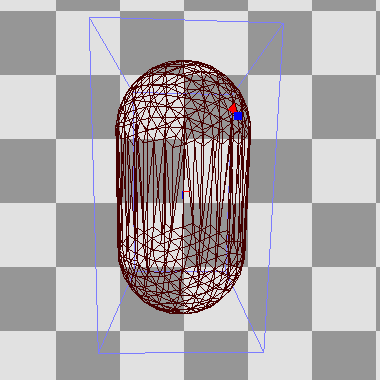
As is typical in a deferred renderer, each source of light is drawn individually into a light buffer, affecting only the pixels within the light's volume. For this, the renderer has various meshes which match each light type's shape. These are procedurally generated, so that e.g. each spotlight's mesh has the right cone angle, and each line light is enclosed by a capsule with the right length and radius:
The volumetric shadow map is once again the main star, helped by a generous amount of blue noise and stochastic sampling. This uses Martin Roberts' quasi-random sequences to produce time-varying 1D, 2D and 3D noise from a static blue noise texture. The light itself is also split up, separated into diffuse, specular and volumetric irradiance components.
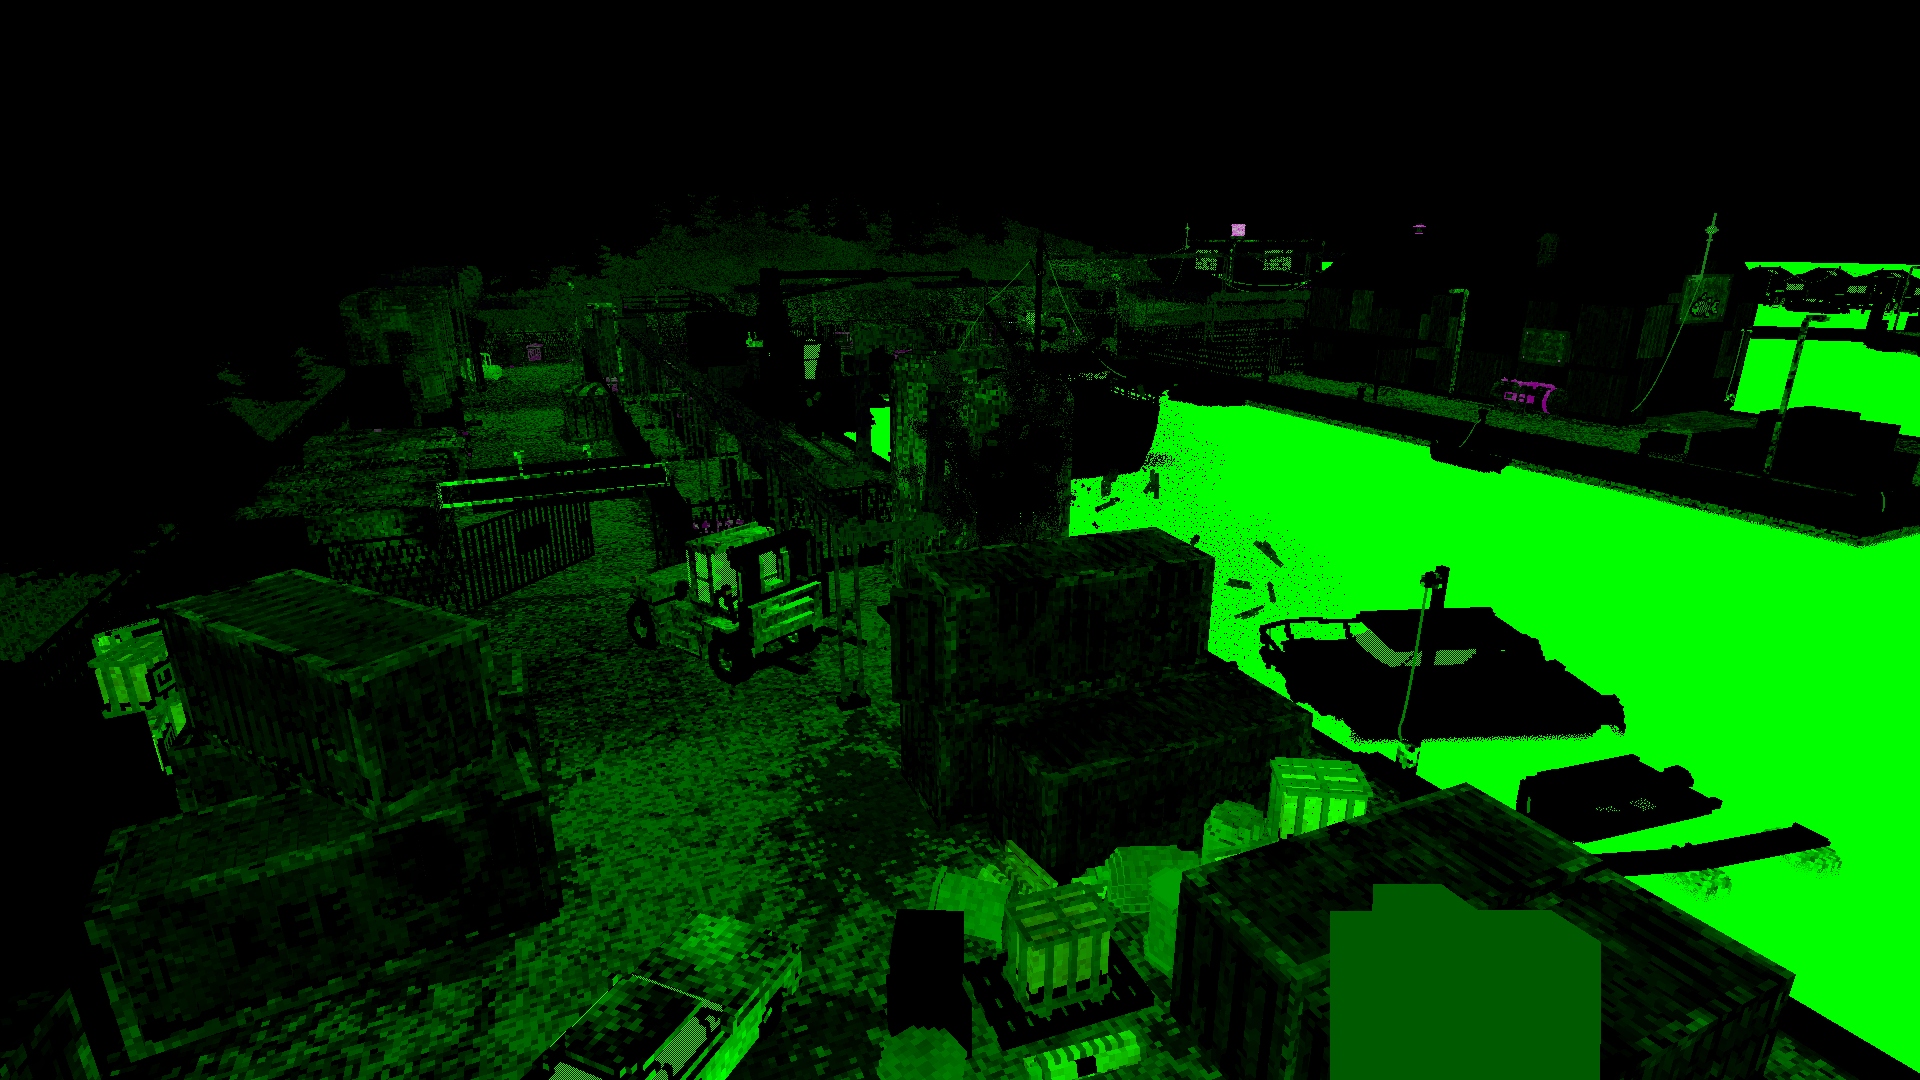
Diffuse light
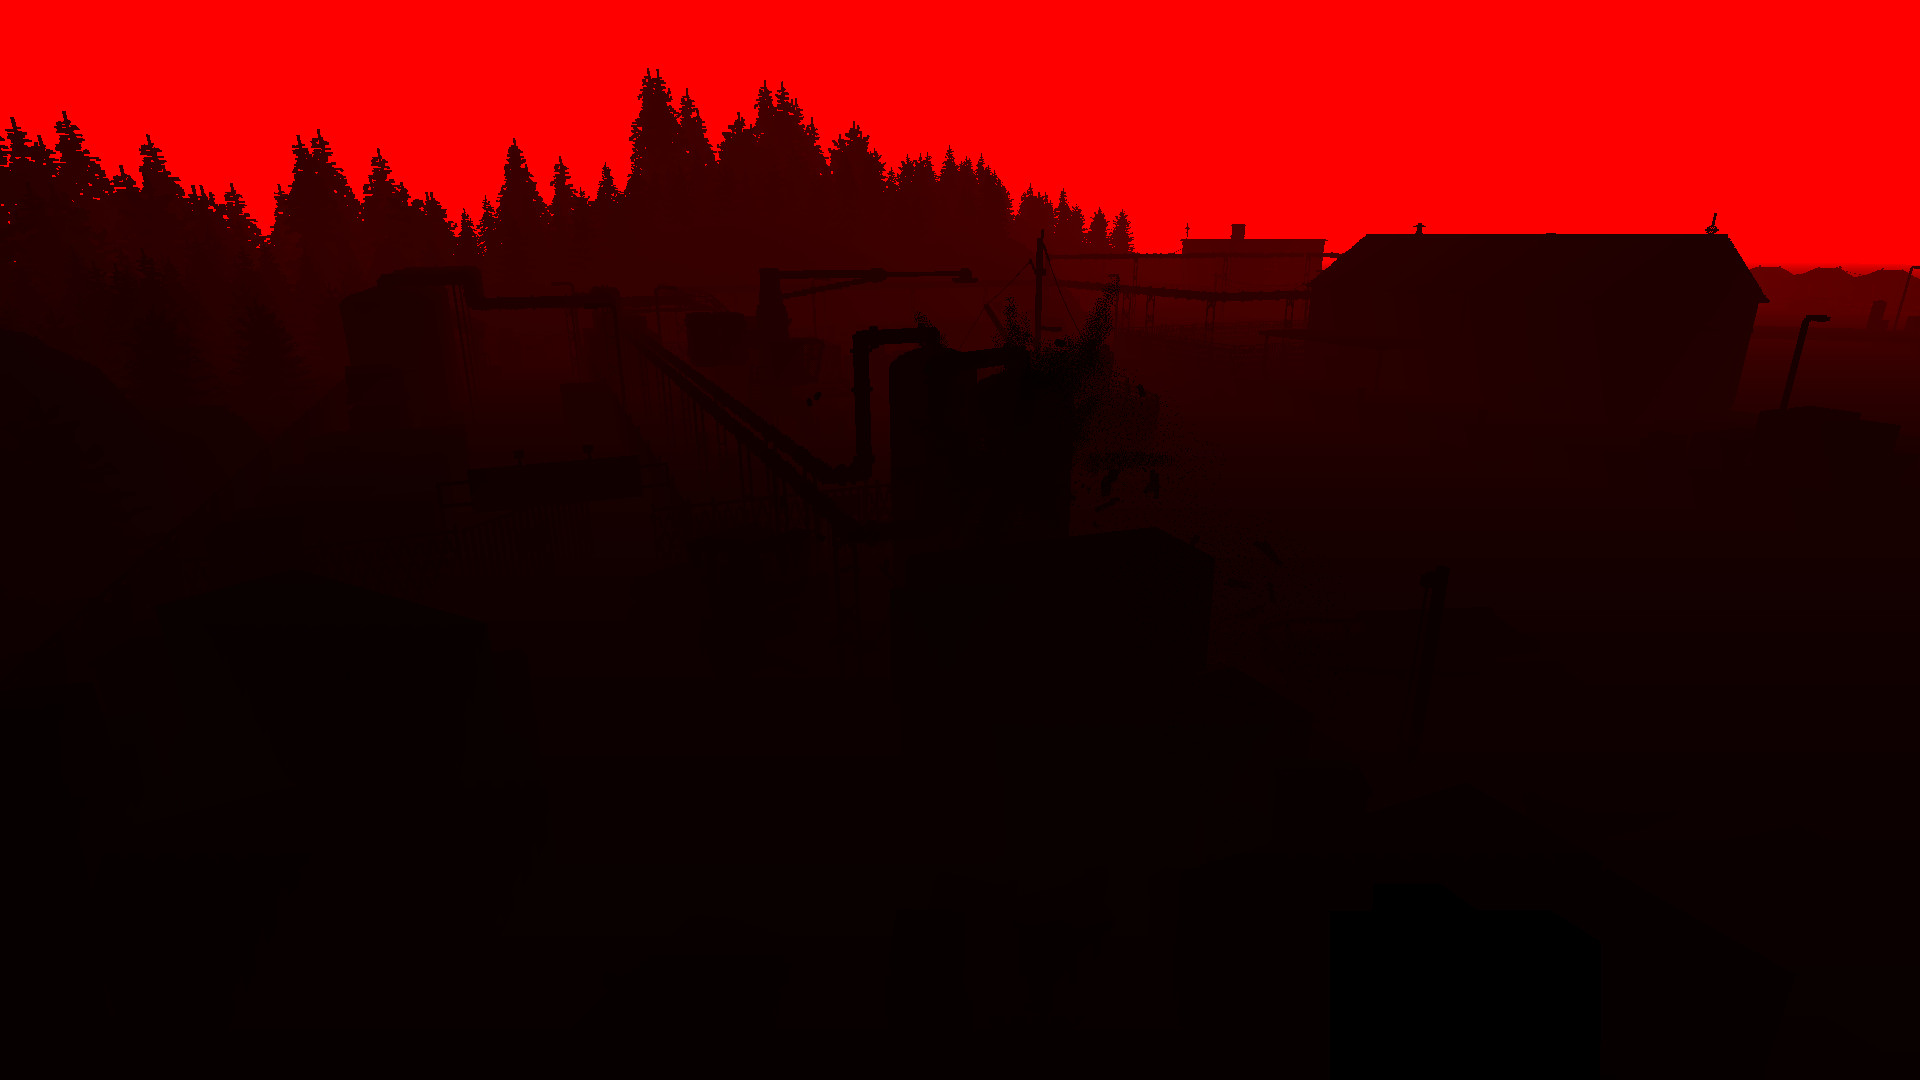
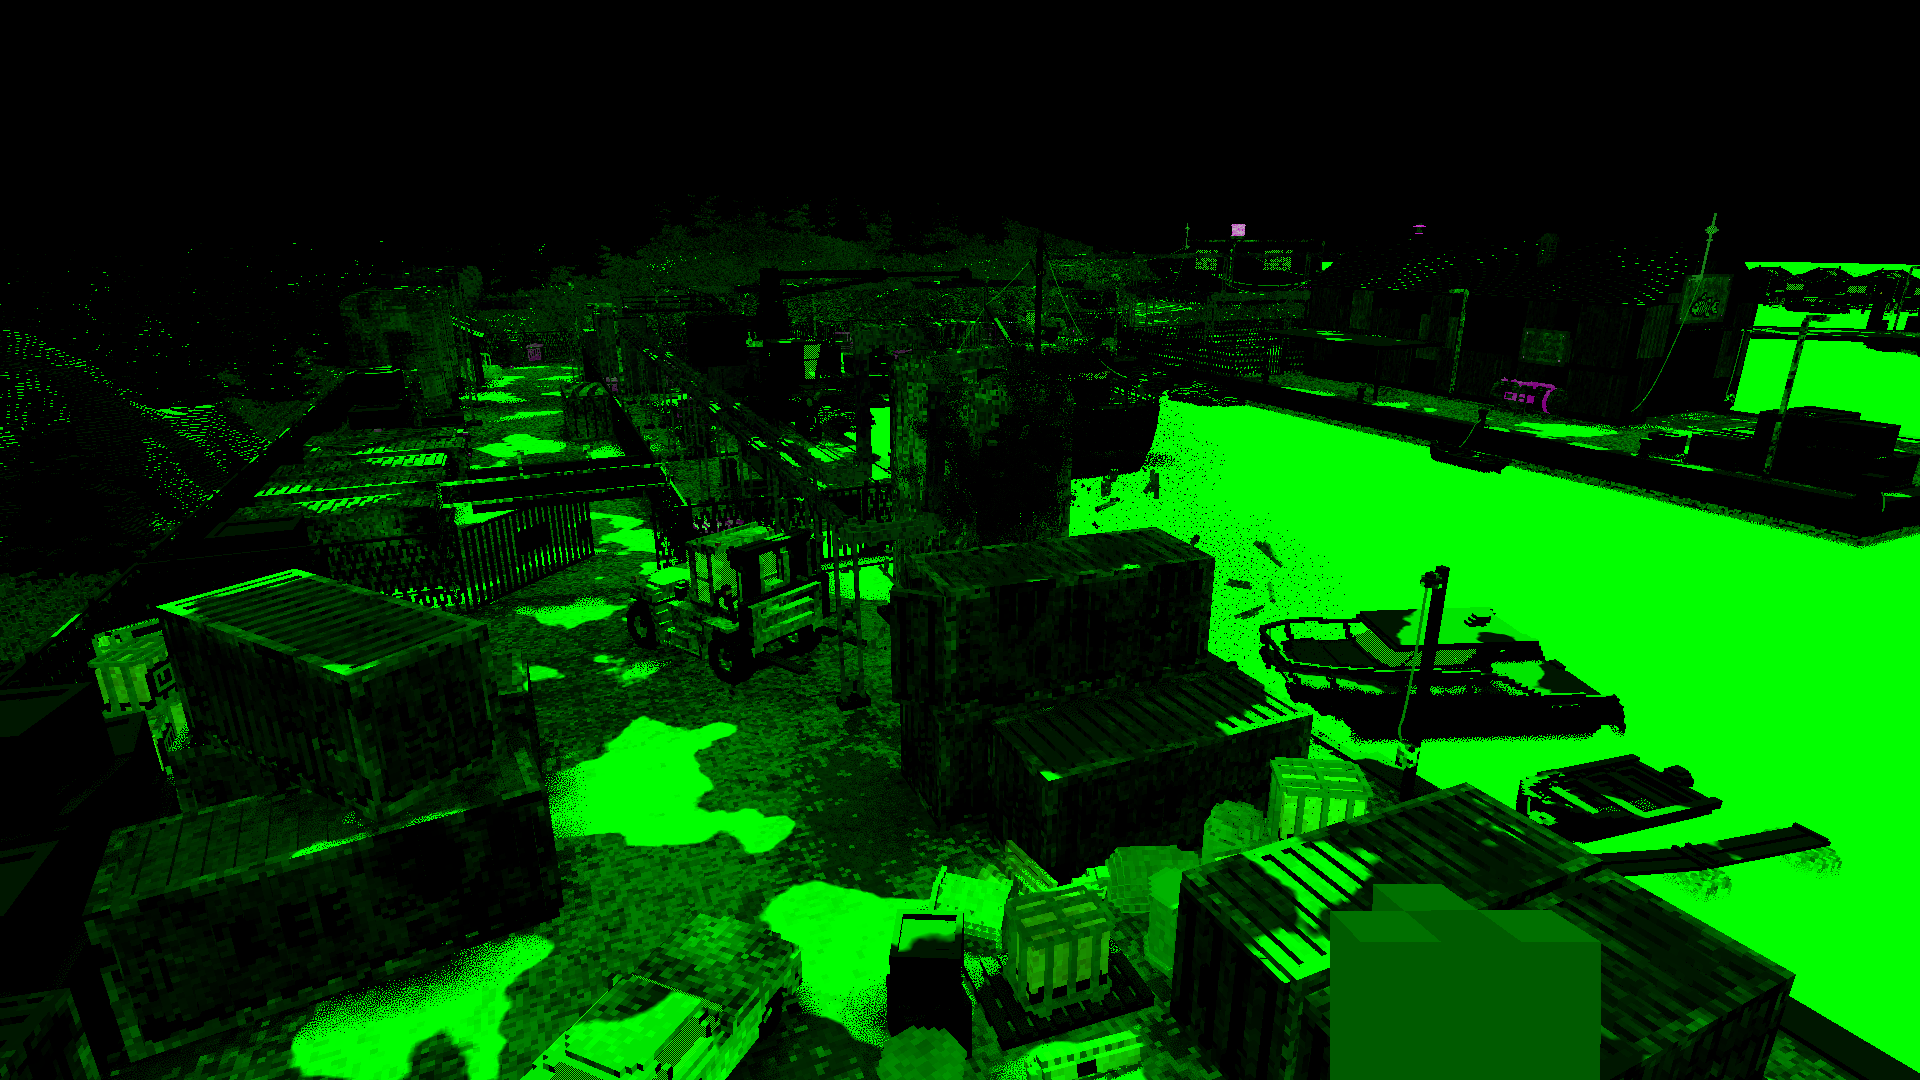
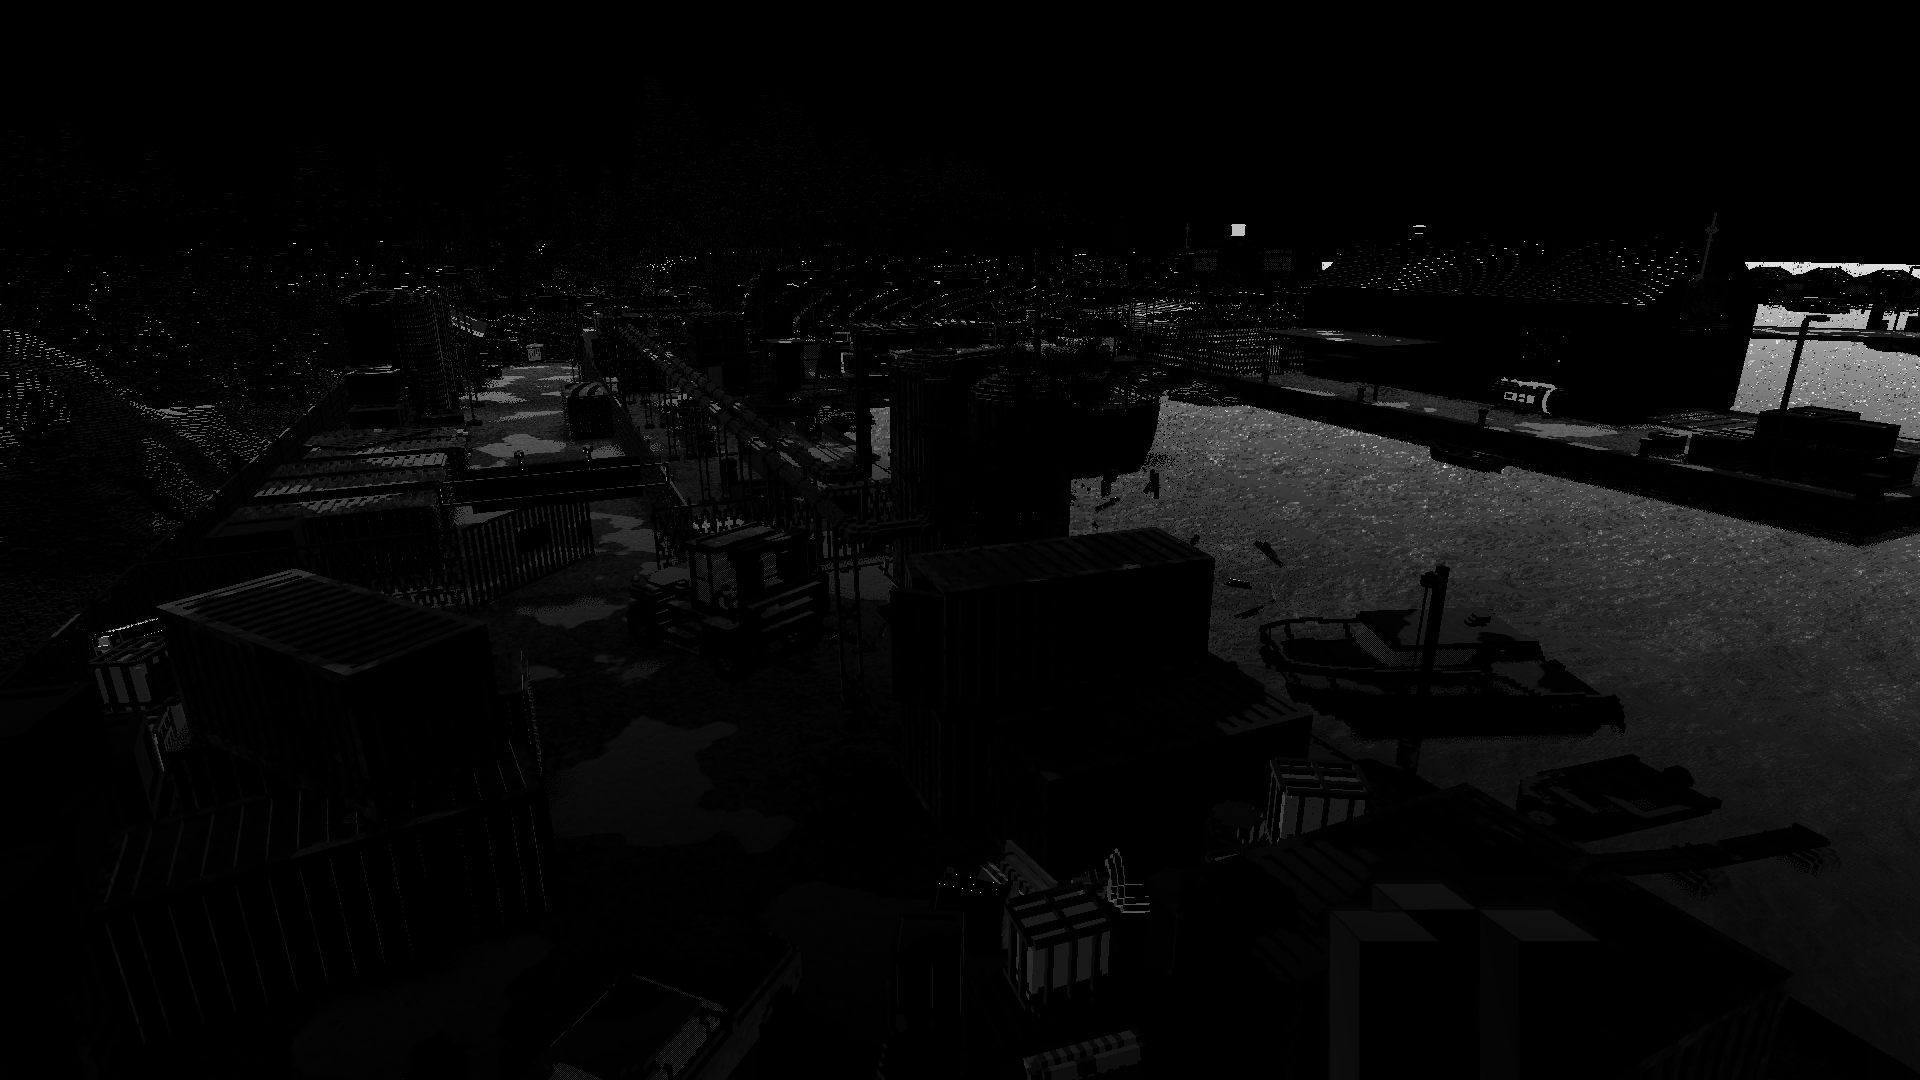
It begins with ambient sky light:
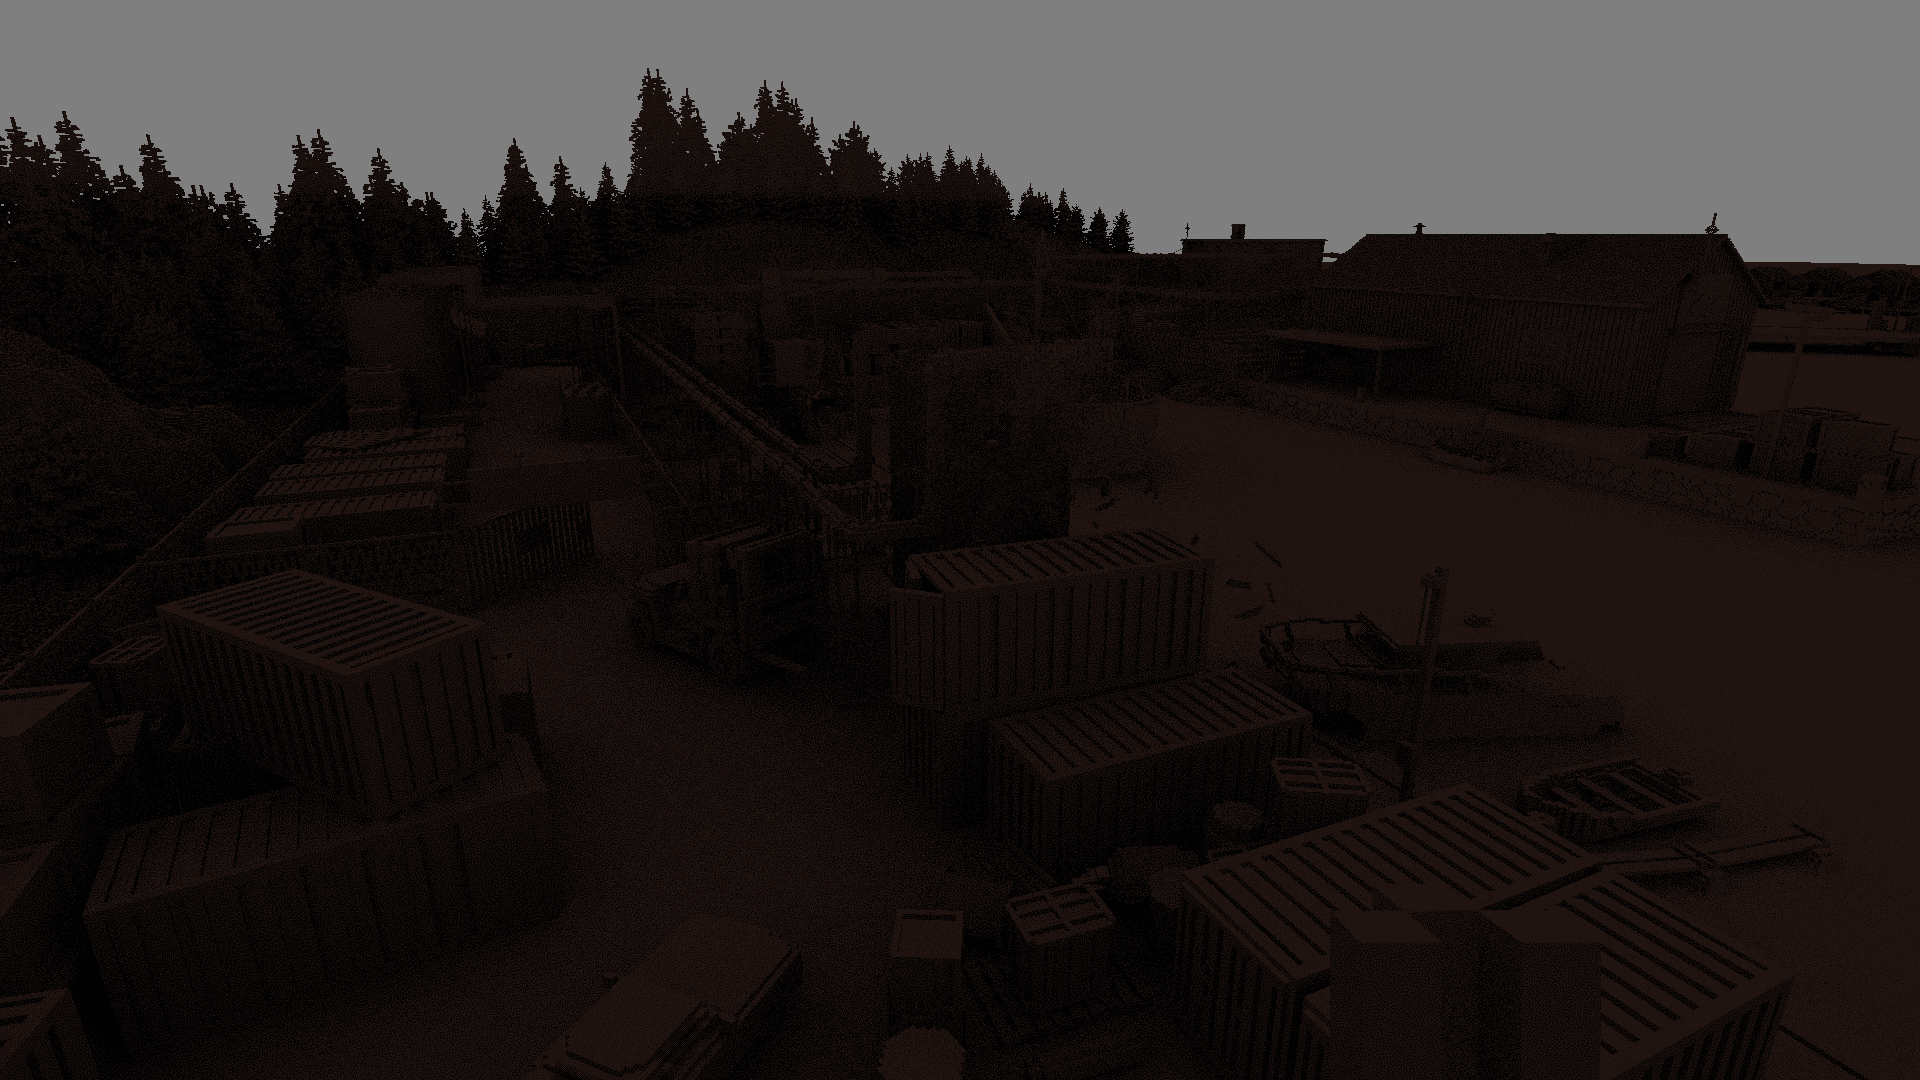
This looks absolutely lovely, with large scale occlusion thanks to volumetric ray tracing in "super sparse" mode. This uses cosine-weighted sampling in a hemisphere around each point, with 2 samples per pixel. To render small scale occlusion, it will first do a single screen-space step one voxel-size out, using the linear depth buffer.
Notice that the tree tops at the very back do not have any large scale occlusion: they extend beyond the volume of the shadow map, which is vertically limited.
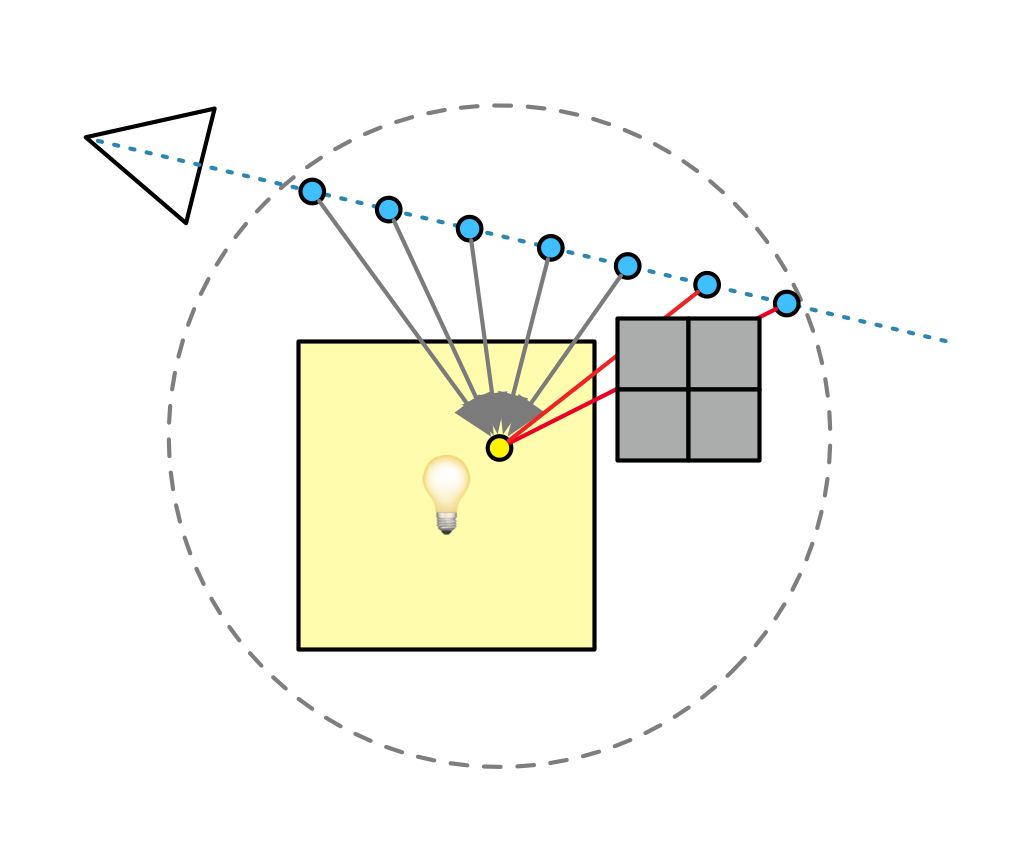
Next up are the individual lights. These are not point lights, they have an area or volume. This includes support for "screen" lights, which display an image, used in other scenes. To handle this, each lit pixel picks a random point somewhere inside the light's extent. The shadows are handled with a raytrace between the surface and the chosen light point, with one ray per pixel.
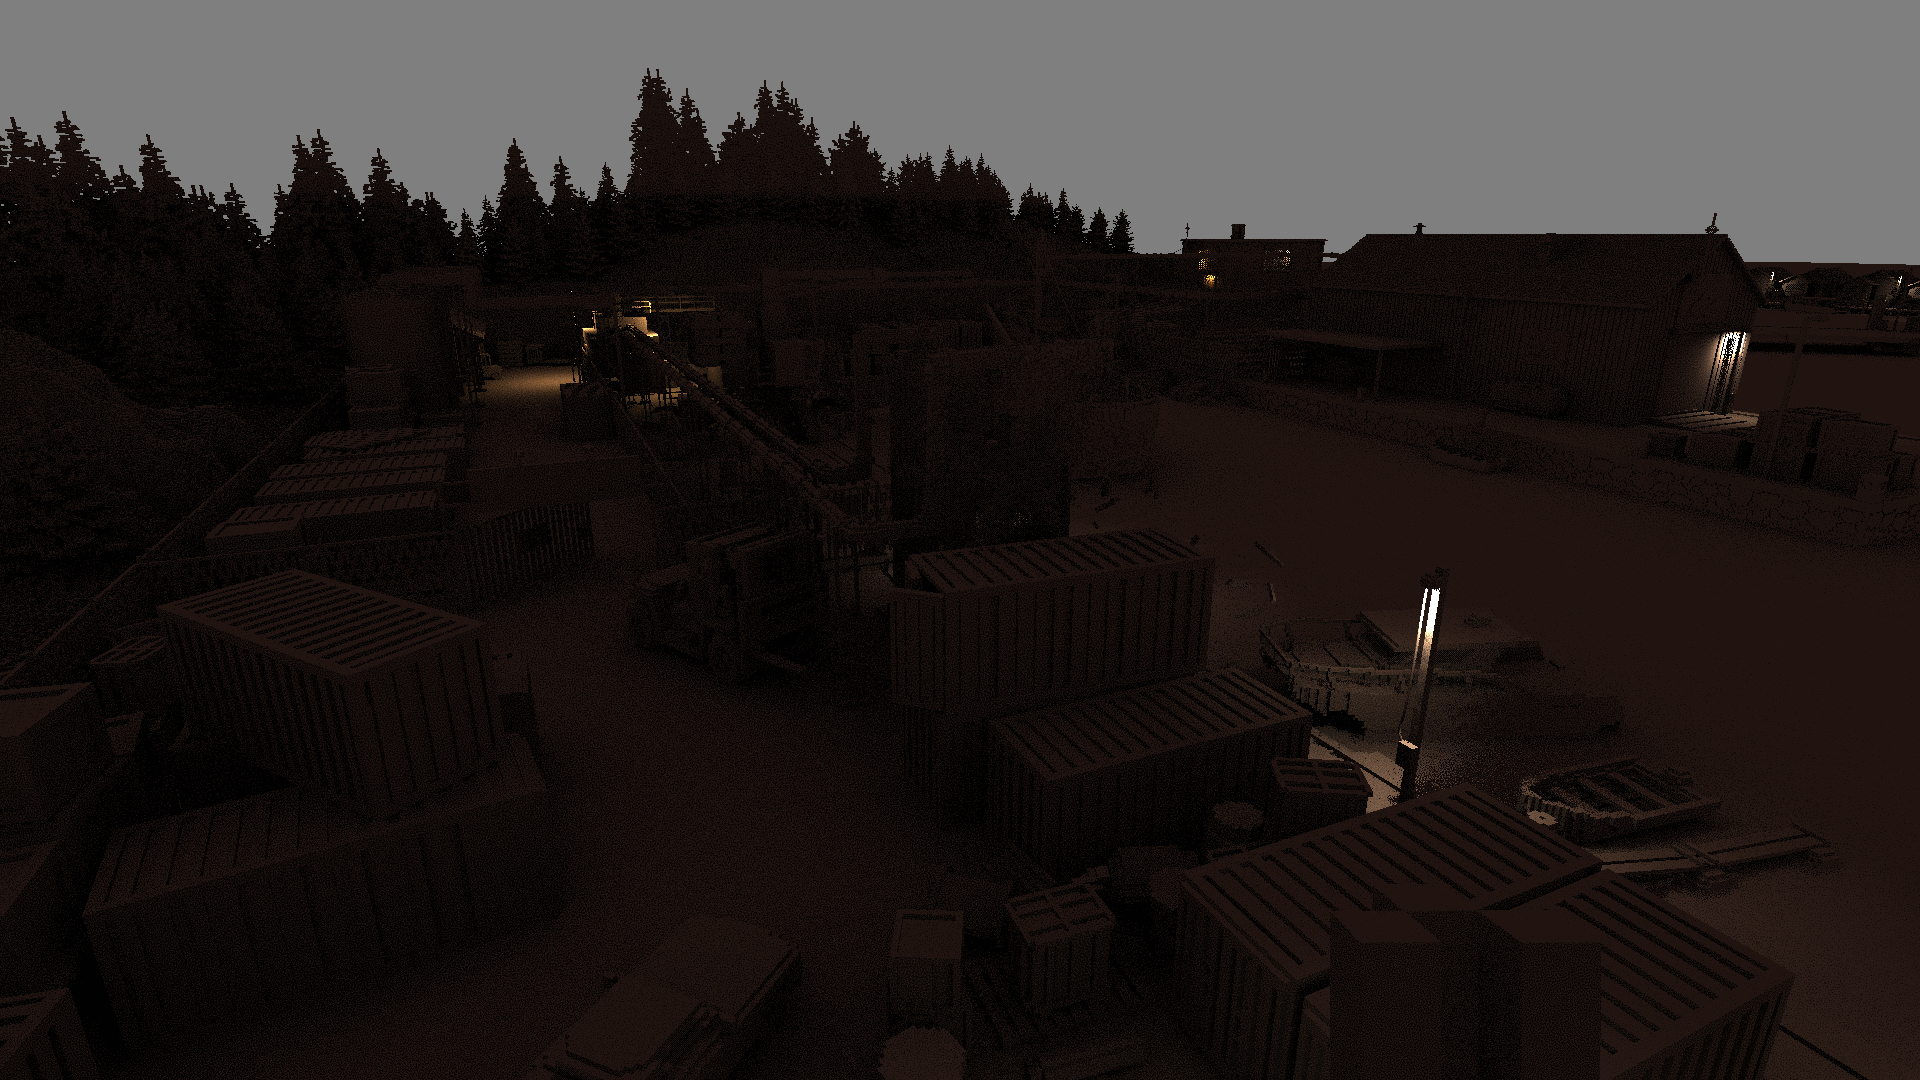

As this is irradiance, it does not yet factor in the color of each surface. This allows for aggressive denoising, which is the next step. This uses a spiral-shaped blur filter around each point, weighted by distance. The weights are also attenuated by both depth and normal: the depth of each sample must lie within the tangent plane of the center, and its normal must match.
This blurred result is immediately blended with the result of the previous frame, which is shifted using the motion vectors rendered for each pixel.
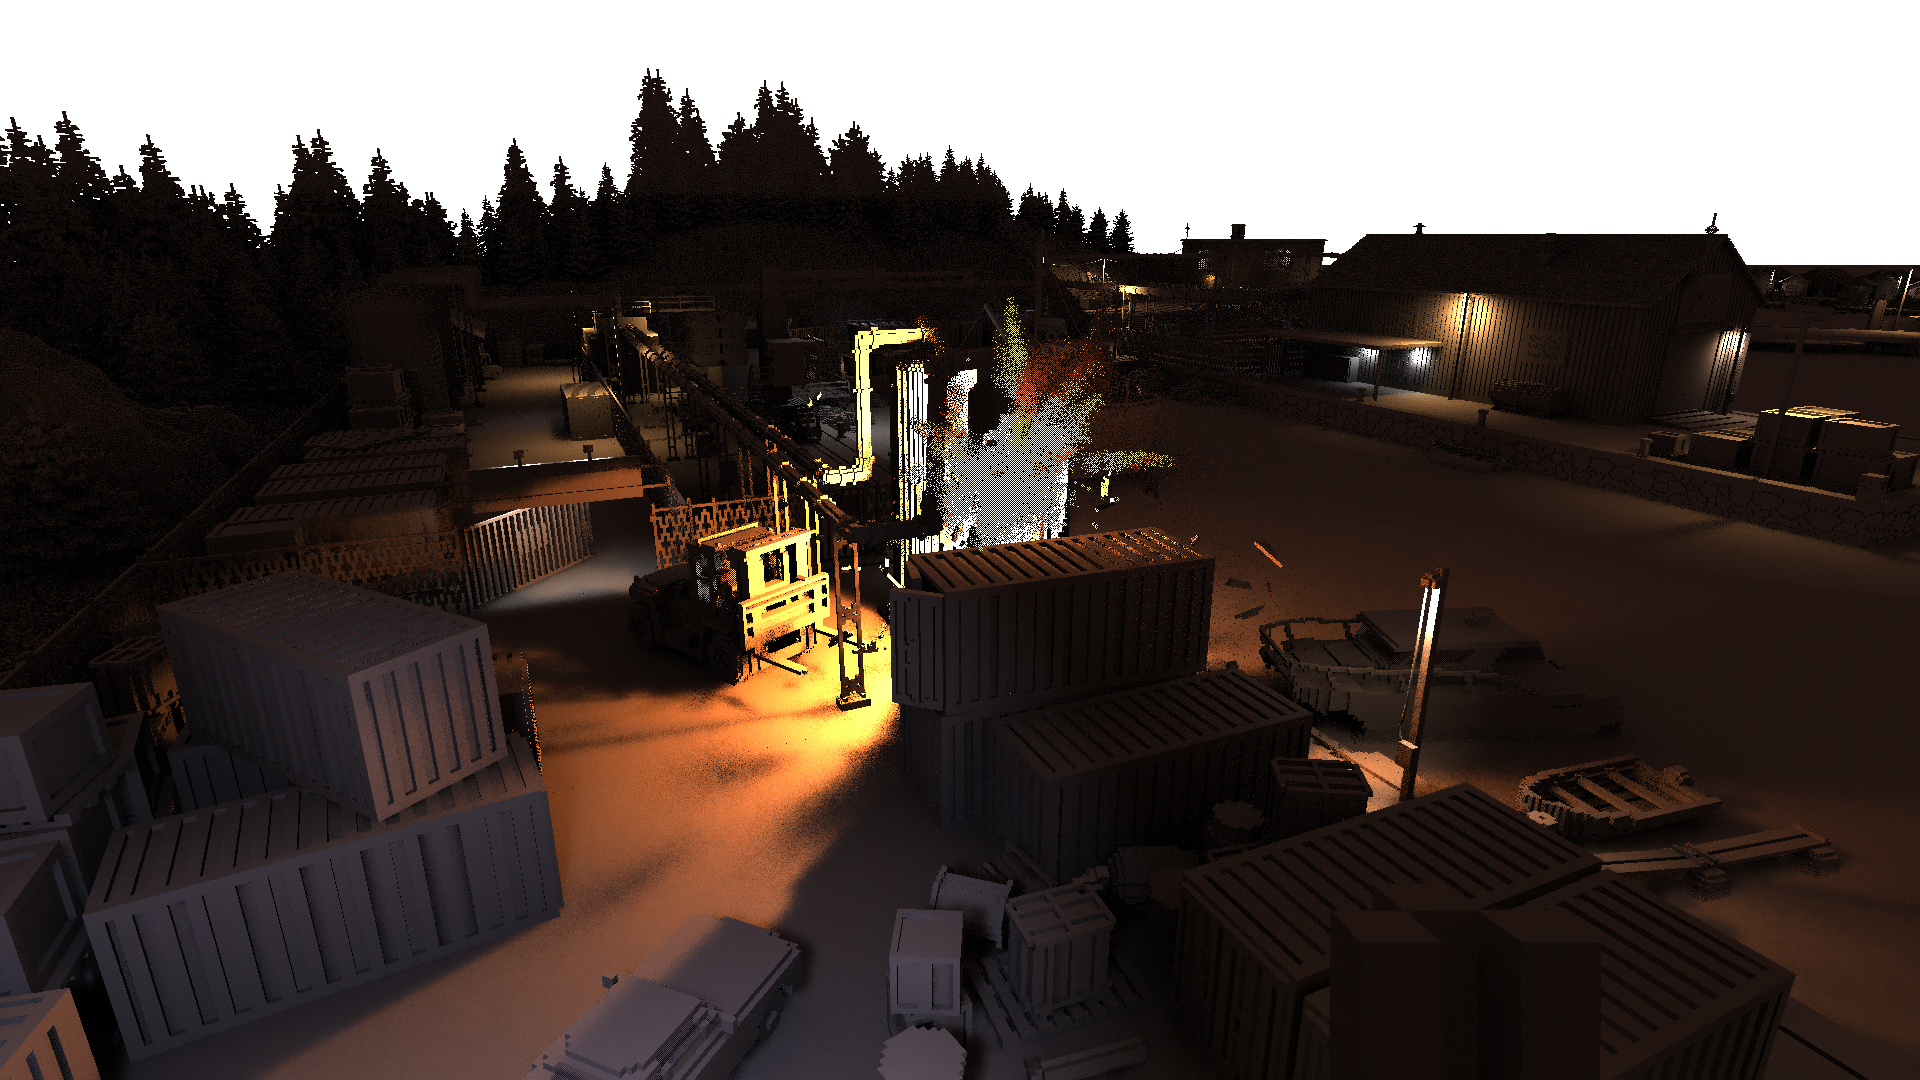
Finally, the blurred diffuse irradiance is multiplied with the non-blurred albedo (i.e. color) of every surface, to produce outgoing diffuse radiance:
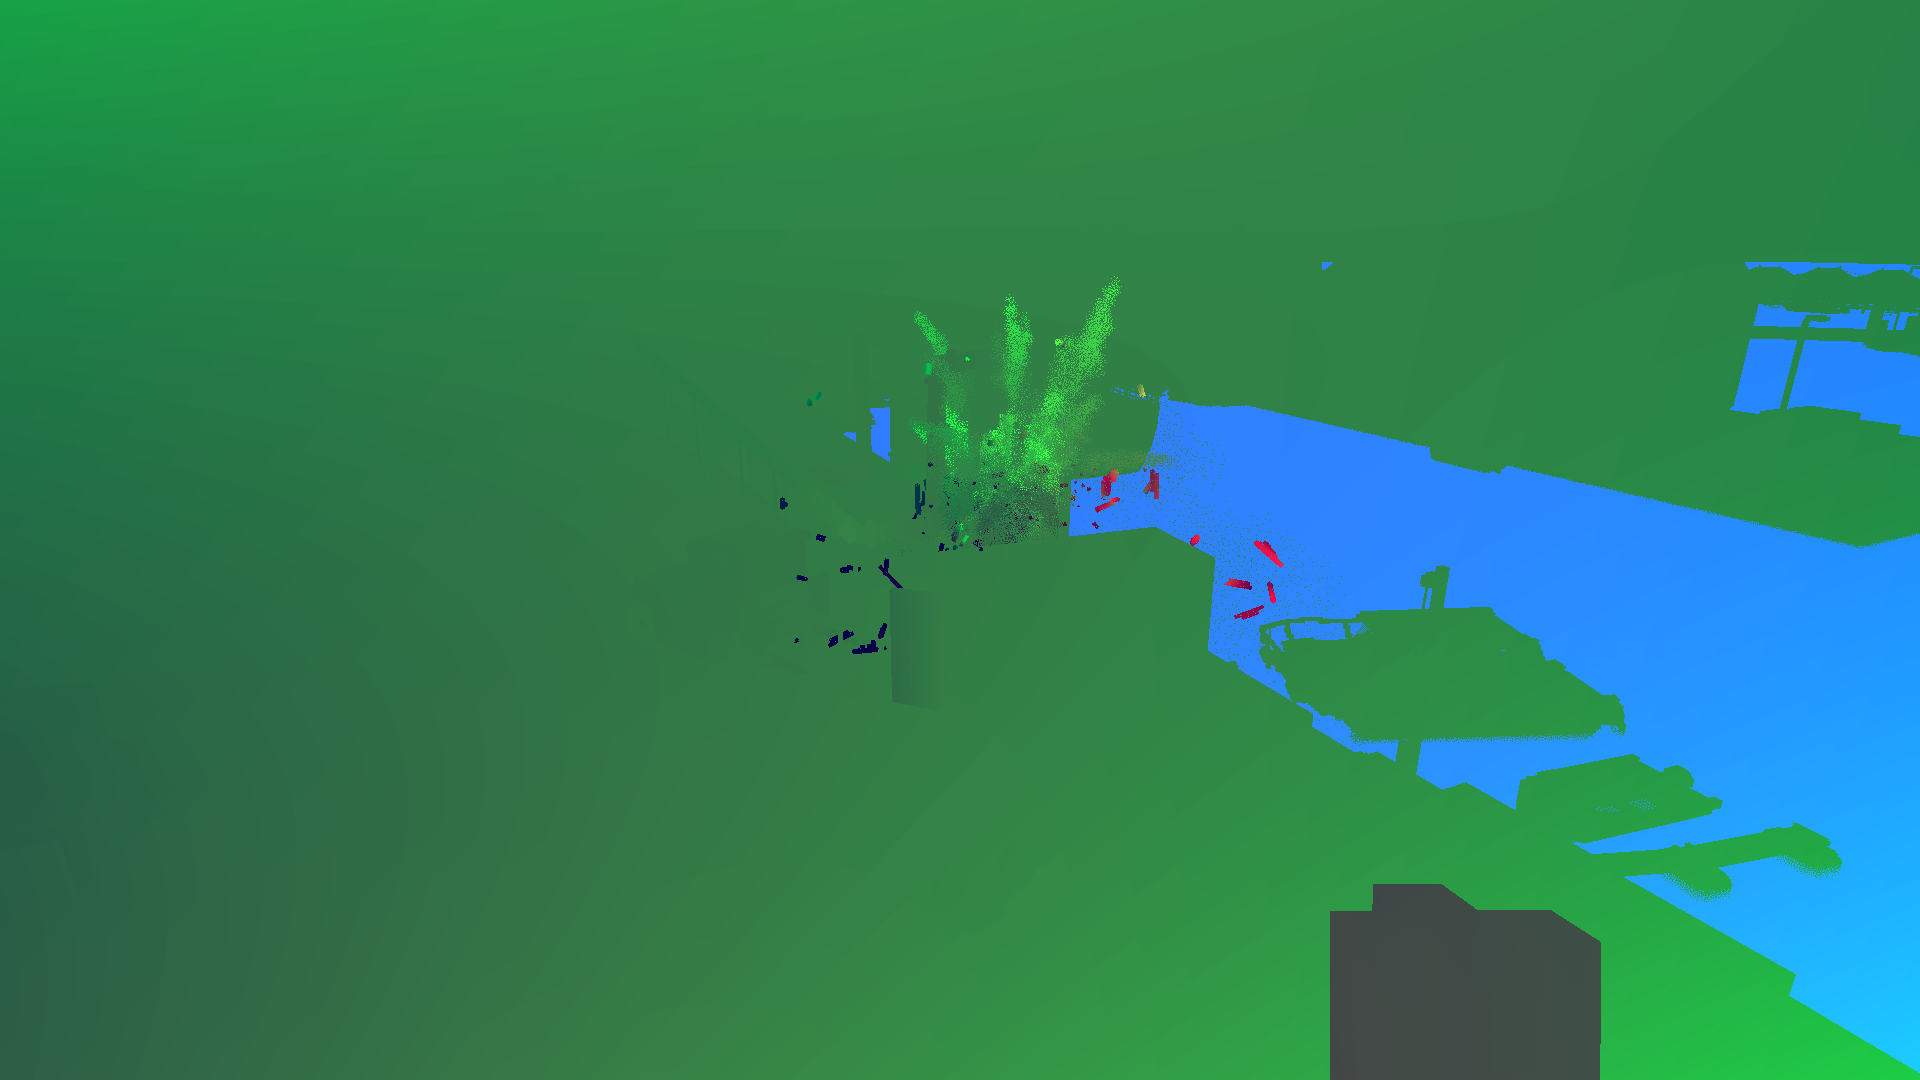
Specular light
As the experiment with the mirror showed, the renderer doesn't really distinguish between glossy specular reflections and "real" mirror reflections. Both are handled as part of the same process, which uses the diffuse light buffer as an input. This is drawn using a single full-screen render.
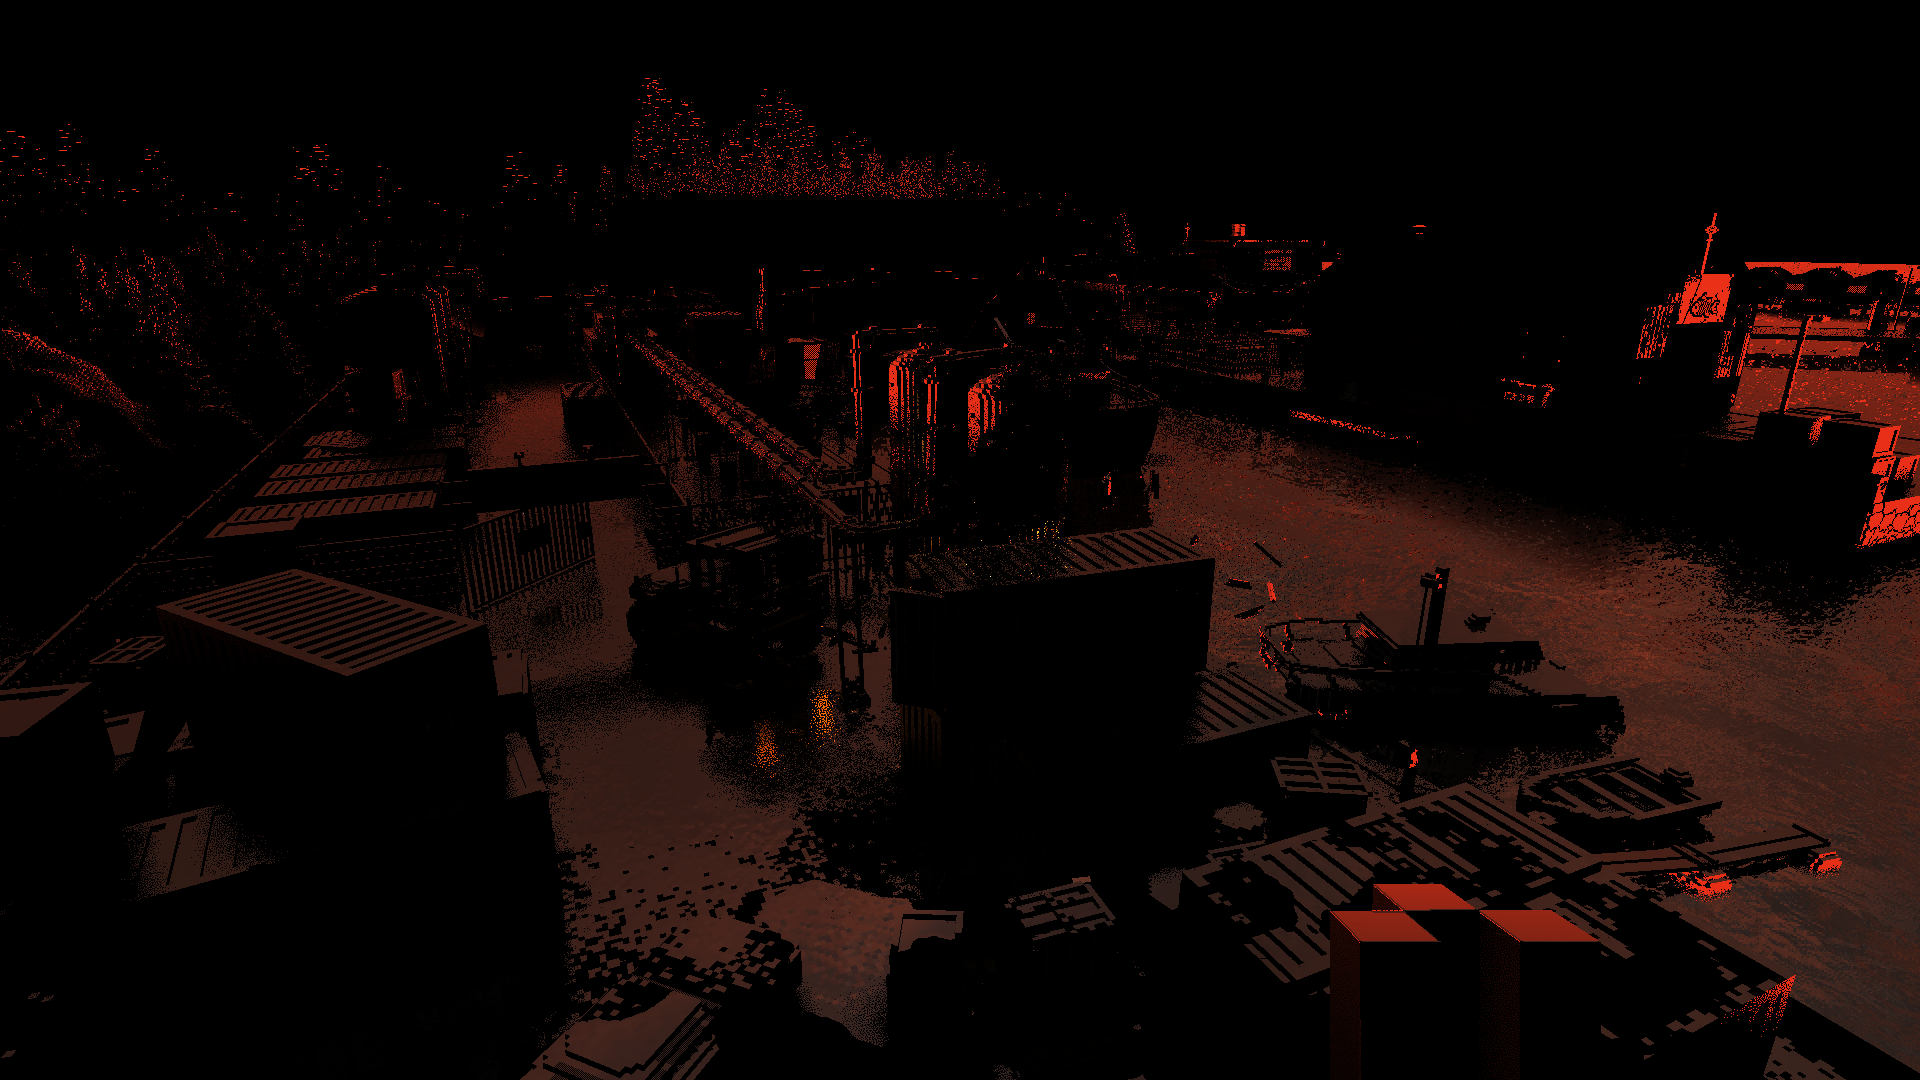
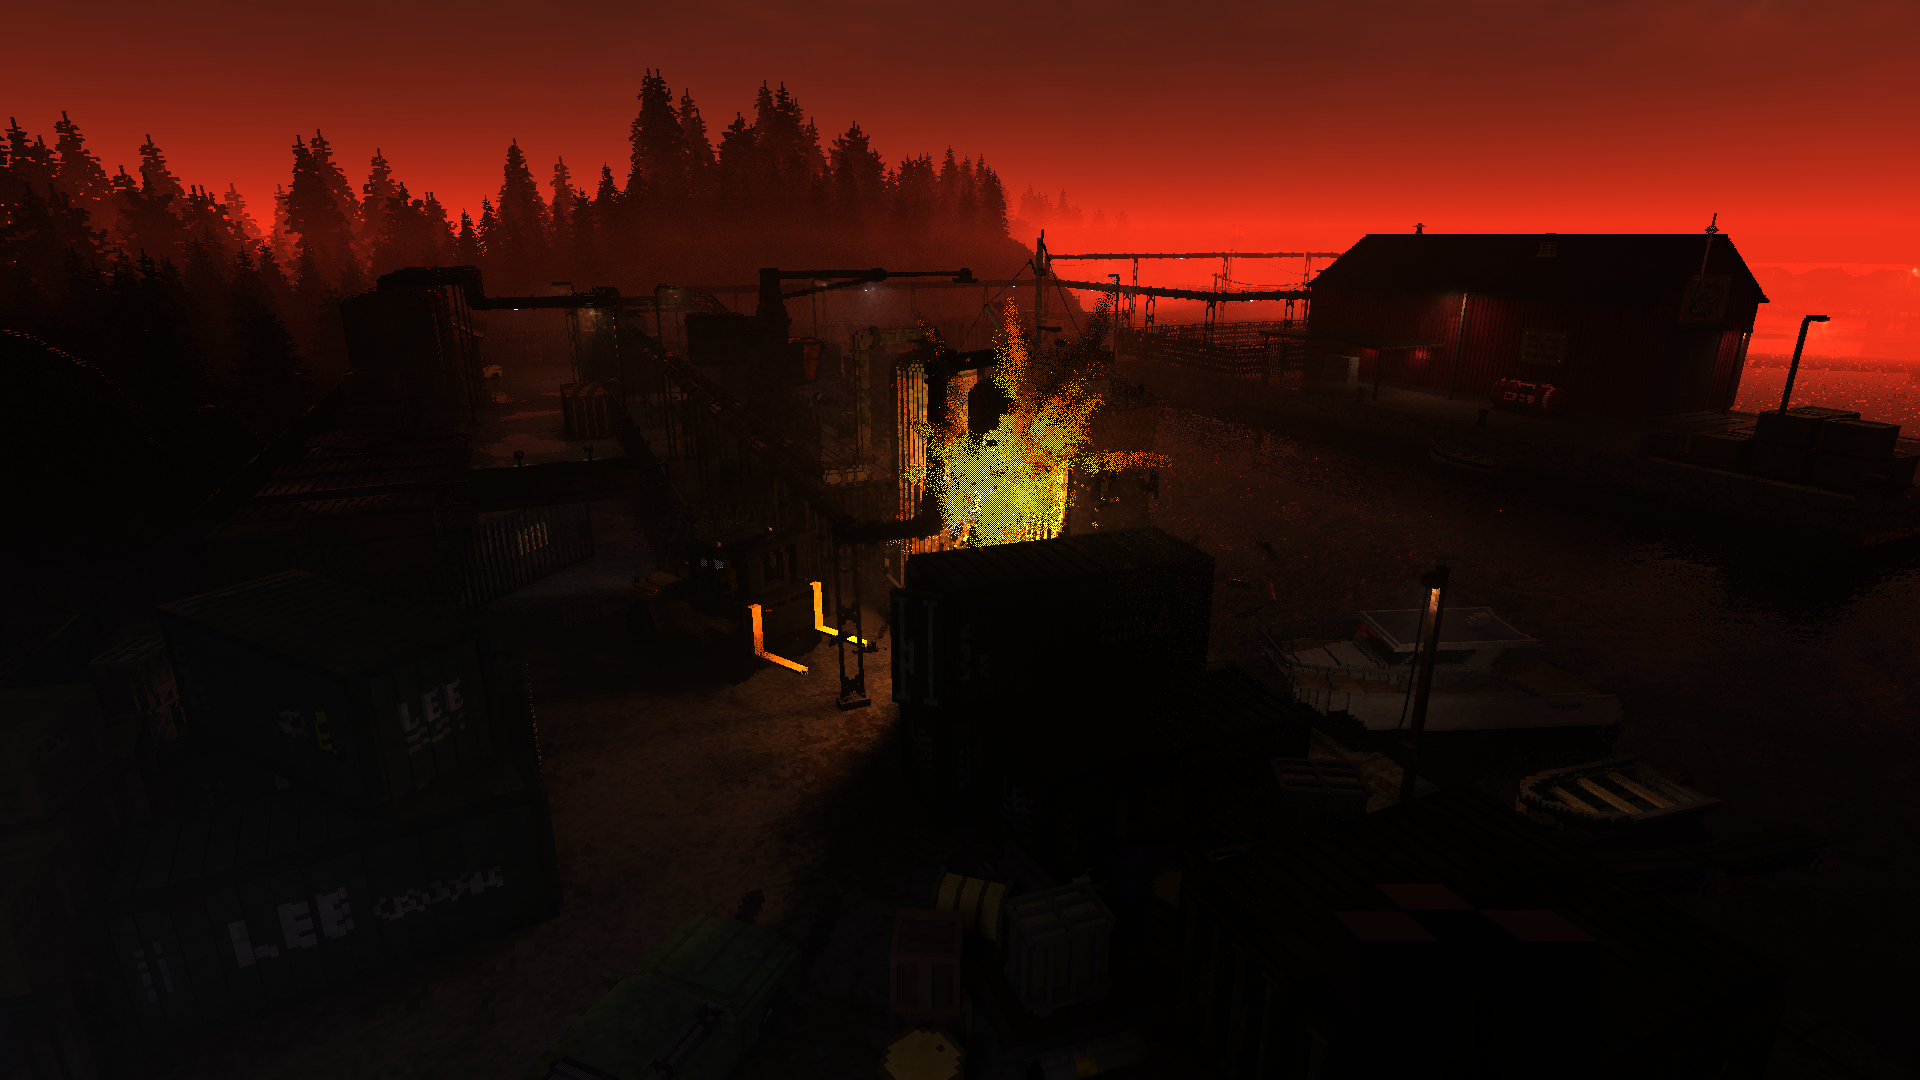
As we saw, there are both screen-space and global reflections. Unconventionally, the screen-space reflections are also traced using the volumetric shadow map, rather than the normal 2D Z-buffer. Glossyness is handled using... you guessed it... stochastic sampling based on blue noise. The rougher the surface, the more randomly the direction of the reflected ray is altered. Voxels with zero reflectivity are skipped entirely, creating obvious black spots.
If a voxel was hit, its position is converted to its 2D screen coordinates, and its color is used, but only if it sits at the right depth. This must also fade out to black at the screen edges. If no hit could be found within a certain distance, it instead uses a cube environment map, attenuated by fog, here a deep red.
The alpha channel is used to store the final reflectivity of each surface, factoring in fresnel effects and viewing angle:
This is then all denoised similar to the diffuse lighting, but without an explicit blur. It's blended only with the previous reprojected specular result, blending more slowly the glossier—and noisier—the surface is:

Volumetric light
Volumetric lights are the most expensive, hence this part is rendered on a buffer half the width and height. It uses the same light meshes as the diffuse lighting, only with a very different shader.
For each pixel, the light position is again jittered stochastically. It will then raytrace through a volume around that position, to determine where the light contribution along the ray starts and ends. Finally it steps between those two points, accumulating in-scattered light along the way. As is common, it will also jitter the steps along the ray.
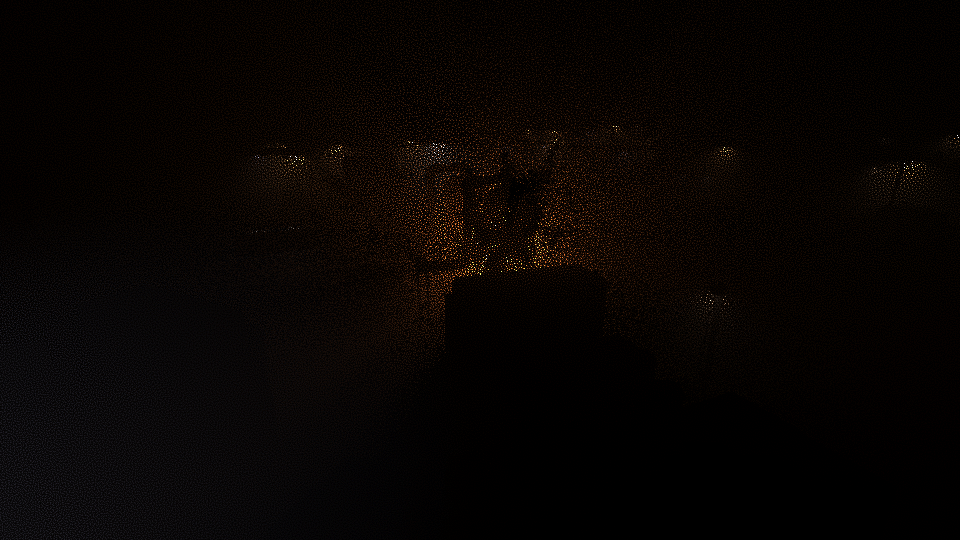
This is expensive because at every step, it must trace a secondary ray towards the light, to determine volumetric shadowing. To cut down on the number of extra rays, this is only done if the potential light contribution is actually large enough to make a visible difference. To optimize the trace and keep the ray short, it will trace towards the closest point on the light, rather than the jittered point.
The resulting buffer is still the noisiest of them all, so once again, there is a blurring and temporal blending step. This uses the same spiral filter as the diffuse lighting, but lacks the extra weights of planar depth and normal. Instead, the depth buffer is only used to prevent the fog from spilling out in front of nearby occluders:
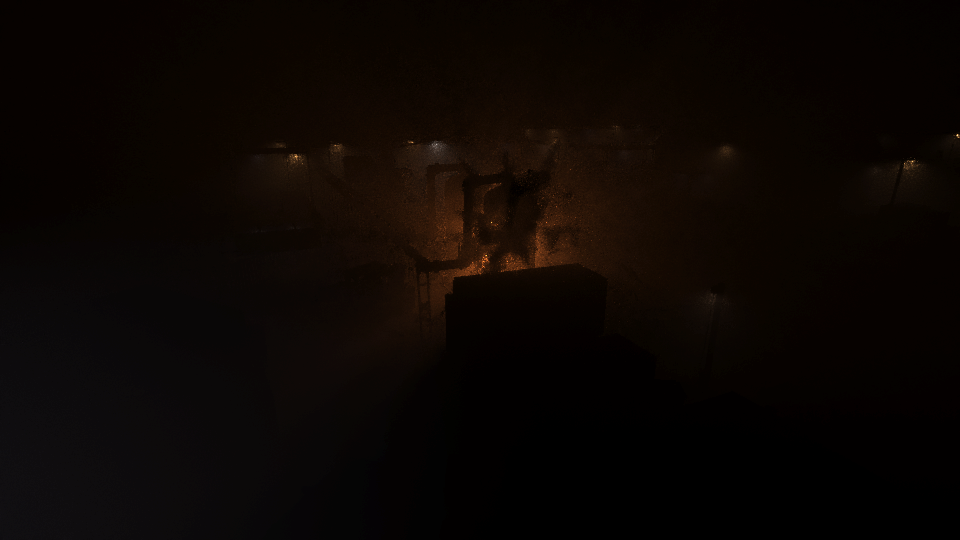
Compositing
All the different light contributions are now added together, with depth fog and a skybox added to complete it. Interestingly, while it looks like a height-based fog which thins out by elevation, it is actually just based on vertical view direction. A clever trick, and a fair amount cheaper.
The Post-Processing
At this point we have a physically correct, lit, linear image. So now all that remains is to mess it up.
There are several effects in use:
- Motion blur
- Depth of field
- Temporal anti-aliasing
- Bloom
- Lens distortion
- Lens dirt
- Vehicle outline
Several of these are optional.
Motion Blur
If turned on, it is applied here using the saved motion vectors. This uses a variable number of steps per pixel, up to 10. Unfortunately it's extremely subtle and difficult to get a good capture of, so I don't have a picture.
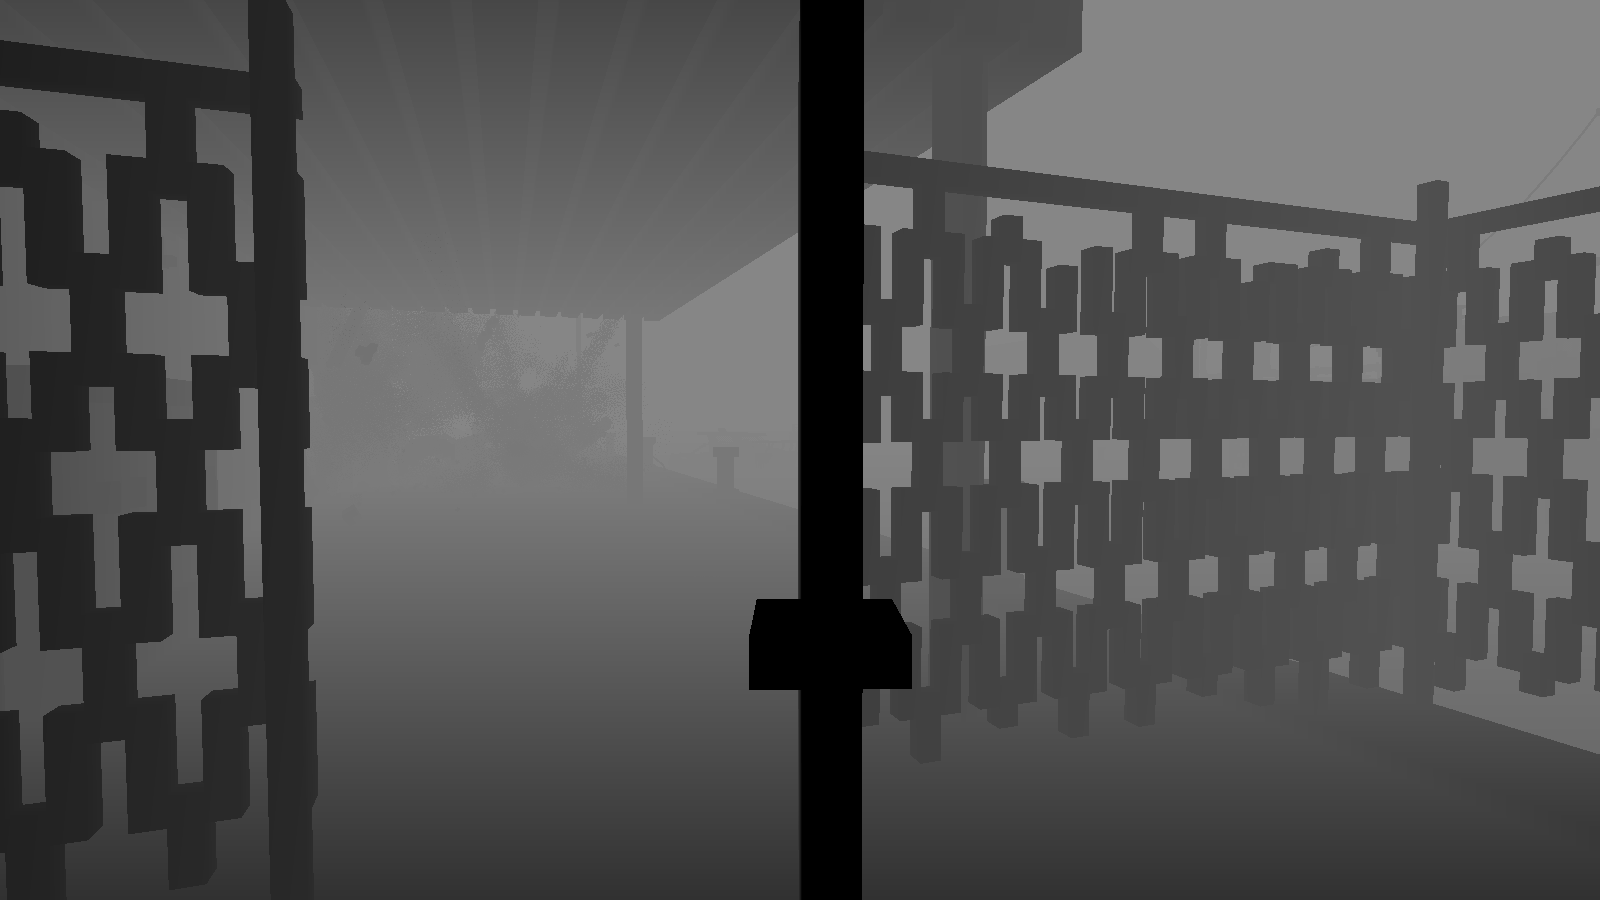
Depth of Field
This effect requires a dedicated capture to properly show, as it is hardly noticeable on long-distance scenes. I will use this shot, where the DOF is extremely shallow because I'm holding the gate in the foreground:
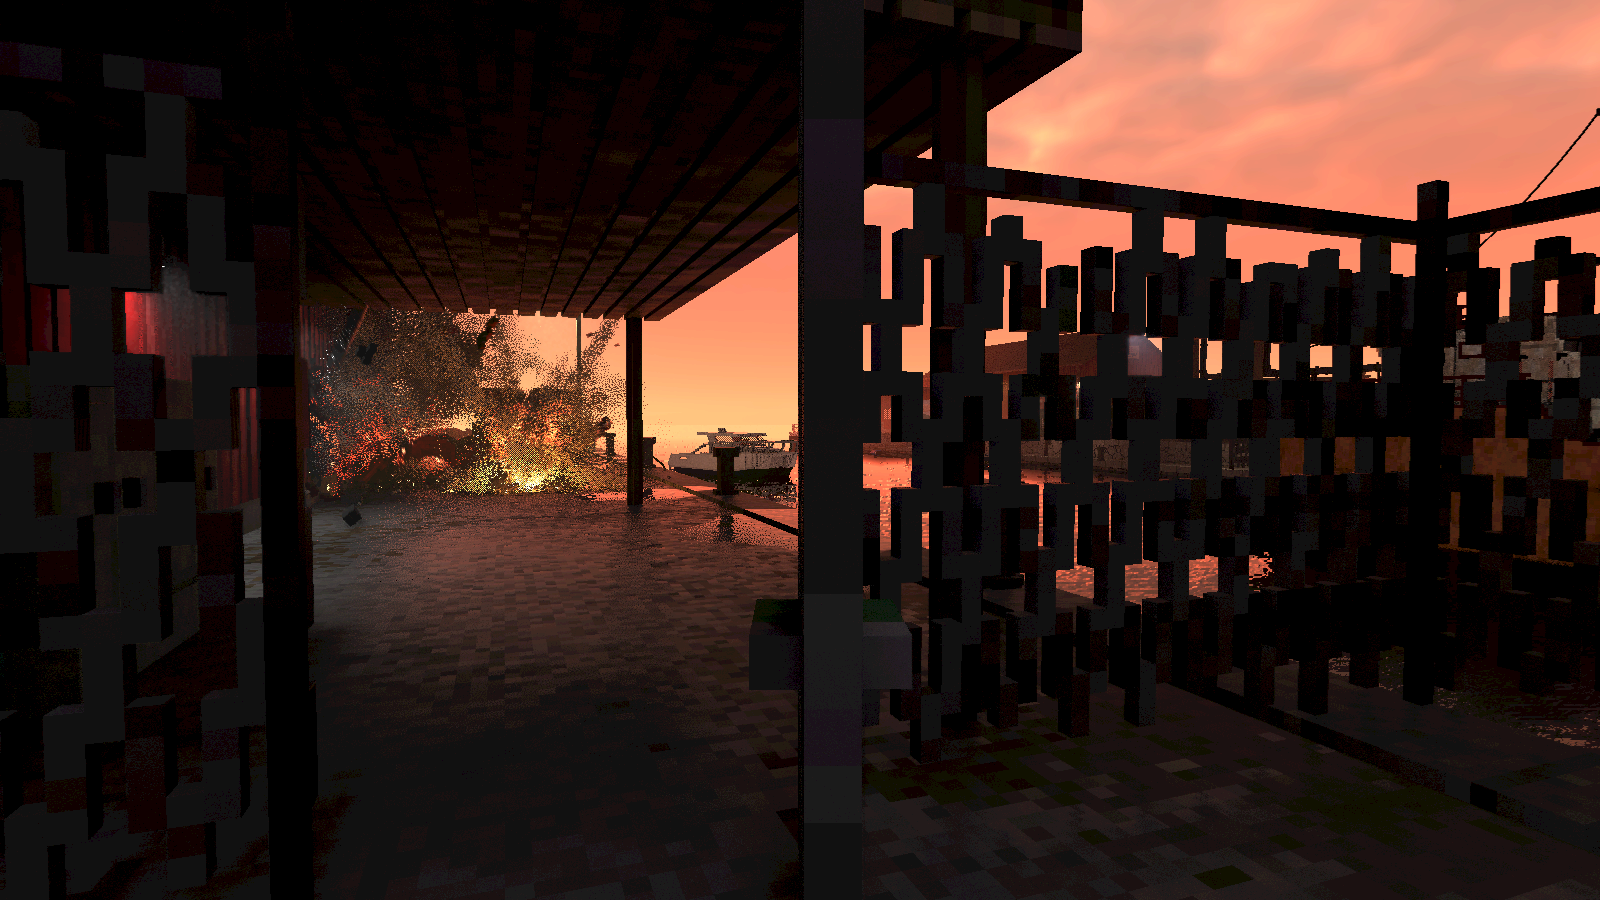
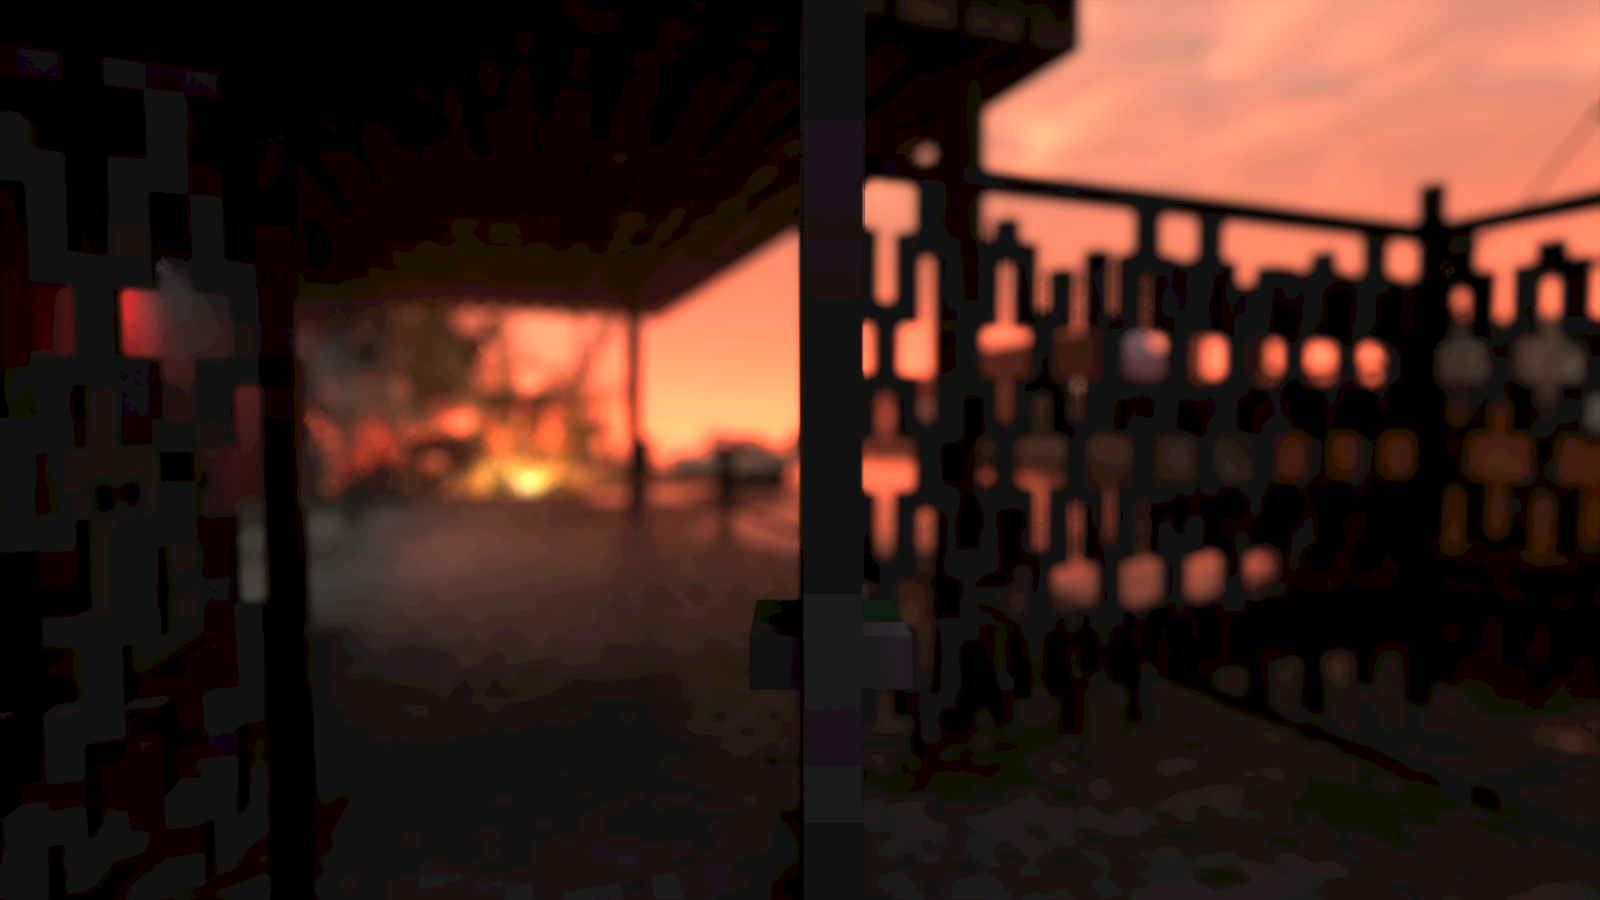
First, the renderer needs to know the average depth in the center of the image. To do so, it samples the linear depth buffer in the middle, again with a spiral blur filter. It's applied twice, one with a large radius and one small. This is done by rendering directly to a 1x1 size image, which is also blended over time with the previous result. This produces the average focal distance.
Next it will render a copy of the image, with the alpha channel (float) proportional to the amount of blur needed (the circle of confusion). This is essentially any depth past the focal point, though it will bias the center of the image to remain more in focus:
The renderer will now perform a 2x2 downscale, followed by a blue-noise jittered upscale. This is done even if DOF is turned off, which suggests the real purpose here is to even out the image and remove the effects of screen door transparency.


Actual DOF will now follow, rendered again to a half-sized image, to cut down on the cost of the large blur radius. This again uses a spiral blur filter. This will use the alpha channel to mask out any foreground samples, to prevent them from bleeding onto the background. Such samples are instead replaced with the average color so far, a trick documented here.

Now it combines the sharp-but-jittered image with the blurry DOF image, using the alpha channel as the blending mask.
Temporal anti-aliasing
At this point the image is smoothed with a variant of temporal anti-aliasing (TXAA), to further eliminate any left-over jaggies and noise. This is now the fourth time that temporal reprojection and blending was applied in one frame: this is no surprise, given how much stochastic sampling was used to produce the image in the first place.

To help with anti-aliasing, as is usual, the view point itself is jittered by a tiny amount every frame, so that even if the camera doesn't move, it gets varied samples to average out.
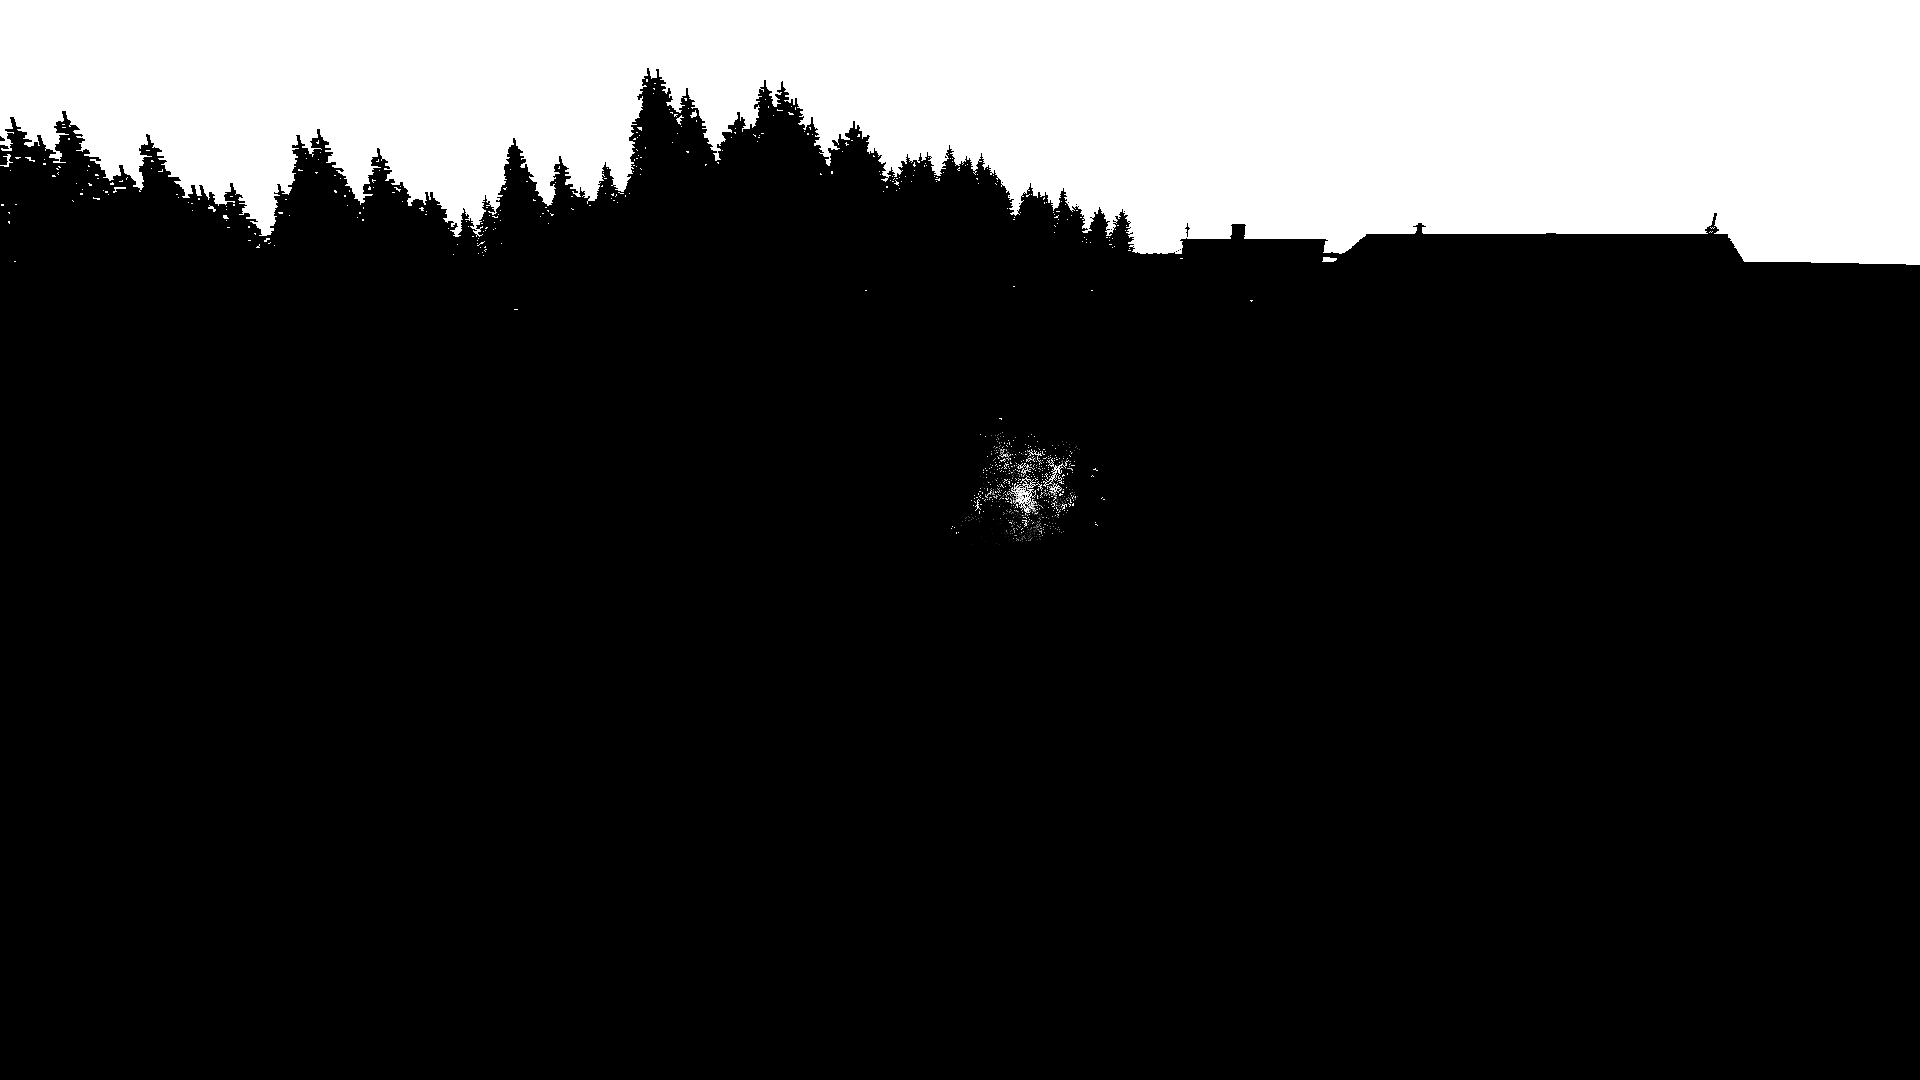
Exposure and bloom
For proper display, the renderer will determine the appropriate exposure level to use. For this, it needs to know the average light value in the image.
First it will render a 256x256 grayscale image. It then progressively downsamples this by 2, until it reaches 1x1. This is then blended over time with the previous result to smooth out the changes.
Using the exposure value, it then produces a bloom image: this is a heavily thresholded copy of the original, where all but the brightest areas are black. This image is half the size of the original.
This half-size bloom image is then further downscaled and blurred more aggressively, by 50% each time, down to ~8px. At each step it does a separate horizontal and vertical blur, achieving a 2D gaussian filter:

The resulting stack of images is then composed together to produce a soft glow with a very large effective radius, here exaggerated for effect:

Final composition
Almost done: the DOF'd image is combined with bloom, multiplied with the desired exposure, and then gamma corrected. If lens distortion is enabled, it is applied too. It's pretty subtle, and here it is just turned off. Lens dirt is missing too: it is only used if the sun is visible, and then it's just a static overlay.

All that remains is to draw the UI on top. For this it uses a signed-distance-field font atlas, and draws the crosshairs icon in the middle:
Bonus Shots
To conclude, a few bonus images.
Ghosting
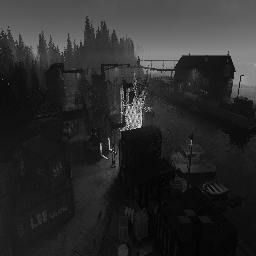
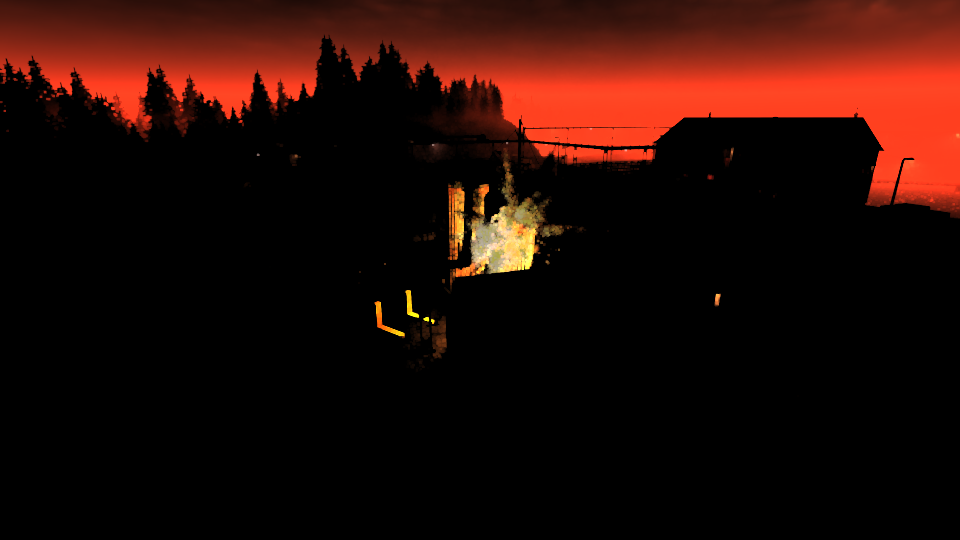
While in third person vehicle view, the renderer will ghost any objects in front of it. As a testament to the power of temporal smoothing, compare the noisy "before" image with the final "after" result:
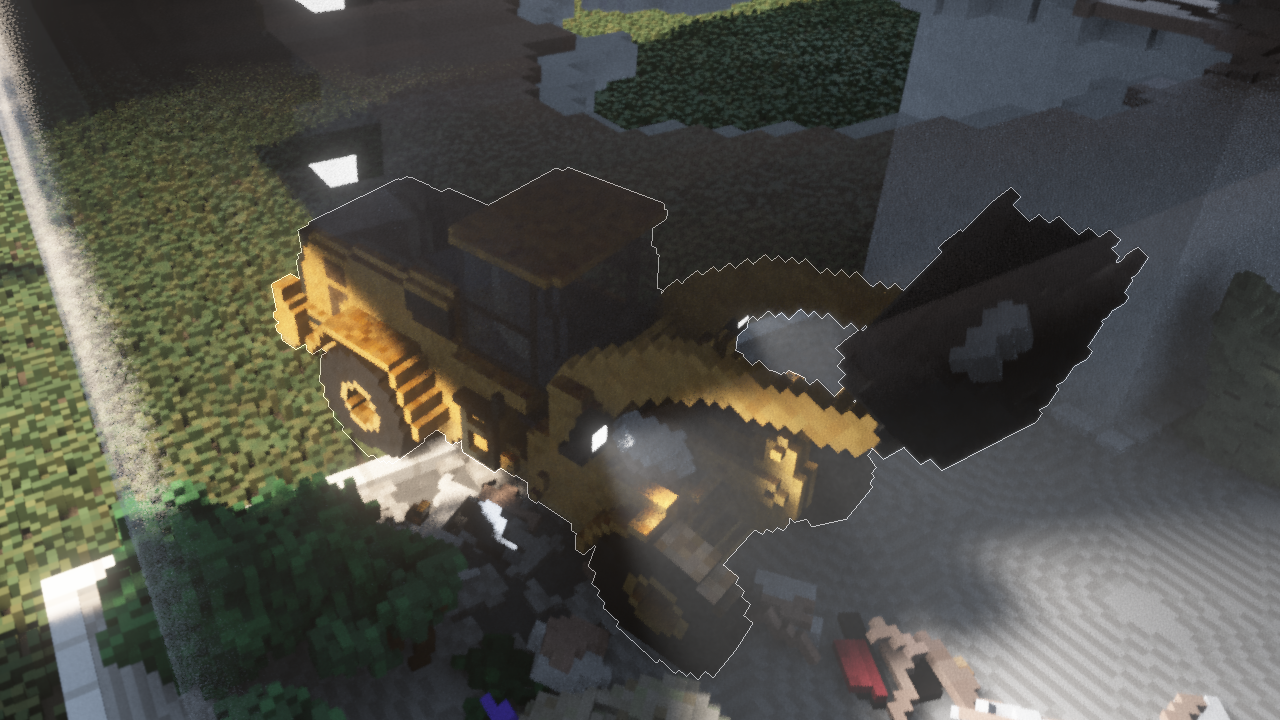
To render the white outline, the vehicle is rendered to an offscreen buffer in solid white, and then a basic edge detection filter is applied.
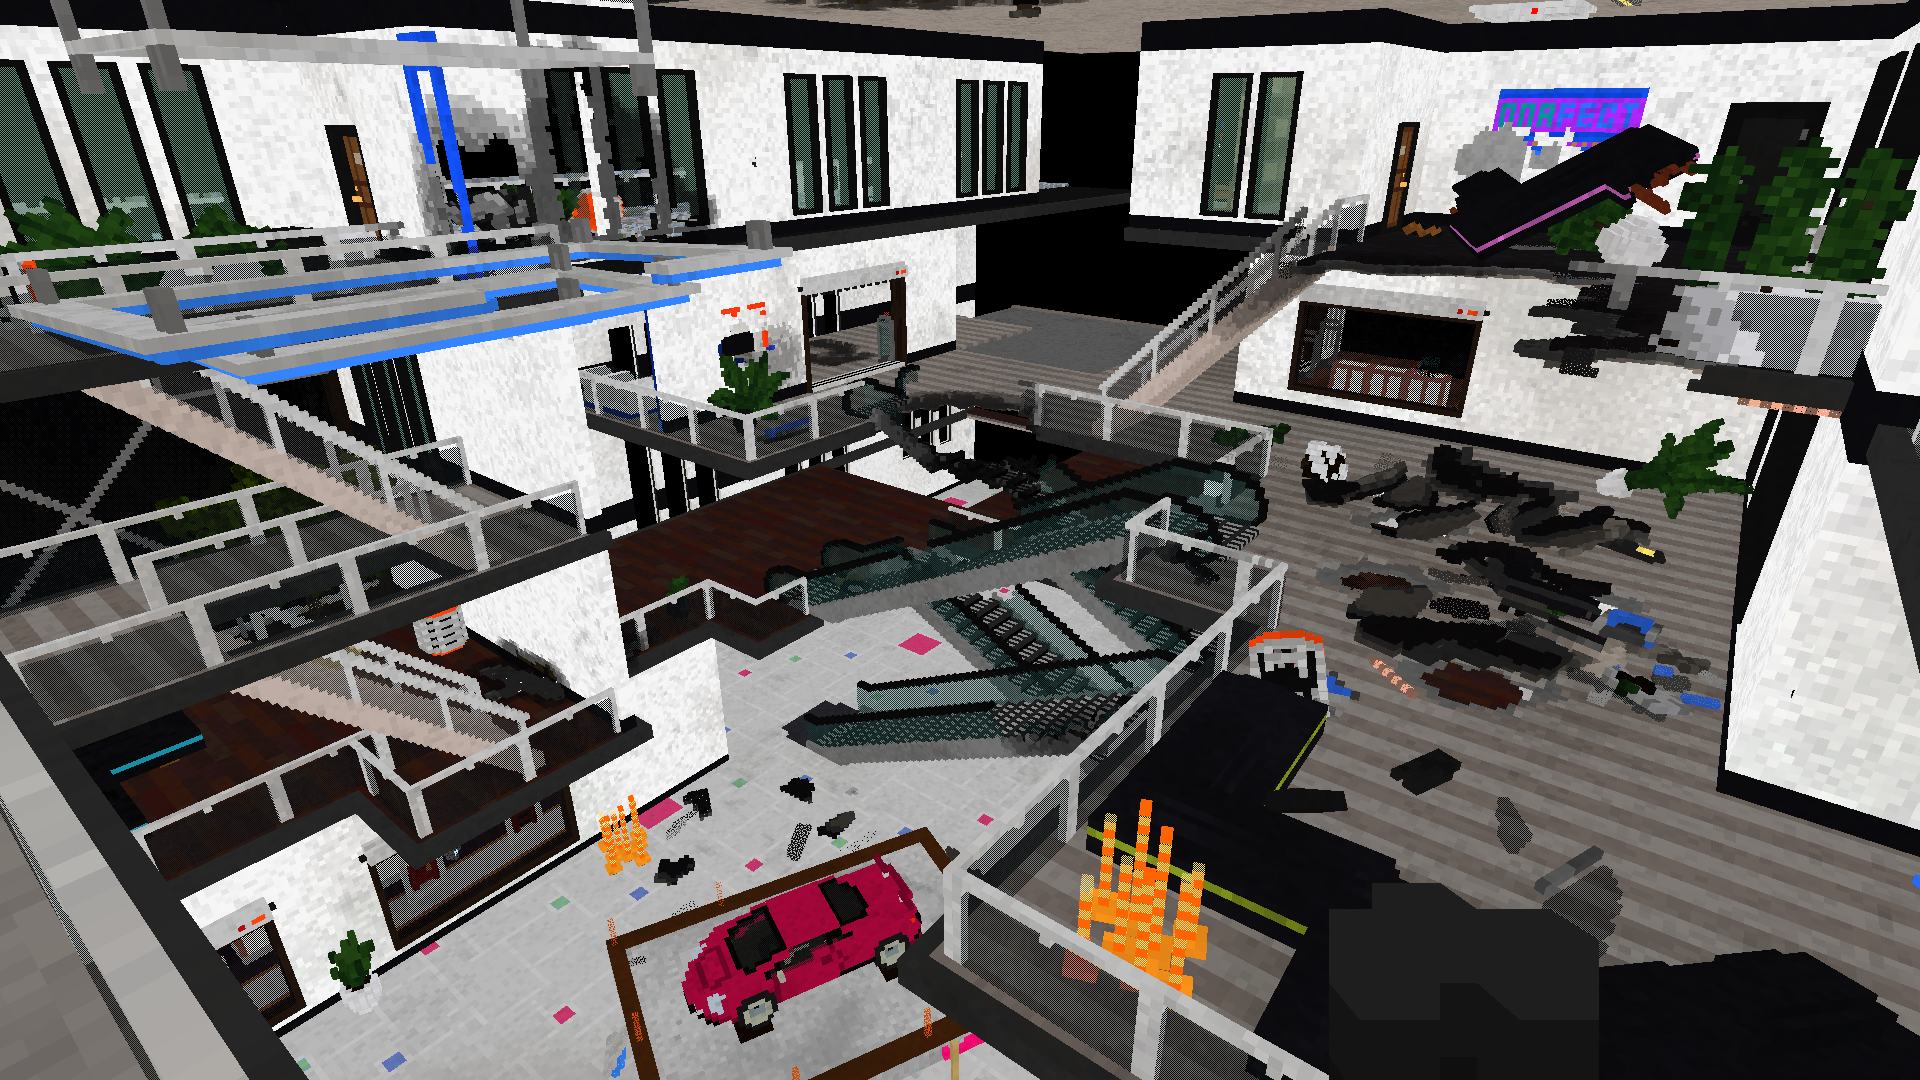
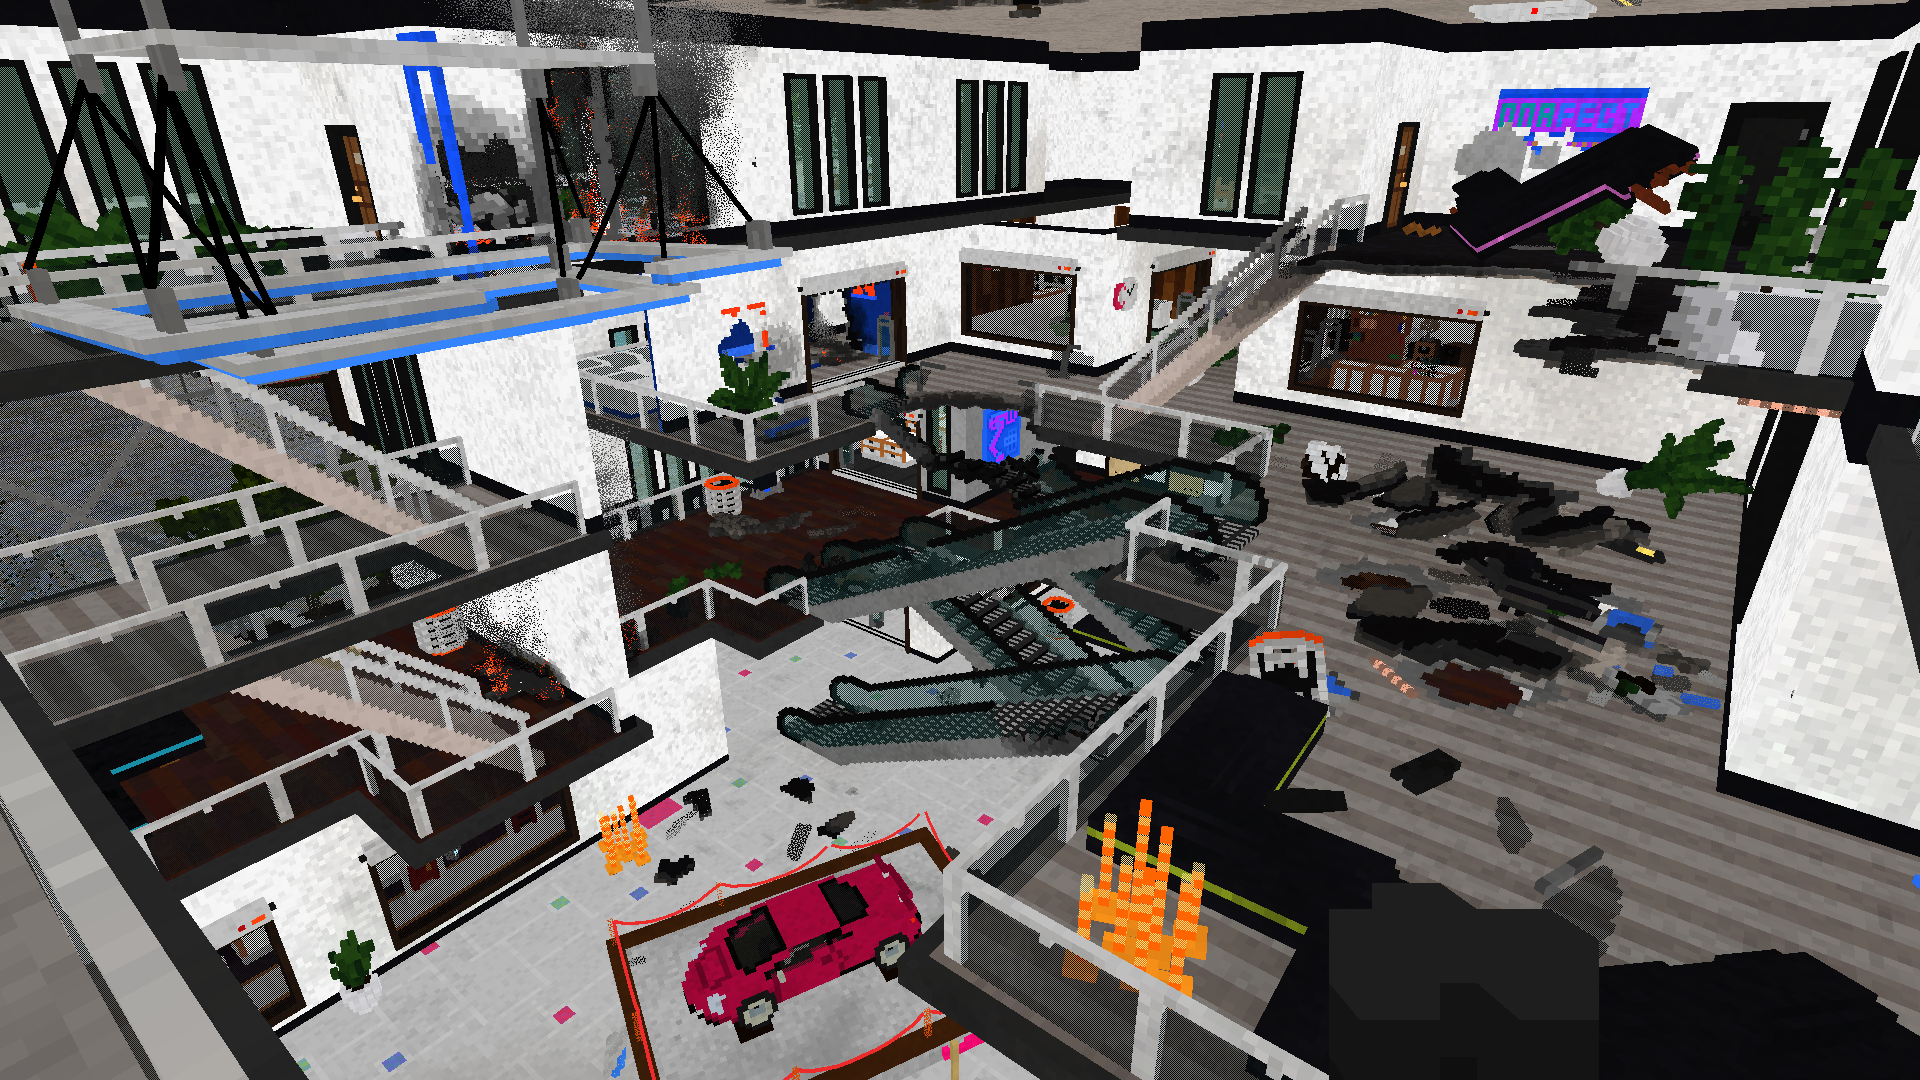
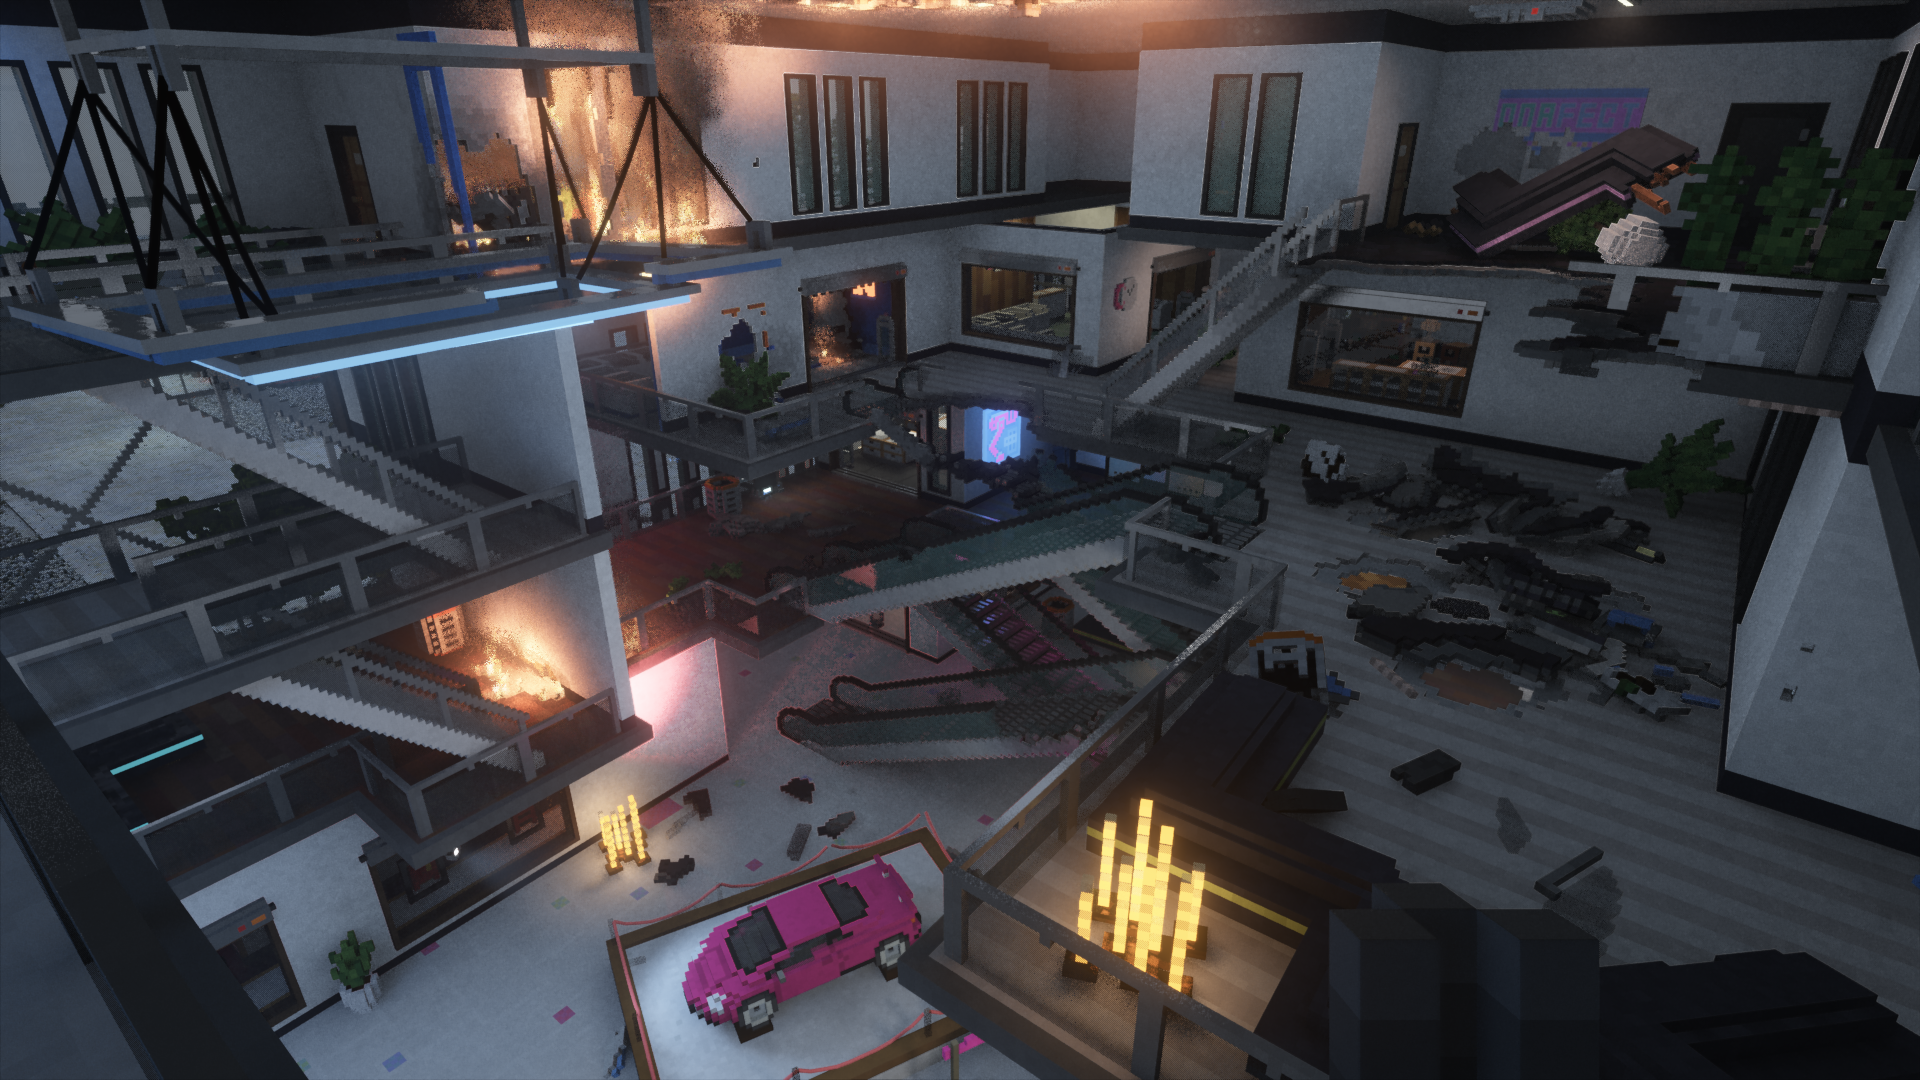
Mall Overdraw
The Evertides Mall map is one of the larger levels in the game, featuring a ton of verticality, walls, and hence overdraw. It is here that the custom early-Z mechanism really pays off:


That concludes this deep dive. Hope you enjoyed it as much as I did making it.
More reading/viewing:
- Another Teardown teardown.
- Video stream with an in-engine walkthrough.